AMQP Queue Alarm Configuration
When you consume messages from a subscribed AMQP queue, the consumer side may go offline and message consumption may slow down due to network communication problems or untimely acknowledgements to received messages. In this case, messages are stacked and cannot be processed in real time.
IoTDA supports AMQP queue alarm configuration. You can set alarm rules to monitor AMQP queue message stacking and consumption speed. After a rule is triggered, alarm information is sent to you immediately so that you can locate and rectify faults in a timely manner. This section describes how to configure alarm rules for AMQP queues.
Procedure
- Access the IoTDA service page and click Access Console. Click the target instance card.
- In the navigation pane, choose .
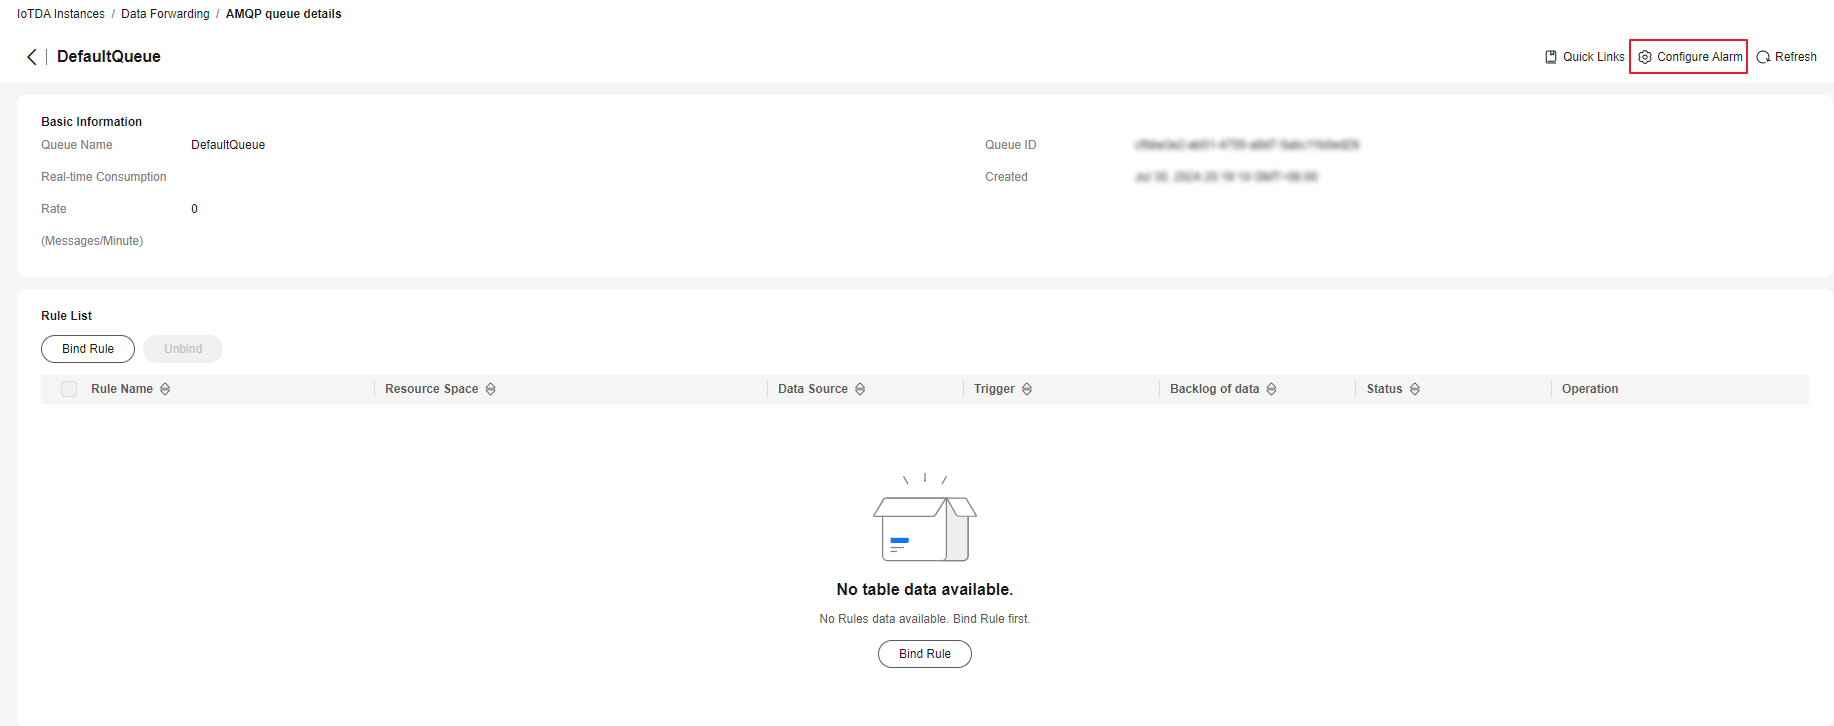
- Click the AMQP Queues tab, locate the queue to configure alarms, and click View.
Figure 1 Data forwarding - AMQP message queue details

- Click Configure Alarm.
Figure 2 AMQP message queue - Alarm configuration
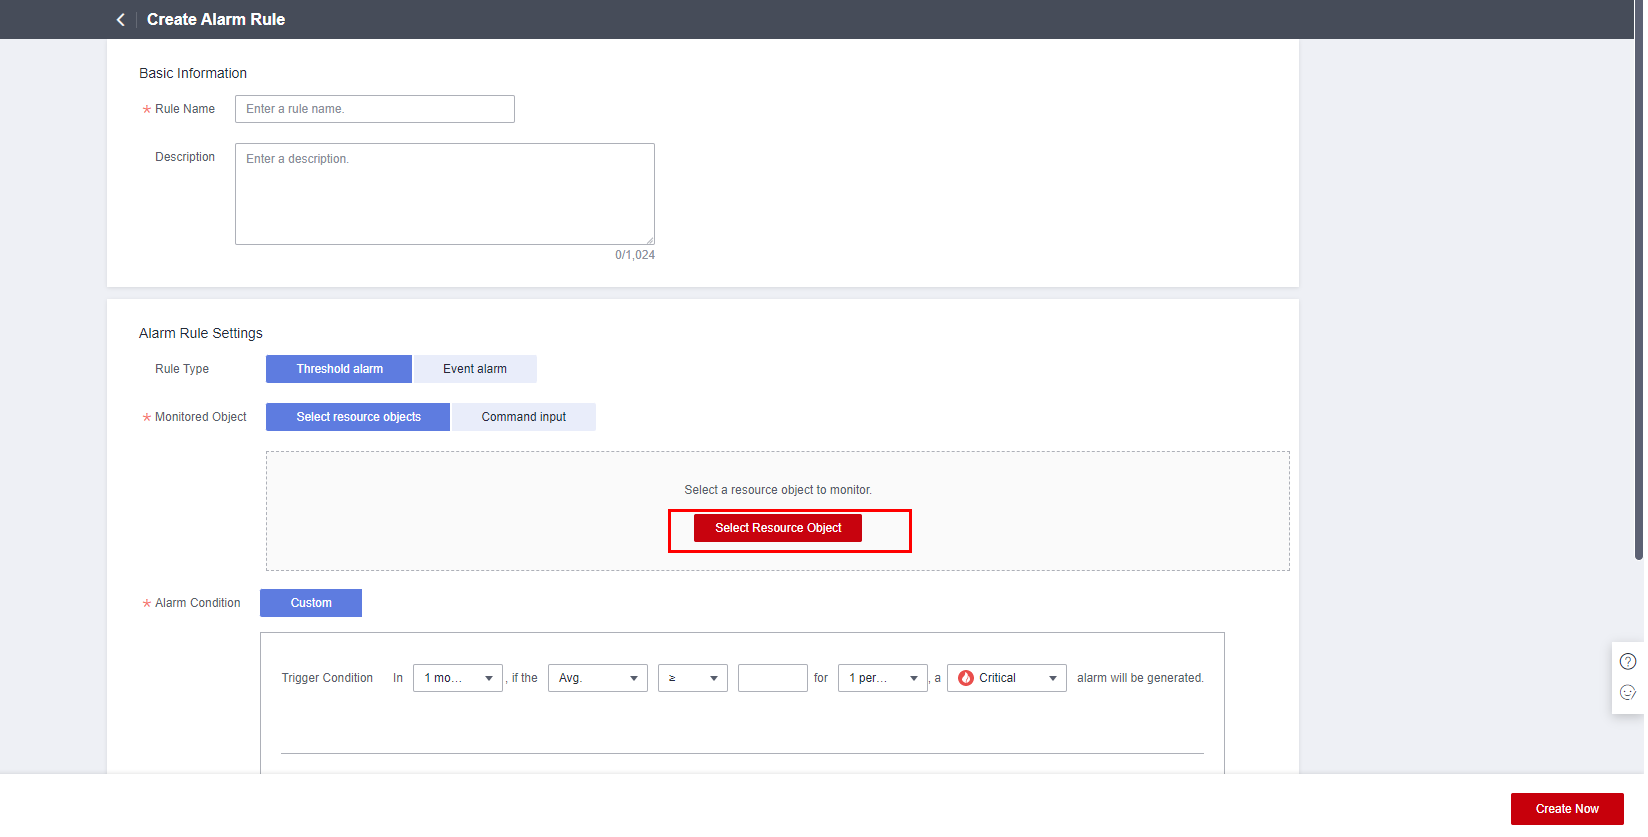
 Figure 3 Creating an alarm rule
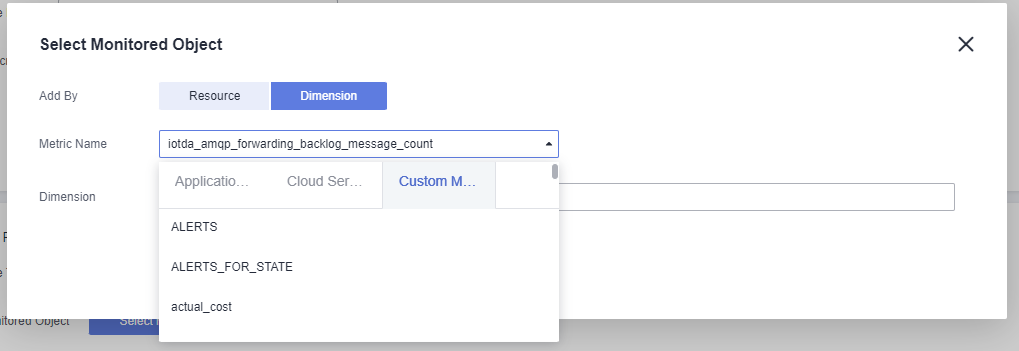
- Click Select Resource Object. Set Add By to Dimension, and select a proper metric and dimension based on the following tables.

Search for iotda_amqp_forwarding_backlog_message_count and iotda_amqp_forwarding_consume_rate under all metrics.

Table 1 Metric description Metric Name
Description
iotda_amqp_forwarding_backlog_message_count
Number of stacked messages in the queue.
iotda_amqp_forwarding_consume_rate
Queue message consumption speed.
Table 2 Metric dimension description Dimension
Description
clusterId
Cluster ID.
namespace
Namespace. The value is fixed to AOM.IoTDA.
queueName
AMQP queue name.
userName
Username.
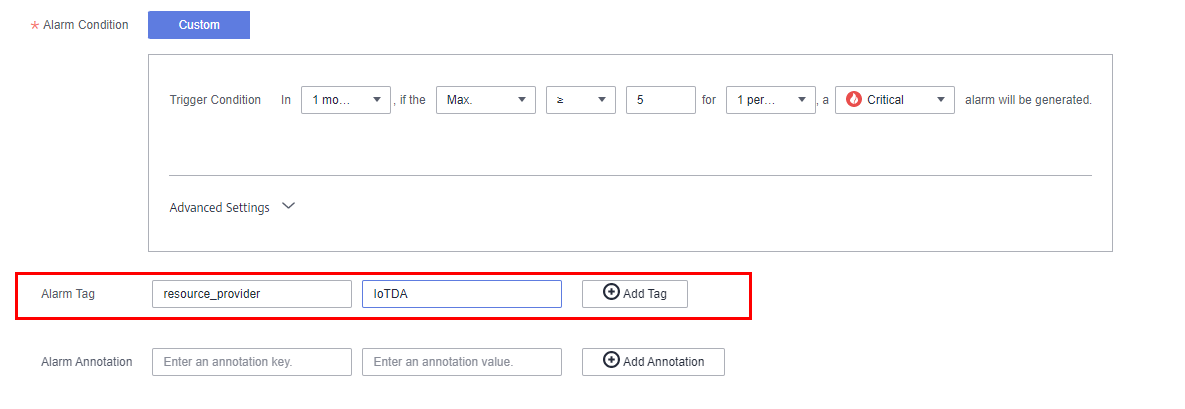
- Set an alarm condition based on the site requirements.
Figure 4 Alarm condition

- Select an alarm tag. If you want to view the alarm on the Device Alarms page in IoTDA, configure the following custom tag.
Table 3 Custom tag Tag Name
Tag Value
resource_provider
IoTDA
Figure 5 Current alarms - AMQP alarms Figure 6 Adding a custom tag
- Specify an action rule for alarm notifications. When an alarm is triggered, the action rule notifies topic subscribers of the alarm through different channels (for example, emails or SMSs) based on the topic. For details, see Creating an Alarm Action Rule.
Figure 7 Alarm notification

- Click Create Now.
Feedback
Was this page helpful?
Provide feedbackThank you very much for your feedback. We will continue working to improve the documentation.See the reply and handling status in My Cloud VOC.
For any further questions, feel free to contact us through the chatbot.
Chatbot


