Changing an OS to HCE
Constraints
- If you want to change the OS of a yearly/monthly ECS, the system disk capacity may be insufficient for the new image. If this is the case, you need to detach the system disk from the ECS and expand its capacity before changing the OS.
- There must be at least one EVS disk.
- Changing from BIOS to UEFI is not supported.
Important Notes
- After the OS is changed, the original OS will not be retained, and the original system disk and data on the system disk will be deleted, including data on the system partition and other partitions. Back up the data before changing the OS. For details, see Backing Up ECS Data.
- The data in data disks remains unchanged.
- After the OS is changed, the IP and MAC addresses remain unchanged.
- The system will automatically start after the OS is changed.
- After the OS is changed, the system disk type cannot be changed.
- After you change the OS, you need to deploy services in the new OS.
- After the OS is changed, custom settings such as DNS and hostname will be reset and need to be reconfigured.
Billing Rules
- After the OS of a pay-per-use ECS is changed, the price may increase if the new OS needs more disk capacity.
Prerequisites
- The source OS has a system disk attached.
- If a password is used to log in to the source OS but a key pair is required to log in to the target OS, the key pair has to be available.
- If you use a private image to change the OS, create a private image first. For details, see Image Management Service User Guide.
- If the image of a specific instance is required, ensure that a private image has been created from that instance.
- If a local image file is required, ensure that this image file has been imported into the cloud platform and registered as a private image.
- If a private image from another region is required, ensure that this image has been replicated to the target region.
- If a private image from another account is required, ensure that the image has been shared with you.
Procedure
- Log in to the management console.
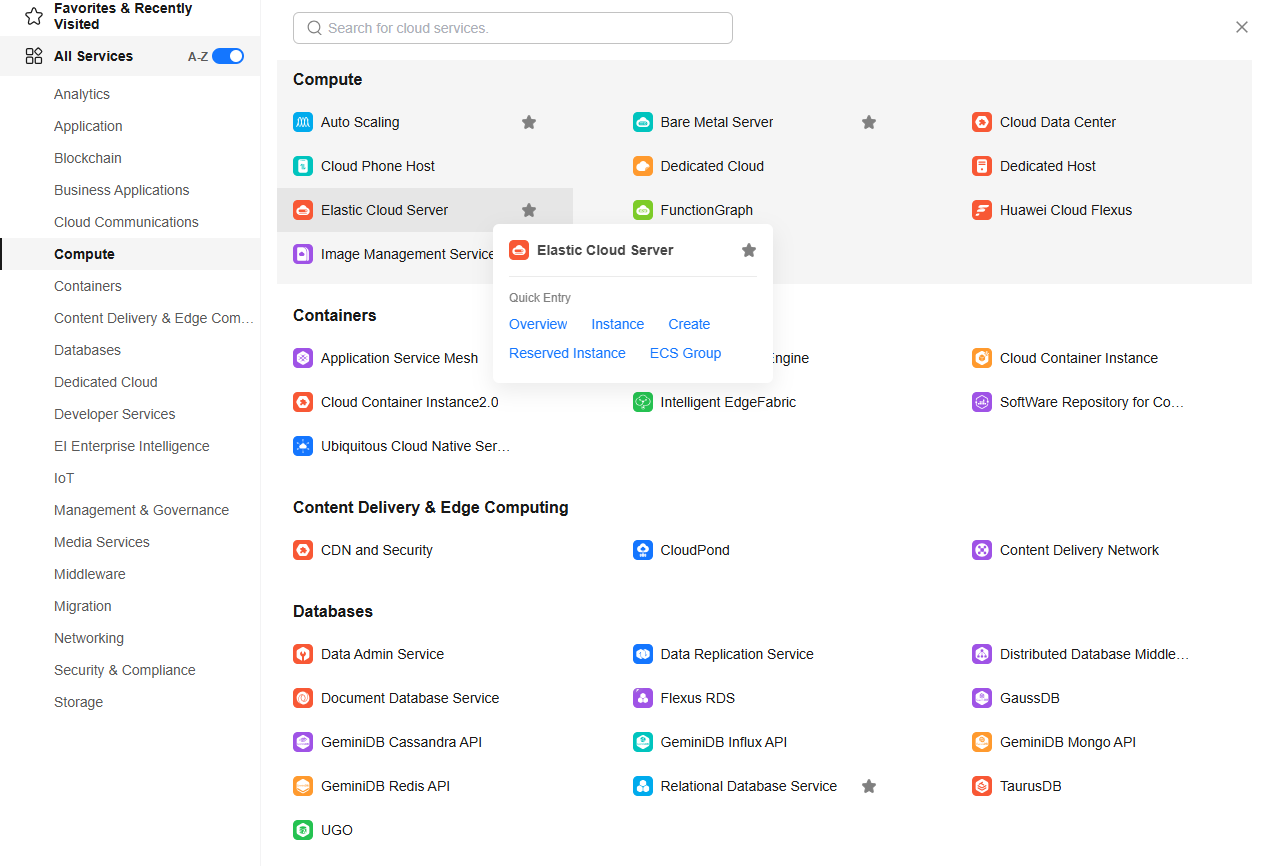
- Click
 . Choose Compute > Elastic Cloud Server.
Figure 1 Selecting an ECS
- Locate the row containing the target ECS. Choose More > Manage Image > Change OS in the Operation column.
Stop the ECS before this step, or select Automatically stop the ECSs and change their OSs in this step.
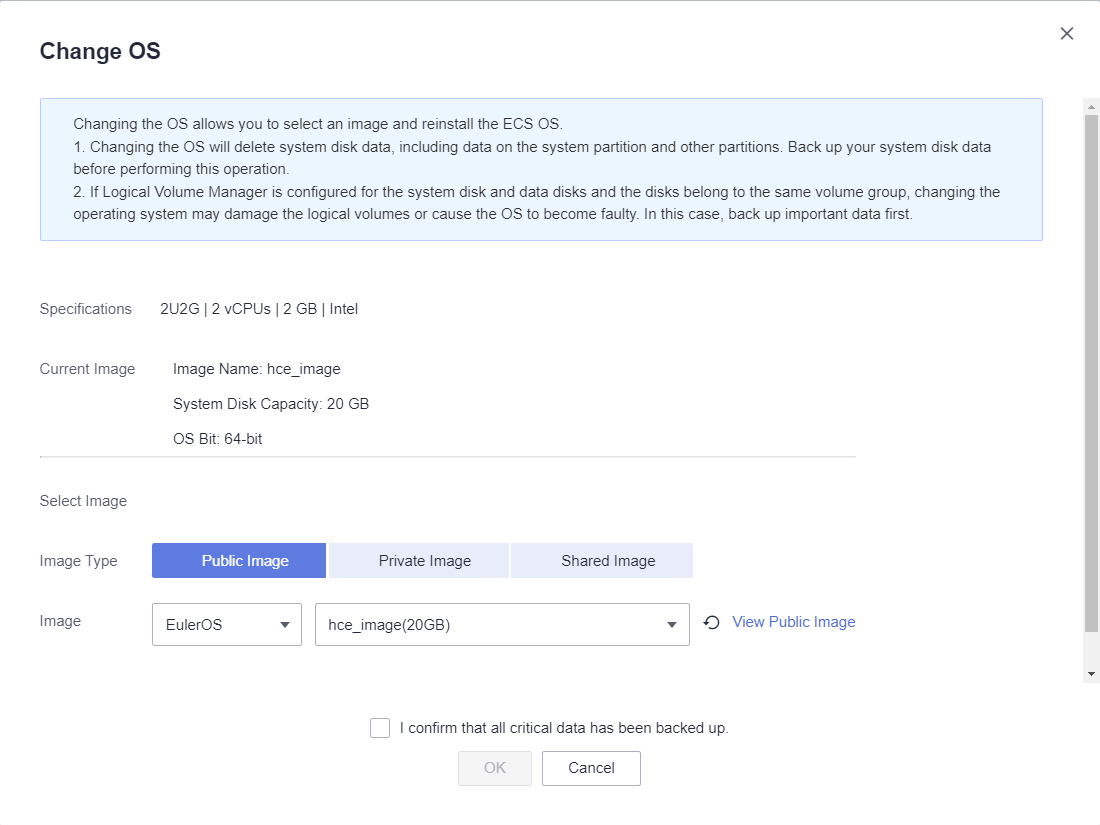
- Change the Image Type and Image.

For a yearly/monthly ECS, if the system disk size is smaller than the image size, you must detach the system disk, expand its capacity, and attach it to the ECS before changing the OS.
For details about how to expand the system disk capacity, see Disk Capacity Expansion.
Figure 2 Changing the OS
- Set Login Mode.
If the ECS uses a key pair for login authentication, you need to provide a key pair. For details, see in the Elastic Cloud Server (ECS) User GuidePasswords and Key Pairs.
- Click OK.
- In the Change ECS OS dialog box, confirm the specifications, read and agree to the agreement or disclaimer, and click OK.
The ECS status changes to Changing OS. When Changing OS disappears, the change is successful.
Figure 3 Checking the task details
Follow-up Operations
- If the OS before and after the change is Linux, and auto-mount on startup has been enabled for the data disk, the auto-mounting information will be lost after the OS is changed. You will need to update the /etc/fstab configuration:
- Write the new partition information into /etc/fstab. It is a best practice to back up the /etc/fstab file before writing data into it.
To enable auto-mounting on startup, see Initializing a Linux Data Disk (fdisk).
- Mount the partition to use the data disk.
mount diskname mountpoint
- Check that the partition was mounted successfully.
df -TH
- Write the new partition information into /etc/fstab. It is a best practice to back up the /etc/fstab file before writing data into it.
- If the OS change fails, repeat steps 2 to 7 to retry.
- If the retry fails, contact customer service for manual recovery.
Feedback
Was this page helpful?
Provide feedbackThank you very much for your feedback. We will continue working to improve the documentation.See the reply and handling status in My Cloud VOC.
For any further questions, feel free to contact us through the chatbot.
Chatbot


