Purchasing an API Data Security Protection Instance and Binding It to an EIP
An API data security protection instance is deployed on an independent system. To log in to an API data security protection instance using a browser, you must bind an EIP to the instance.
If you purchase an on-premises API data security protection instance, submit a service ticket, obtain the instance image and install it.
Prerequisites
The account used to purchase the API data security protection instance must be a master account or an IAM account with permissions to create and authorize an agency. For details about how to create an agency, see Cloud Service Agency.
Procedure
- Log in to the DSC console.
- Click
 in the upper left corner and select a region or project.
 - Choose .
- Click Purchase an instance in the upper left corner. The Buy API Data Security Protection page is displayed.
- Configure the basic information by referring to Table 1.
Table 1 Basic settings Parameter
Description
Billing Mode
The yearly/monthly billing mode is supported.
Region
Select a region from the drop-down list.
Project
Select a project from the drop-down list.
DB Instance Type
Primary/Standby is supported.
Instance Layout
Choose On the cloud or Outside the cloud.
Instance Name
Enter an instance name.
Primary AZ
This parameter is mandatory when Instance Layout is set to On the cloud.
Choose a region for the primary AZ. For details, see What Are Regions and AZs?
Standby AZ
This parameter is mandatory when Instance Layout is set to On the cloud.
To enhance cross-AZ DR, choose a different region for the standby AZ.
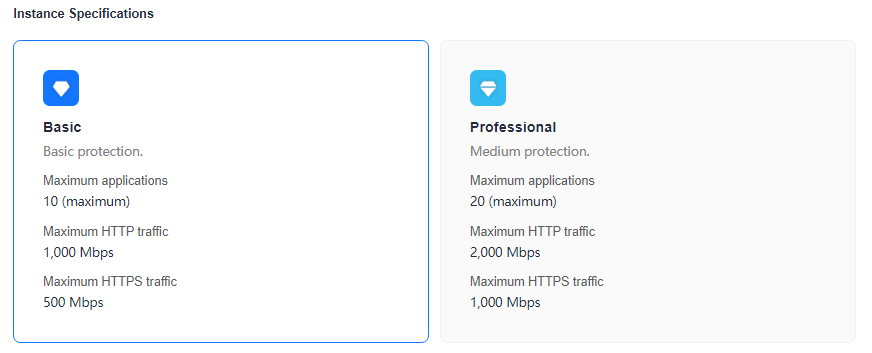
- Choose a basic or profession edition for the instance. Table 2 describes the details.
Table 2 Specifications Specifications
Basic
Professional
-
Basic protection
Medium protection
Maximum applications
10
20
Maximum HTTP traffic
1,000 Mbit/s
2,000 Mbit/s
Maximum HTTPS traffic
500 Mbit/s
1,000 Mbit/s
Figure 1 Specifications
- Set Networking.
Table 3 Network configuration Parameter
Description
VPC
- Select a created VPC from the drop-down list. If no VPC is available, create one on the VPC console. For details, see Creating a VPC and Subnet.
- Once the instance is created, the VPC cannot be changed. If you need to select another VPC, unsubscribe the instance and purchase again.
- Click View VPCs to go to the VPC page and view and manage your VPC.
Subnet
- Select a created subnet from the drop-down list. If no subnet is available, click Create Subnet to apply for one on the console. For details, see Creating a VPC and Subnet.
- The subnet uses one IP address. Ensure that there are enough IP addresses in your quota.
NOTE:
Dual-stack IPv6 is not supported.
Security Group
This parameter is mandatory when Instance Layout is set to On the cloud.
- Select a created security group from the drop-down list. If no security group is available, click Manage Security Groups to apply for one on the console. For details, see Creating a Security Group.
- To properly use database encryption and access control, add the TCP 8441 inbound rule.
Elastic IP
This parameter is mandatory when Instance Layout is set to On the cloud.
Select an EIP from the drop-down list. If no EIP is available, click Buy Elastic IP to apply for one on the console. For details, see Assigning an EIP.
Primary Node IP Address
This parameter is mandatory when Instance Layout is set to Outside the cloud.
Enter the IP address of the primary node.
Standby Node IP Address
This parameter is mandatory when Instance Layout is set to Outside the cloud.
Enter the IP address of the standby node.
Floating IP Address
This parameter is mandatory when Instance Layout is set to Outside the cloud.
Enter the floating IP address.
- Set Login Information.
Set the password of user sysadmin.
- The password must meet the following requirements:
- Contains 8 to 32 characters.
- Contains at least three of the following types: uppercase letters, lowercase letters, digits, and special characters (!@$%^-_=+[{}]:,./?~#*).
- Cannot contain the username or the username spelled backwards.
- The system cannot obtain the password of admin. Keep the account information secure.
- The password must meet the following requirements:
- Set Required Duration and click Next.
- Click Pay Now.
- After the payment, go back to the API Data Security Protection page, the instance status is Creating. An instance is created in 10 to 20 minutes.
- Bind an EIP if Instance Layout is set to On the cloud.
- Wait until the instance is in the Running state. Locate the instance in the list and click in the Operation column.
- In the displayed dialog box, select an unbound EIP and click OK.
If no EIP is available, create one by referring to EIP Overview.
- If Instance Layout is set to Outside the cloud, locate an instance and click Obtaining Interconnection in the Operation column. You can view the interconnection information of the instance, as shown in the following figure.
Feedback
Was this page helpful?
Provide feedbackThank you very much for your feedback. We will continue working to improve the documentation.See the reply and handling status in My Cloud VOC.
For any further questions, feel free to contact us through the chatbot.
Chatbot


