
Format of the Compatible Instance for Interconnecting with the Object Storage Proxy
When you perform operations on object instances of different storage types (OBS or MinIO), you need to configure storage proxy connectors for the object instances of different storage types to implement unified access management of the connector instances.
Billing
After connecting an application to the OBS-type object storage proxy connector, you need to pay for the OBS service separately. For details on the pricing, see Huawei Cloud Pricing. After the application is disabled, OBS is still billed based on the specified billing rules. If you do not need to use OBS, unsubscribe from the instance in a timely manner by referring to Billing Termination to avoid extra fees.
Creating an Object Storage Proxy
- Log in to the application designer by referring to Logging In to the Application Designer.
- In the navigation pane, choose Integrations.
- Click Connector Instance under Connector.
- In the navigation pane, choose Storage > Object Storage Proxy.
- On the right of the page, click + to set the parameters for interconnecting with the object storage proxy. Figure 1 Creating an Object Storage Proxy

- Click Save.
Calling a Connector in a Flow
- Create an empty flow by referring to Creating a Blank Flow.
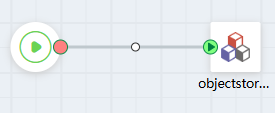
- On the flow design page, choose Connector > Storage, and drag the objectstorageproxy diagram element to the canvas.
objectstorageproxy is preset in the system and is used to call the API of the storage proxy connector.
Figure 2 Dragging the objectstorageproxy diagram element to the canvas
- Click the diagram element, click
 , and set basic information. Figure 3 Setting basic information
Table 2 Parameter description Parameter
Description
Label
Label of a diagram element displayed on the page.
Name
Unique ID of the diagram element in the system. The ID cannot be the same as that of other diagram elements. The naming requirements are as follows:
- Enter up to 80 characters.
- Start with a letter and can contain only letters, digits, and underscores (_). It cannot end with an underscore (_).
Description
Enter the description of the diagram element in the text box.
Connector
Select a connector from the drop-down list box.
- Click
 and set parameters. Figure 4 Configuring objectstorageproxy parameters
Table 3 Configuration parameters Parameter
Description
Action
Action preset by the system for the connector. Select an action based on service requirements.
- Get_endpoint_objectstorageproxy: Obtain the address prefix of the object file to be uploaded.
- view_object_objectstorageproxy: Check the storage objects.
- put_object_objectstorageproxy: Store objects in the system to OBS buckets.
In this example, get_endpoint_objectstorageproxy is selected.
Input Parameters
Customized parameters set when the connector is defined.
- If Target is set to object, set the object name in Source.
- If Target is set to data, configure object data in Source.
- If Target is set to bucket, configure the bucket in Source.
- If Target is set to acl, configure the access control permission for the object file in Source. For example, private, public-read, public-read-write, and default (same as the bucket permission).
Output Parameters
- Set Source to result and Target to receive the payment result. You must define a structure variable of an empty instance to receive the payment result.
- Select error from the Source drop-down list box, and set Target to the error code when the calling fails.
- Select endpoint from the Source drop-down list box. The Target drop-down list box is used to obtain the address prefix of the object file to be uploaded. You must define a variable of the text type to receive the object file.
- Connect the Start and objectstorage diagram elements. Figure 5 Connecting diagram elements
- Click the blank area of the flow designer, select
 , and set the flow output parameters.
 Use the output parameters of the objectstorageproxy diagram element as the output parameters of the entire flow.
Figure 6 Setting output parameters
- Click
 to save the flow.
 - Click
 to activate the flow.
 You do not need to set input parameters. If the following information is displayed, the address prefix of the uploaded object file is successfully obtained:
{
  "interviewId": "002N000000T1Jl8Zzzpg",
  "outputs": {
    "variable0": "http://10.100.92.158:9000/mybucket/"
  }
}
Feedback
Was this page helpful?
Provide feedbackThank you very much for your feedback. We will continue working to improve the documentation.See the reply and handling status in My Cloud VOC.
For any further questions, feel free to contact us through the chatbot.
Chatbot


