
Connectors
On Connectors, you can manage preset and custom connectors. This includes creating connectors, deleting connectors, and copying connectors to other workspaces. For preset connectors, you can only view details, view historical versions, and download them. This section uses a custom connector as an example.
Adding a Connector
- Log in to Huawei Cloud Astro Canvas by referring to Logging In to Huawei Cloud Astro Canvas.
- Choose My Assets from the main menu.
- In the navigation pane, choose Connectors.
- Click Create.
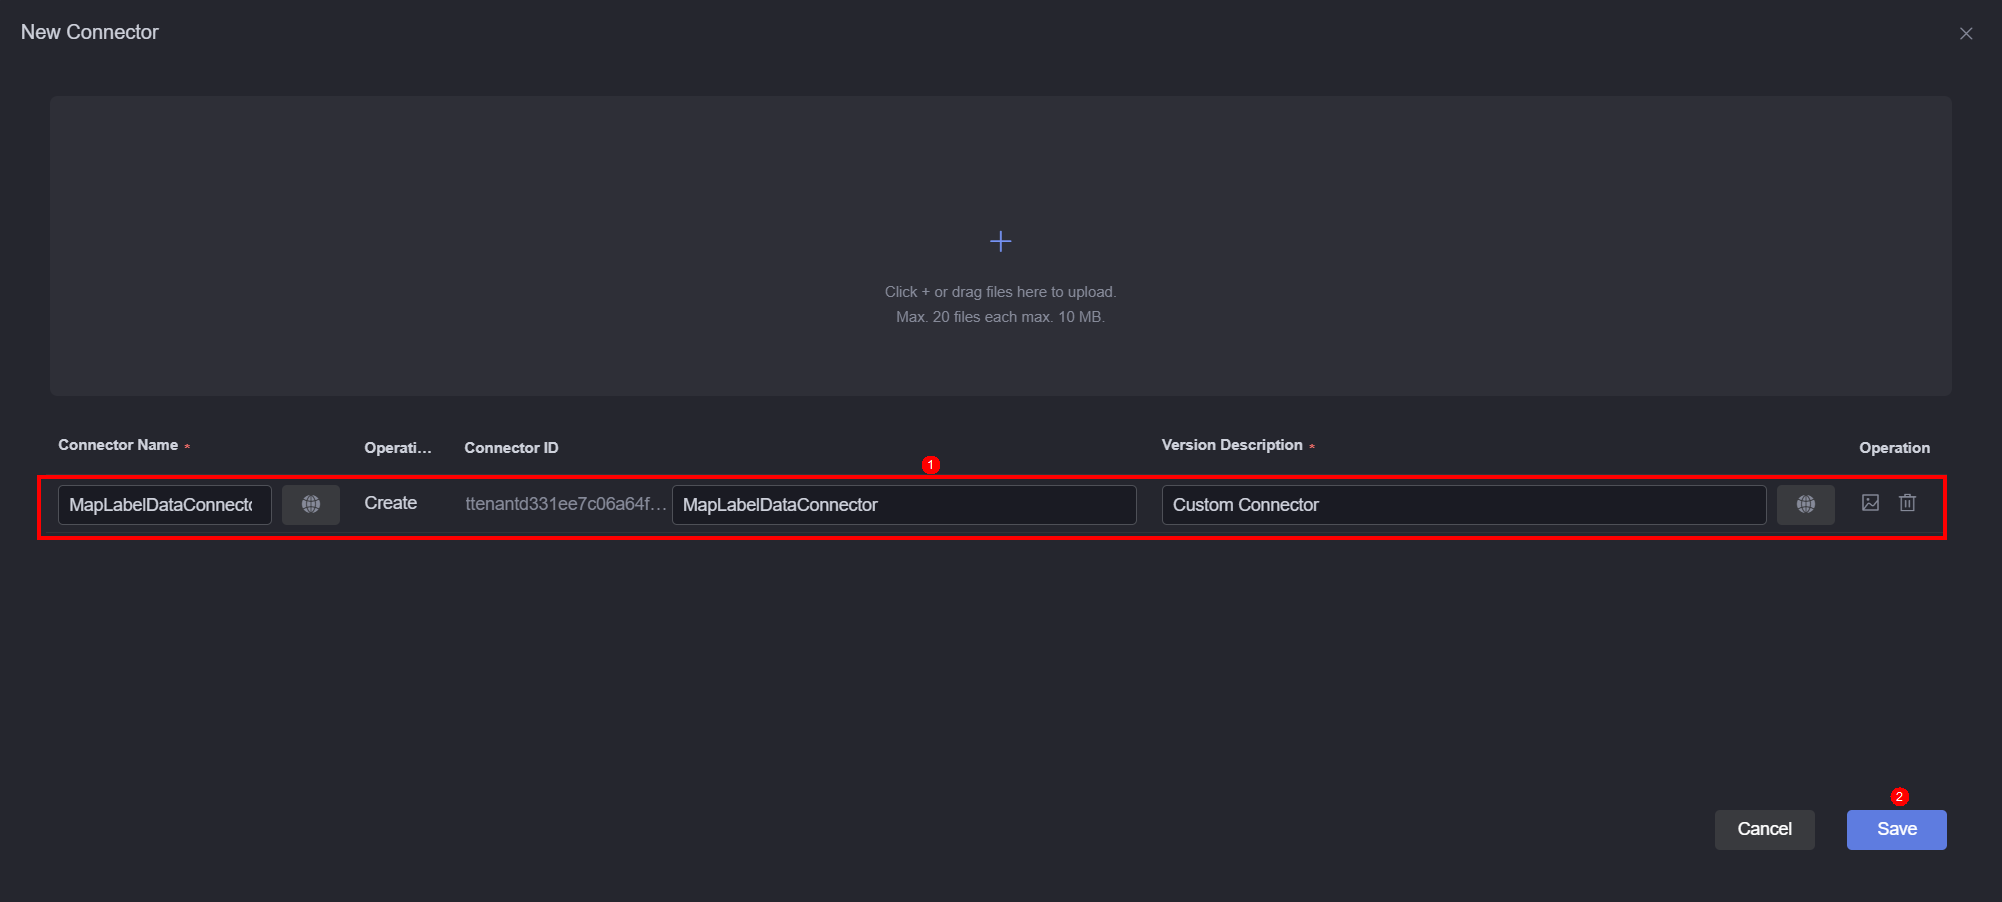
- Click + or drag the required connector to the corresponding position, as shown in the following figure. Set the connector information, and click Save.
Figure 1 Uploading a connector
Copying a Connector to Another Workspace
- Log in to Huawei Cloud Astro Canvas by referring to Logging In to Huawei Cloud Astro Canvas.
- Choose My Assets from the main menu.
- In the navigation pane, choose Connectors.
- Move the cursor to the target connector and click
 .
. - In the displayed dialog box, select the target workspace and click Confirm.
By default, the connector is copied to Connectors in the target workspace. If resource conflicts occur when you copy connectors to another workspace, the original content in the workspace is updated.
Checking Connector Details
- Log in to Huawei Cloud Astro Canvas by referring to Logging In to Huawei Cloud Astro Canvas.
- Choose My Assets from the main menu.
- In the navigation pane, choose Connectors.
- Move the cursor to the target connector and click
 .
. - The connector details page displays the connector name, developer, version, and update time.
Updating a Connector
Before updating a connector, obtain the lock first. Otherwise, the update button is grayed out.
- Log in to Huawei Cloud Astro Canvas by referring to Logging In to Huawei Cloud Astro Canvas.
- Choose My Assets from the main menu.
- In the navigation pane, choose Connectors.
- Move the cursor to the target connector and click
 to obtain the lock.
 - Click
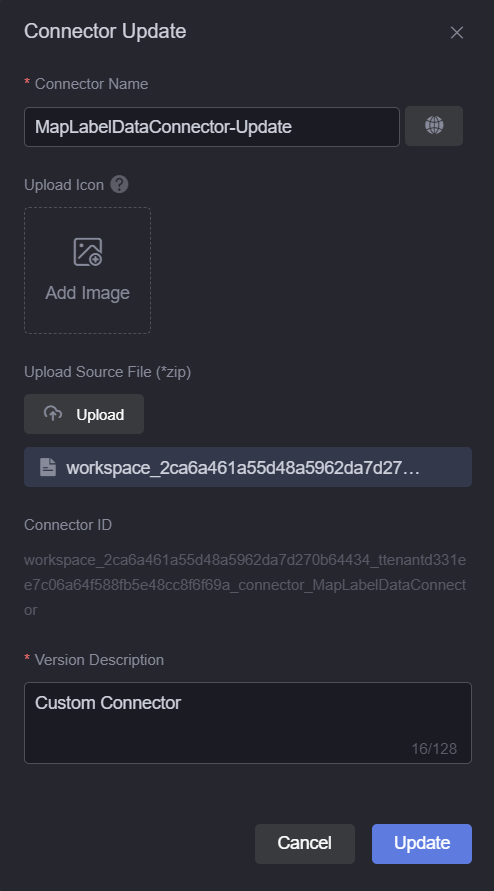
 . The page for updating the connector is displayed.
 - On the connector update page, upload a connector, set connector parameters, and click Update.
Figure 2 Setting connector information

- Click
 of the target connector to view its new version.
 : Click this icon to download the connector of the current version.
 : Click this icon to edit the connector of this version online.
Editing a Connector
- Log in to Huawei Cloud Astro Canvas by referring to Logging In to Huawei Cloud Astro Canvas.
- Choose My Assets from the main menu.
- In the navigation pane, choose Connectors.
- Move the cursor to the target connector and click .
- On the connector editing page, click in the upper right corner to obtain the lock.
- Modify the connector file online and click
 .
. - In the displayed dialog box, click Confirm.
- On the connector update page, set connector parameters (for example, change the connector name to Connector-Update) and click Update.
Figure 3 Updating a connector
- On the My Connectors page, the connector name is Connector-Update.
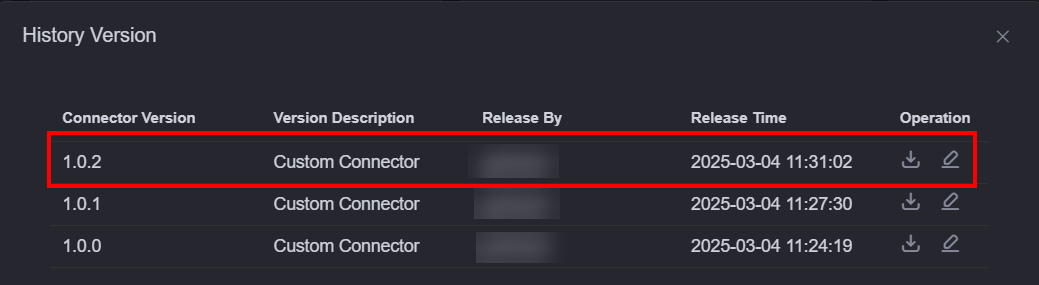
- Click of the target connector to view its new version.
Figure 4 New version
Downloading a Connector
- Log in to Huawei Cloud Astro Canvas by referring to Logging In to Huawei Cloud Astro Canvas.
- Choose My Assets from the main menu.
- In the navigation pane, choose Connectors.
- Move the cursor to the target connector and click .
By default, the latest version of the connector (for example, 1.0.2) is downloaded. To download the connector of an earlier version, click
next to the target version.Figure 5 Downloading the connector of an earlier version
Deleting a Connector
Before deleting a connector, obtain the lock first. Otherwise, the delete button is grayed out.
- Log in to Huawei Cloud Astro Canvas by referring to Logging In to Huawei Cloud Astro Canvas.
- Choose My Assets from the main menu.
- In the navigation pane, choose Connectors.
- Move the cursor to the target connector and click to obtain the lock.
- Click
 on the connector.
 - In the displayed dialog box, click Confirm.
Deleted connectors cannot be recovered. Exercise caution when performing this operation.
Changing the Connector Name
- Log in to Huawei Cloud Astro Canvas by referring to Logging In to Huawei Cloud Astro Canvas.
- Choose My Assets from the main menu.
- In the navigation pane, choose Connectors.
- Click next to the target connector name to change the connector name.
Copying Custom Connectors to Another Workspace in Batches
- Log in to Huawei Cloud Astro Canvas by referring to Logging In to Huawei Cloud Astro Canvas.
- Choose My Assets from the main menu.
- In the navigation pane, choose Connectors.
- Select multiple connectors and click Copy to Workspace.
You can select multiple connectors by pressing Ctrl and click the target connectors, Ctrl+A, or Ctrl+Shift+Left-click and drag (box-select).
- In the displayed dialog box, select the target workspace and click Confirm.
Deleting Custom Connectors in Batches
- Log in to Huawei Cloud Astro Canvas by referring to Logging In to Huawei Cloud Astro Canvas.
- Choose My Assets from the main menu.
- In the navigation pane, choose Connectors.
- On the target custom connector, click to obtain the lock.
- Select multiple locked connectors and click the delete button.
You can select multiple connectors by pressing Ctrl and click the target connectors, Ctrl+A, or Ctrl+Shift+Left-click and drag (box-select).
- In the displayed dialog box, click Confirm.
Feedback
Was this page helpful?
Provide feedbackThank you very much for your feedback. We will continue working to improve the documentation.See the reply and handling status in My Cloud VOC.
For any further questions, feel free to contact us through the chatbot.
Chatbot


