
Uploading a Custom Widget
Upload a custom widget to the platform and use it on pages.
Uploading a Custom Widget
- Log in to Huawei Cloud Astro Canvas by referring to Logging In to Huawei Cloud Astro Canvas.
- Choose My Assets from the main menu.
- In the navigation pane, choose Widgets. On the displayed page, click Add Widget.
- Click
 , select the BarGraph.zip package obtained in Creating and Developing a Custom Widget, enter basic information, and click the save button.
Figure 1 Uploading the custom widget BarGraph
, select the BarGraph.zip package obtained in Creating and Developing a Custom Widget, enter basic information, and click the save button.
Figure 1 Uploading the custom widget BarGraph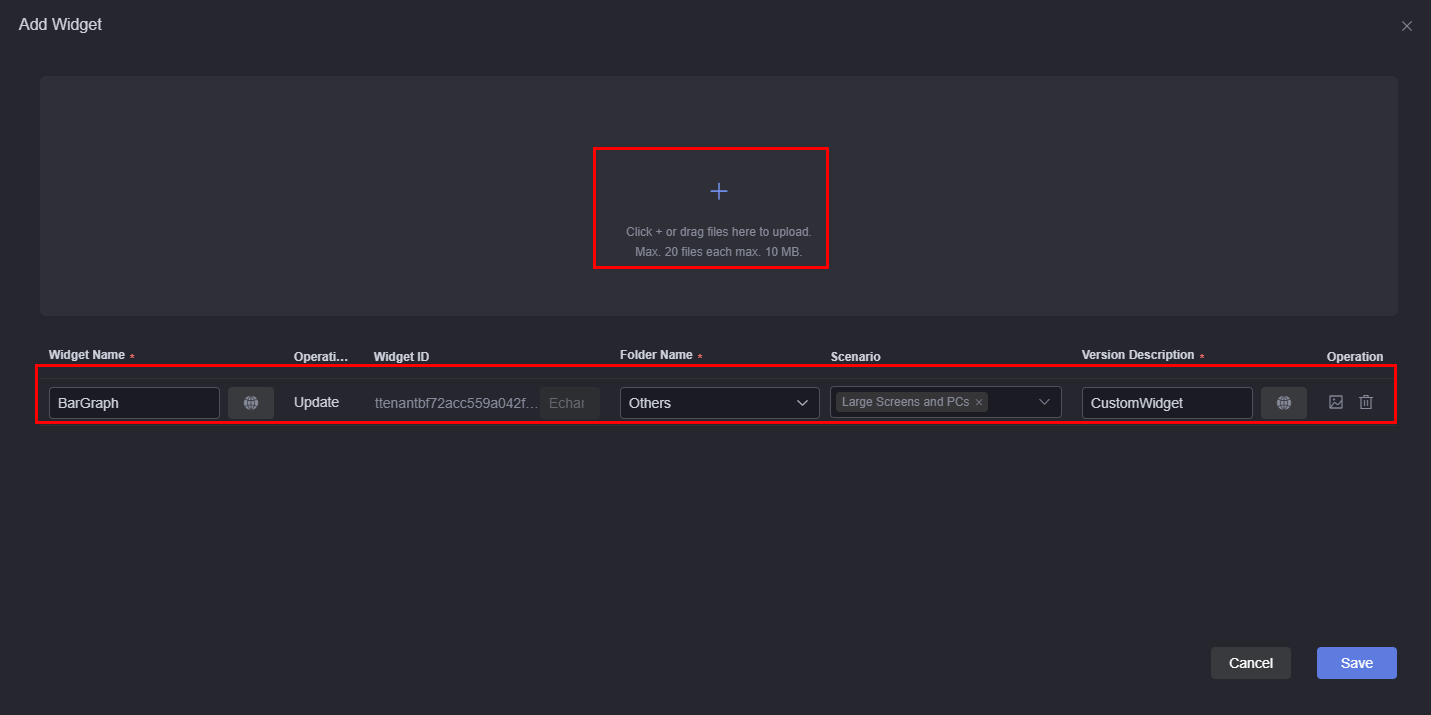
Table 1 Parameters for uploading a widget Parameter
Description
Widget Name
Automatically set by the system based on the widget package name.
Example: BarGraph
Operation Type
Type of the current operation, for example, add or update.
Widget ID
The prefix is not editable and is automatically populated when the widget package is uploaded.
Folder Name
Folder for storing widgets. In this example, select Others.
Scenario
Specifies the application scenario of the widget package. You can select Large Screens and PCs or Mobile.
Version Description
Description of the widget. After the setting, the content is displayed on the overview tab page of the widget details page.
Operation
- Click
 in the operation column to upload a widget icon.
 - Click
 in the operation column to delete the uploaded widget package.
After the upload is complete, return to the Widgets page to view the uploaded widgets.
Figure 2 Checking the uploaded BarGraph widget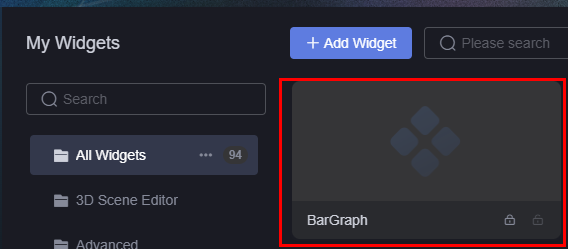
- Click
- Use the custom widget on a large screen page.
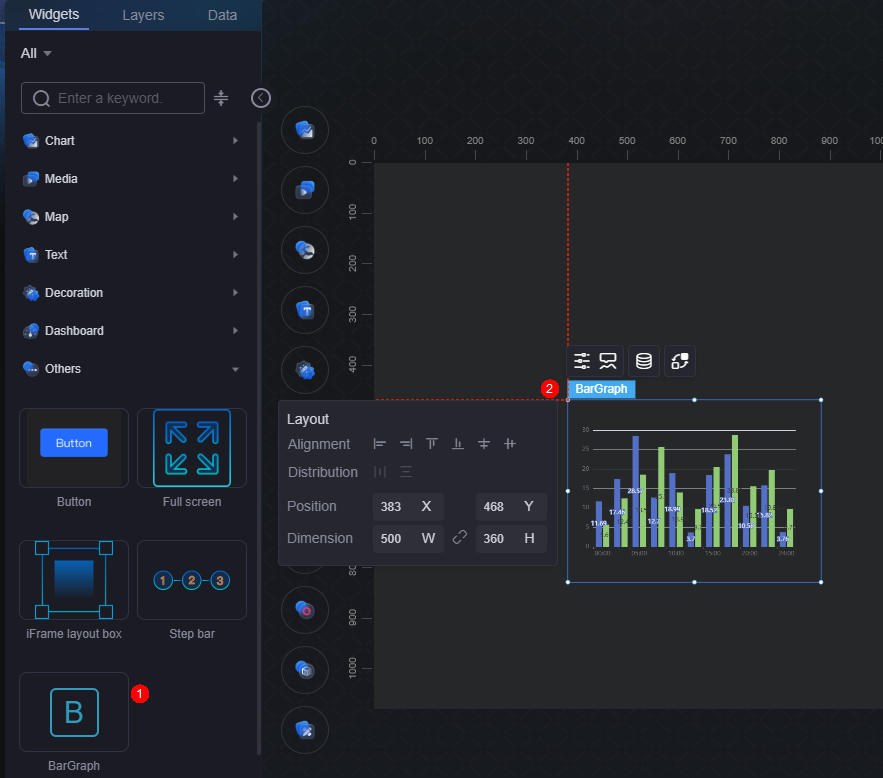
- Create a large screen page. For details, see Creating a Page Using an Empty Canvas.
- On the large screen page, choose All > Others, find the BarGraph widget, and drag it to the canvas.
Figure 3 Dragging the BarGraph widget to the canvas
- Select the TabsWidget widget in the canvas and click
 above the widget.
 - In As Trigger, click + Interaction Event and select Click Series.
- In Response Actions, click + Response Actions and select Set Global Variables.
- In Action Details, click
 next to Assigning Values to Variables and select New Global Variable.
Figure 4 Selecting New Global Variable
next to Assigning Values to Variables and select New Global Variable.
Figure 4 Selecting New Global Variable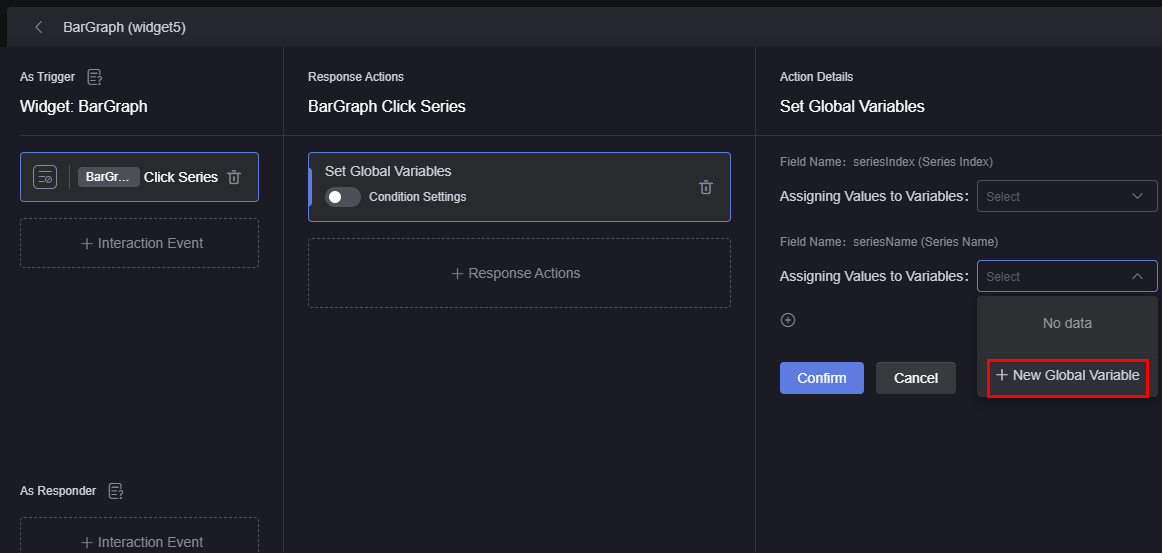
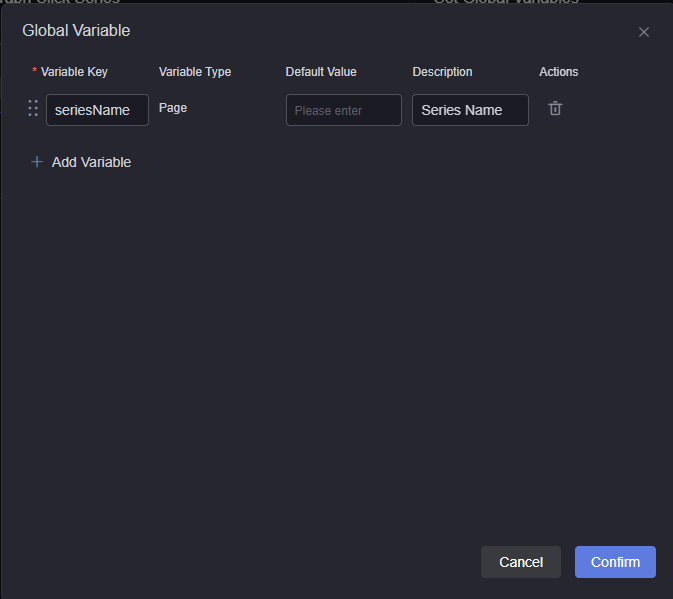
- Set Variable Key to seriesName, enter Series Name in the Description text box, and click Confirm.
Figure 5 Creating the global variable seriesName
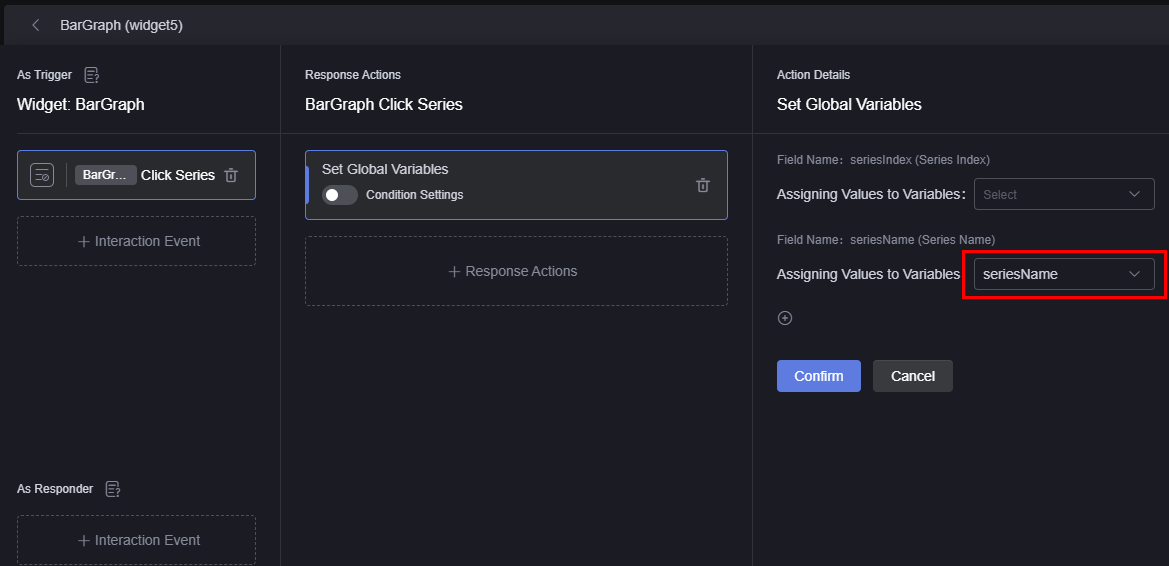
- Return to the widget interaction page, select the variable created in 5.g from the Assigning Values to Variables drop-down list box, and click Confirm.
Figure 6 Selecting the seriesName variable
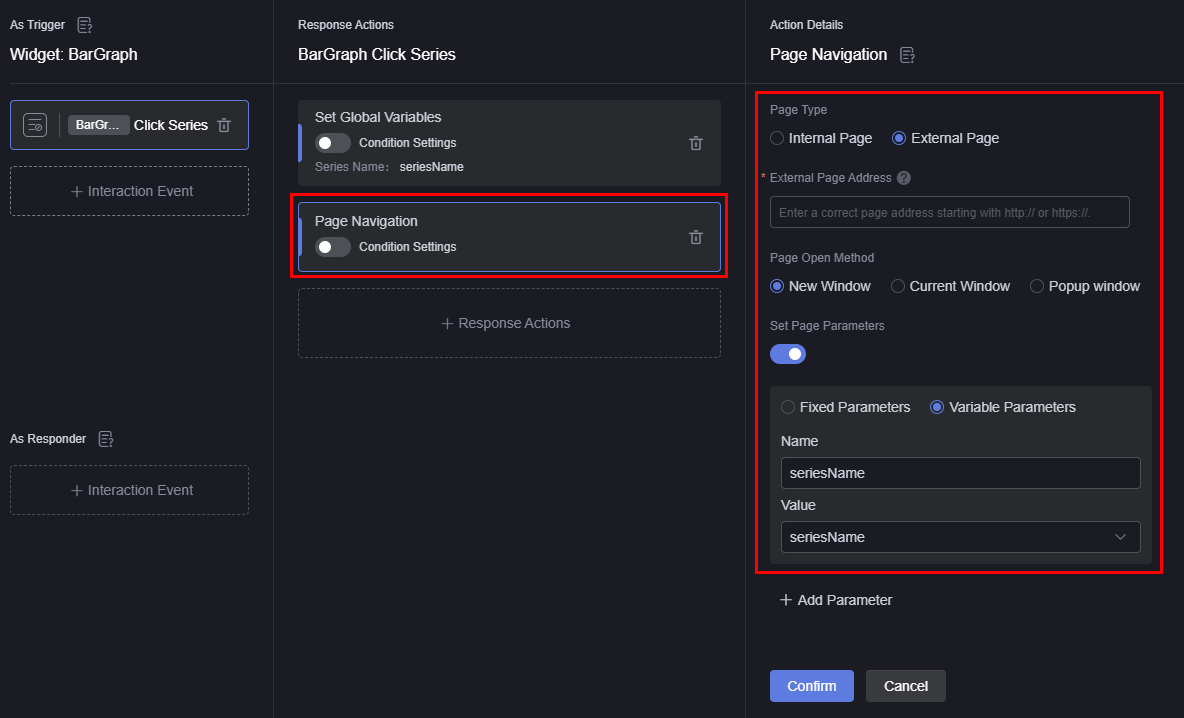
- Add the response action Page Navigation and set the redirection page.
After the page parameter is set to the global variable seriesName, the parameter name seriesName in Figure 7 is displayed in the URL of the destination address, and the value of the parameter varies according to the value of the global variable seriesName.
Figure 8 Effect after global variables are set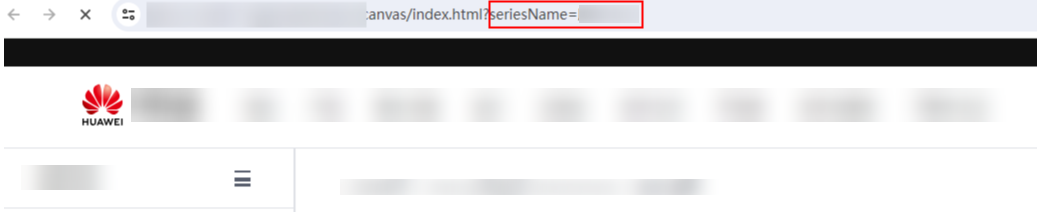
- Click the confirm button and then click the finish button to return to the development page.
- Click
 in the upper part of the page to save the settings.
 - Click
 , and release the page by referring to Publishing a Page.
 - Open the URL of the released page and view the final setting effect.
Feedback
Was this page helpful?
Provide feedbackThank you very much for your feedback. We will continue working to improve the documentation.See the reply and handling status in My Cloud VOC.
For any further questions, feel free to contact us through the chatbot.
Chatbot


