
Building with Ant and Uploading the Package to a Release Repo (x86, Preset Image, GUI)
In this section, you use CodeArts Build to build a project with Ant on a x86 server and upload the resulting software package to a release repo. These steps will be carried out through a graphical user interface (GUI).
Prerequisites
- You have registered with Huawei Cloud and completed real-name authentication. If you do not have a HUAWEI ID yet, follow these steps to create one:
- Visit Huawei Cloud official website.
- Click Sign Up and create your account as instructed.
Once your account is created, the system automatically redirects you to your personal information page.
- Complete individual or enterprise real-name authentication. For details, see Real-Name Authentication.
- You have enabled CodeArts Free Edition. If not, enable it by referring to Purchasing a CodeArts Package.
Creating a CodeArts Repo Repository
- Log in to the Huawei Cloud console with your Huawei Cloud account.
- Click
 in the upper left corner and choose from the service list.
 - Click Access Service. The homepage of CodeArts Build is displayed. On the navigation bar, click Homepage.
- Click Create Project, and select the Scrum template. Set the project name to Scrum01 and keep the default values for other parameters. Click OK to access the project.
- In the navigation pane, choose .
- On the displayed page, click Create Repository. Select Template, and click Next.
- You will then be redirected to the Create Template Repository page. In the Select Repository Template stage, search for Java Ant Demo and select the template. Click Next.
- Set Repository Name to Repo01 and keep the default values for other parameters. Click OK.
Creating a Build Task
- In the navigation pane, choose .
- Click Create Task. The Basic Information page is displayed.
- Configure the following parameters and click Next.
Table 1 Basic information Parameter
Description
Name
Assign a custom name to the build task, for example, BuildTask01.
Code Source
Select Repo to pull the code hosted in a CodeArts Repo repository for your build.
Repository
Select Repo01, the code repository created in section "Creating a CodeArts Repo Repository".
Default Branch
Keep the default value master.
Description
Optional. Enter additional information to describe the build task.
- Select the Ant template and click OK to create the build task. Then you will be redirected to the page for configuring build actions.
- On the Build Actions page, keep the default settings and click Save.
Running the Build Task
- Click the name of the build task.
- On the displayed Build History page, click Execute to start the build task. In the displayed dialog box, click OK.
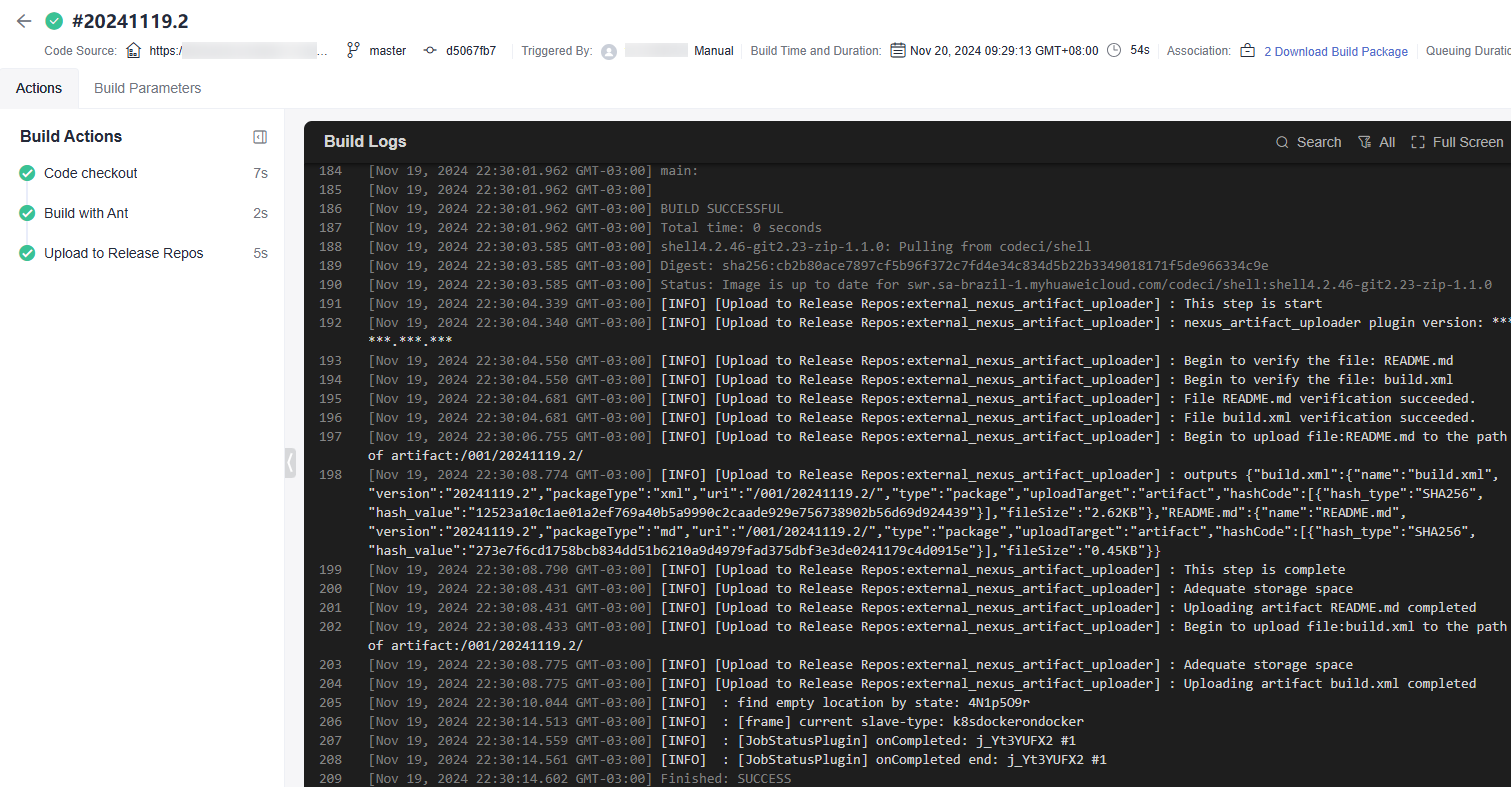
- The page shown in Figure 1 displays a successful run of the task.
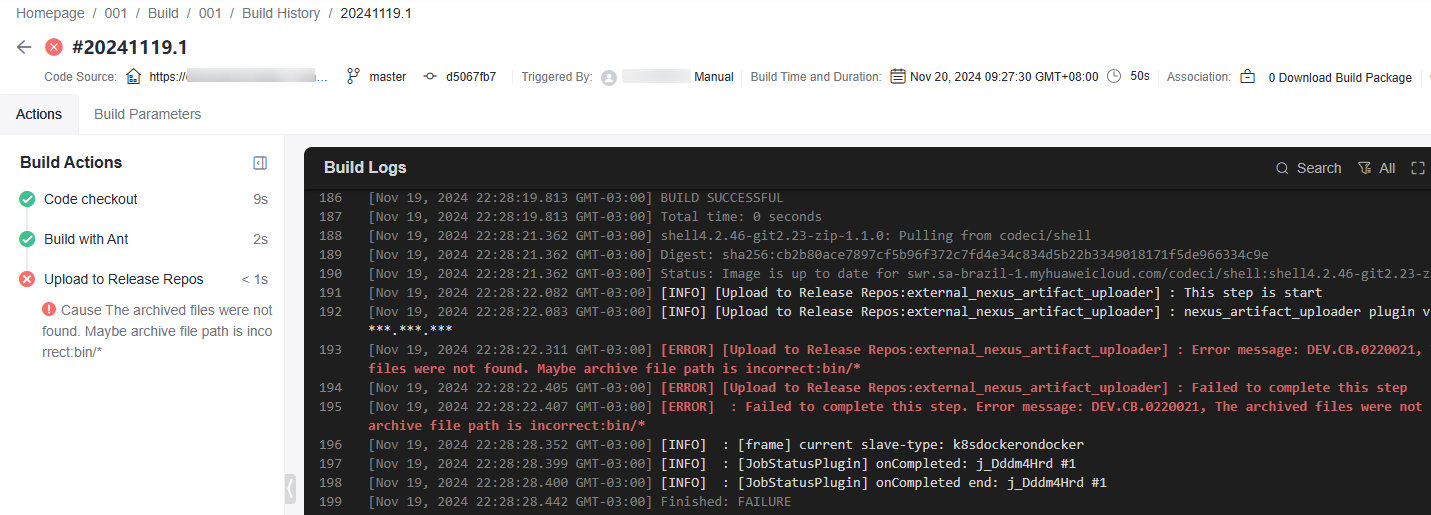
- If the task fails, troubleshoot the issue by reviewing the prompt or analyzing the logs. Figure 2 Build failure
Viewing the Build Results
- In the navigation pane, choose .
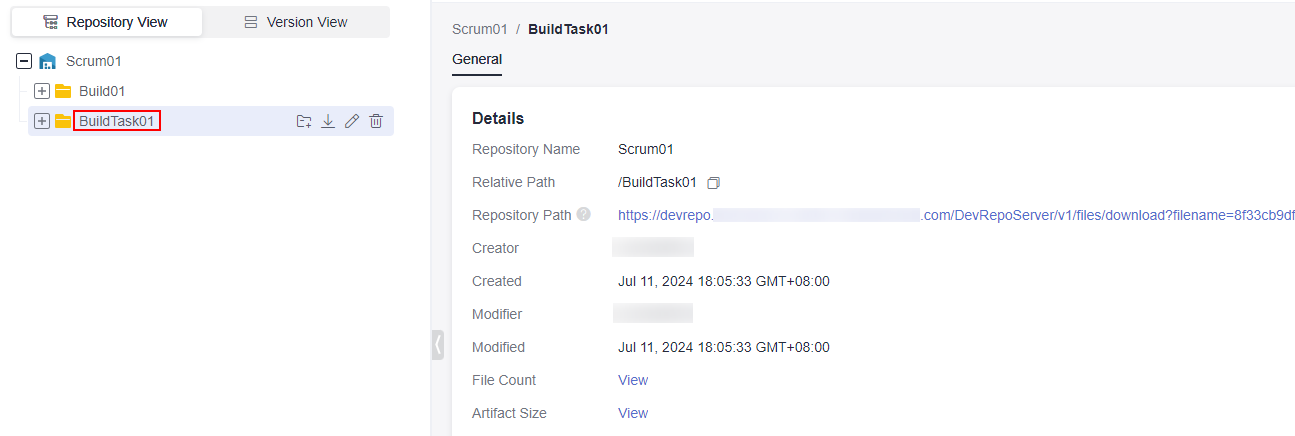
- On the displayed page, find the folder that shares the same name as the build task (the name you specify when creating a build task), as shown in Figure 3. The software package can be found within this folder.
Clearing Resources
To avoid unnecessary charges, you are advised to release the following resources once your builds are finished.
- In CodeArts Repo: Delete code repositories.
- In the release repo: Delete software packages and clear the recycle bin by referring to CodeArts Artifact User Guide > "Release Repo (New Version)" > "Managing the Recycle Bin".

Released resources cannot be recovered. Exercise caution when performing these operations.
Related Information
Learn about more build tools in Configuring Build Actions.
Feedback
Was this page helpful?
Provide feedbackThank you very much for your feedback. We will continue working to improve the documentation.See the reply and handling status in My Cloud VOC.
For any further questions, feel free to contact us through the chatbot.
Chatbot


