Connecting to IoTDA Based on the BearPi-HM_Nano Development Board and OpenHarmony
This section uses BearPi-HM_Nano development board as an example to describe how to connect an OpenHarmony 3.0 device to IoTDA using the huaweicloud_iot_link SDK.
Prerequisites
- You have registered a Huawei Cloud account.
- You have subscribed to IoTDA. If you have not subscribed to the service, go to the IoTDA service page, and click Access Console to subscribe to the service.
Hardware Environment
You need to prepare a BearPi-HM_Nano development board, E53_IA1 expansion module, Type-C data cable, and PC.
Software Environment
Set up the environment in IDE-based mode or CLI-based mode. The BearPi-HM_Nano main control chip is Hi3861. Install the corresponding environment.

- If you install gcc_riscv32 in the environment of the Hi3861 development board, download the gcc_riscv32 image. Otherwise, some plug-ins may fail to be downloaded or installed.
- It may take a long time to download a large amount of open-source code. Therefore, reserve sufficient time.
Creating a Product
- Log in to the console, choose Products in the navigation pane, and click Create Product.
- Set the parameters as prompted and click OK.
Basic Information
Resource Space
The platform automatically allocates the created product to the default resource space. You can also select an existing resource space from the drop-down list or create one.
Product Name
Customize the value. The product name must be unique in the same resource space. The value can contain up to 64 characters. Only letters, digits, and special characters (_?'#().,&%@!-) are allowed.
Protocol
Select MQTT.
Data Type
Select JSON.
Industry
Set this parameter as required.
Device Type
Set this parameter as required.
Advanced Settings
Product ID
Set a unique identifier for the product. If this parameter is specified, the platform uses the specified product ID. If this parameter is not specified, the platform allocates a product ID.
Figure 1 Creating a product - MQTT
Developing a Product Model
- Click the created product. The product details page is displayed.
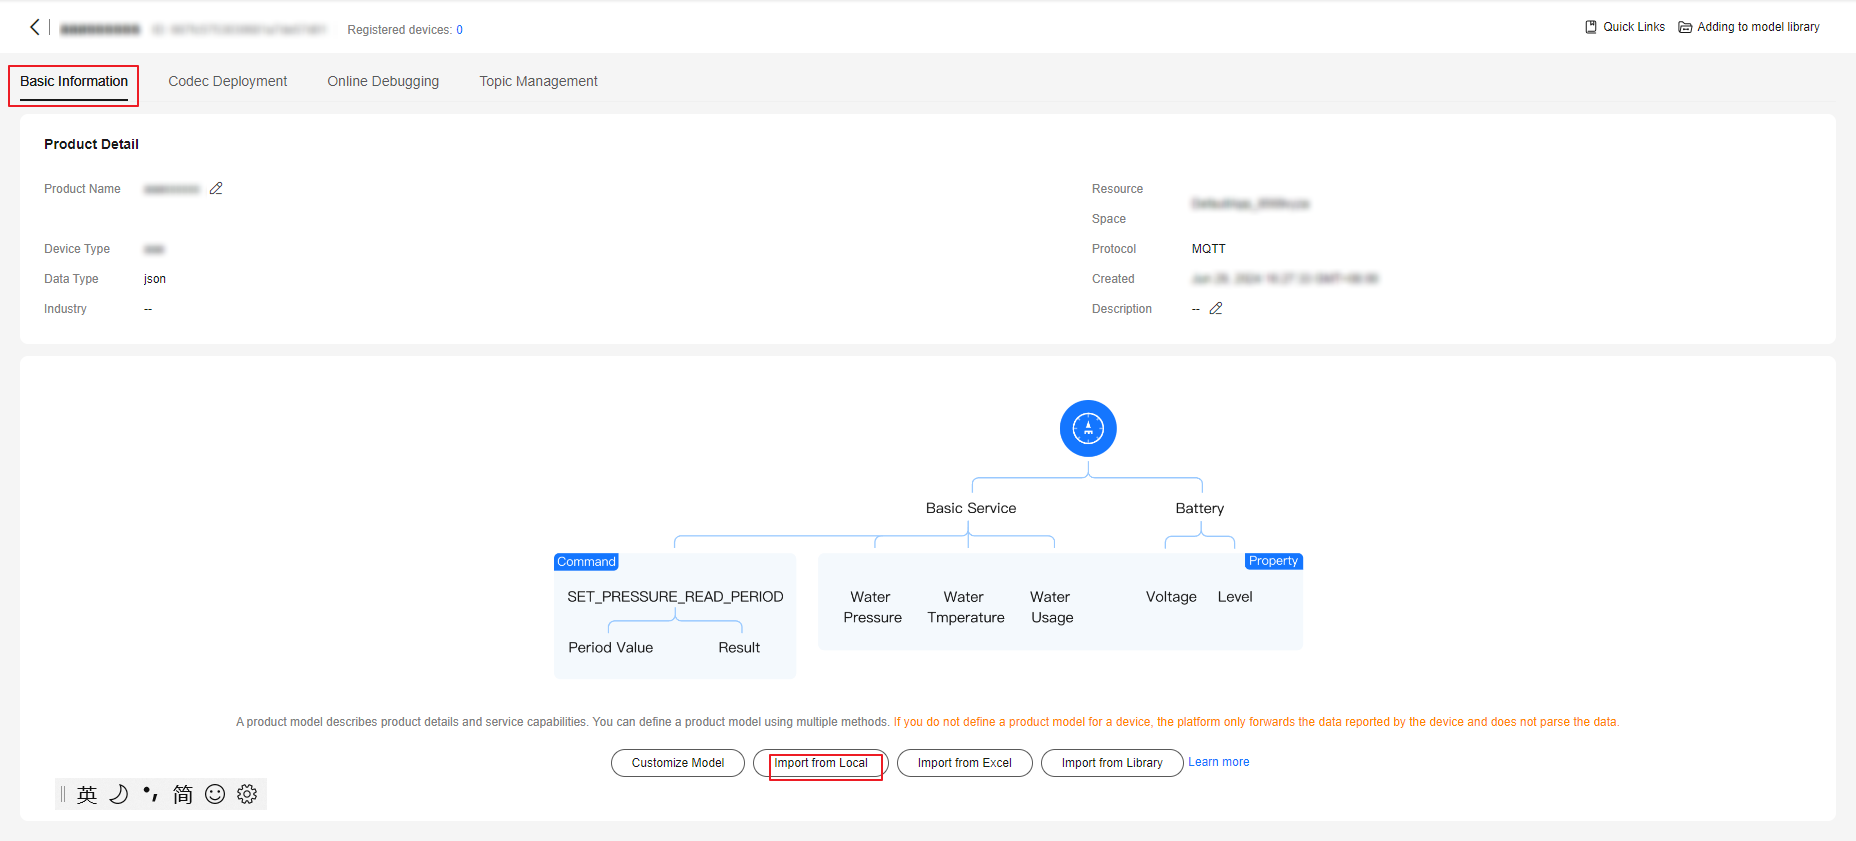
- On the Basic Information tab page, upload the model file BearPi_Agriculture.zip.
Figure 2 Uploading a product model - MQTT

- In the product list, click the name of a product to access its details page. On the displayed page, you can view basic product information, such as the product ID, product name, device type, data format, manufacturer name, resource space, and protocol type.
- You can click Delete to delete a product that is no longer used. After the product is deleted, its resources such as the product models and codecs will be cleared. Exercise caution when deleting a product.
Registering a Device
- Log in to the IoTDA console.
- In the navigation pane, choose Devices > All Devices, click Register Device, set parameters based on the table below, and click OK.
Figure 3 Registering a device - MQTT

Parameter
Description
Resource Space
Select the resource space to which the device belongs.
Product
Select the product to which the device belongs. If no product is available, create a product first.
Node ID
Set this parameter to the IMEI, MAC address, or serial number of the device. If the device is not a physical one, set this parameter to a custom character string of 4 to 64 characters. Only letters, digits, underscores (_), and hyphens (-) are allowed.
Device Name
Customize the device name.
Authentication Type
Select Secret.
Secret
Customize the secret used for device access. If the secret is left blank, the platform automatically generates a secret.
Figure 4 Device - Device registered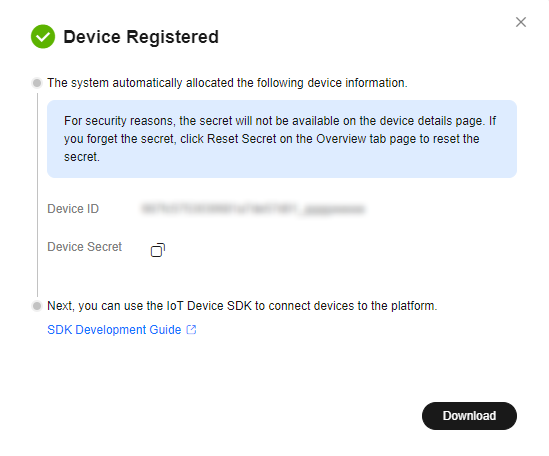

- Save the device ID and secret. They are used for authentication when the device attempts to access IoTDA.
- If the secret is lost, you can reset the secret. The secret generated during device registration cannot be retrieved.
- You can delete a device that is no longer used from the device list. Deleted devices cannot be recovered. Exercise caution when performing this operation.
Using the Huaweicloud_iotlink SDK
- Download the source code oh3.0_hwcloud_iotlink-master.zip.
- Copy the preceding source code to the src > third_party directory of the OpenHarmony source code. Note that the third-party libraries of OpenHarmony and Huaweicloud_iotlink SDK use the OpenHarmony library files, such as cJSON and Mbed TLS.
- Add the following code to the OpenHarmony 3.0 source code file device\bearpi\bearpi_hm_nano\app\BUILD.gn and select the demo using the comment symbol (#).
"//third_party/hwcloud_iotlink/demos/mqtt_tiny_v5_agriculture_demo:mqtt_tiny_v5_agriculture_demo",
Figure 5 Selecting a demo

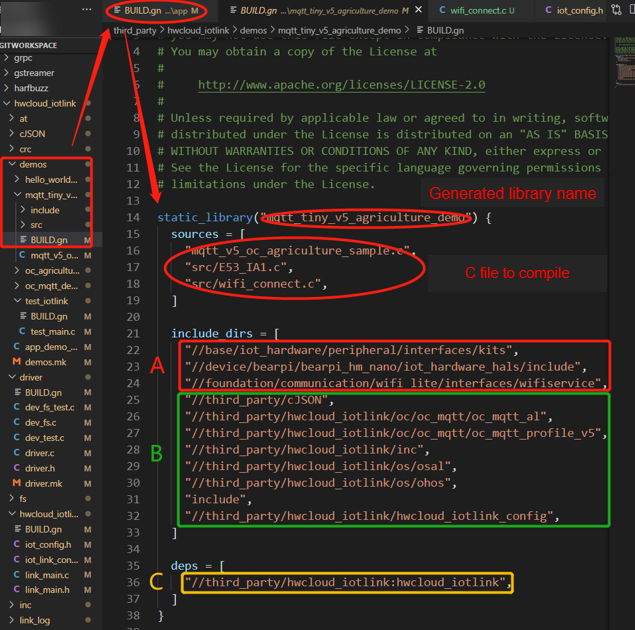
2 in the preceding figure is the demo of connecting an MQTT device to Huawei Cloud. Check the BUILD.gn file, as shown in Figure 6. A contains the library files related to the development board hardware and Wi-Fi. B contains the library files required for connecting an MQTT device to Huawei Cloud, including cJSON, MQTT- and OSAL-related files, and configuration library files. C indicates that the hwcloud_iotlink library needs to be compiled when the file is compiled. Necessary libraries and C files of the file are located based on the specified path for compilation.

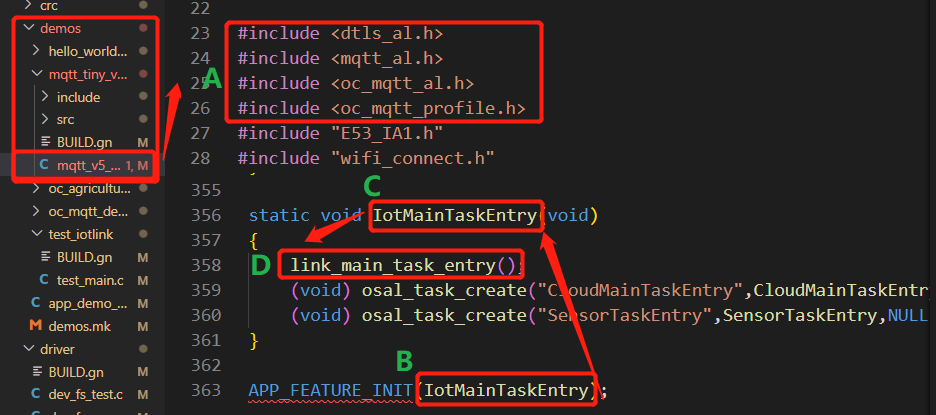
A in Figure 7 shows the library files and DTLS library files required for connecting an MQTT device to Huawei Cloud. The link_main_task_entry() function must be called in the entrypoint function IoTMainTaskEntry() first to ensure the OSAL installation and initialization of other configurations.
- Set parameters.
Figure 8 Modifying parameters


- To connect to the cloud, you need to modify the network configuration information, Wi-Fi hotspot account and password, and device ID and secret registered on the cloud based on your device. Note that this device supports only 2.4 GHz Wi-Fi.
- Change the interconnection address to the MQTT access address displayed in the Access Details dialog box on the Overview page of the console.
- Compilation and burning can be performed in IDE mode or CLI mode.
- After burning, press the RESET button on the development board to start the device.
- The preceding code is based on OpenHarmony 3.0. For other versions, modify the OpenHarmony source code path introduced in the BUILD.gn file as required.
Connecting the Device to the Platform
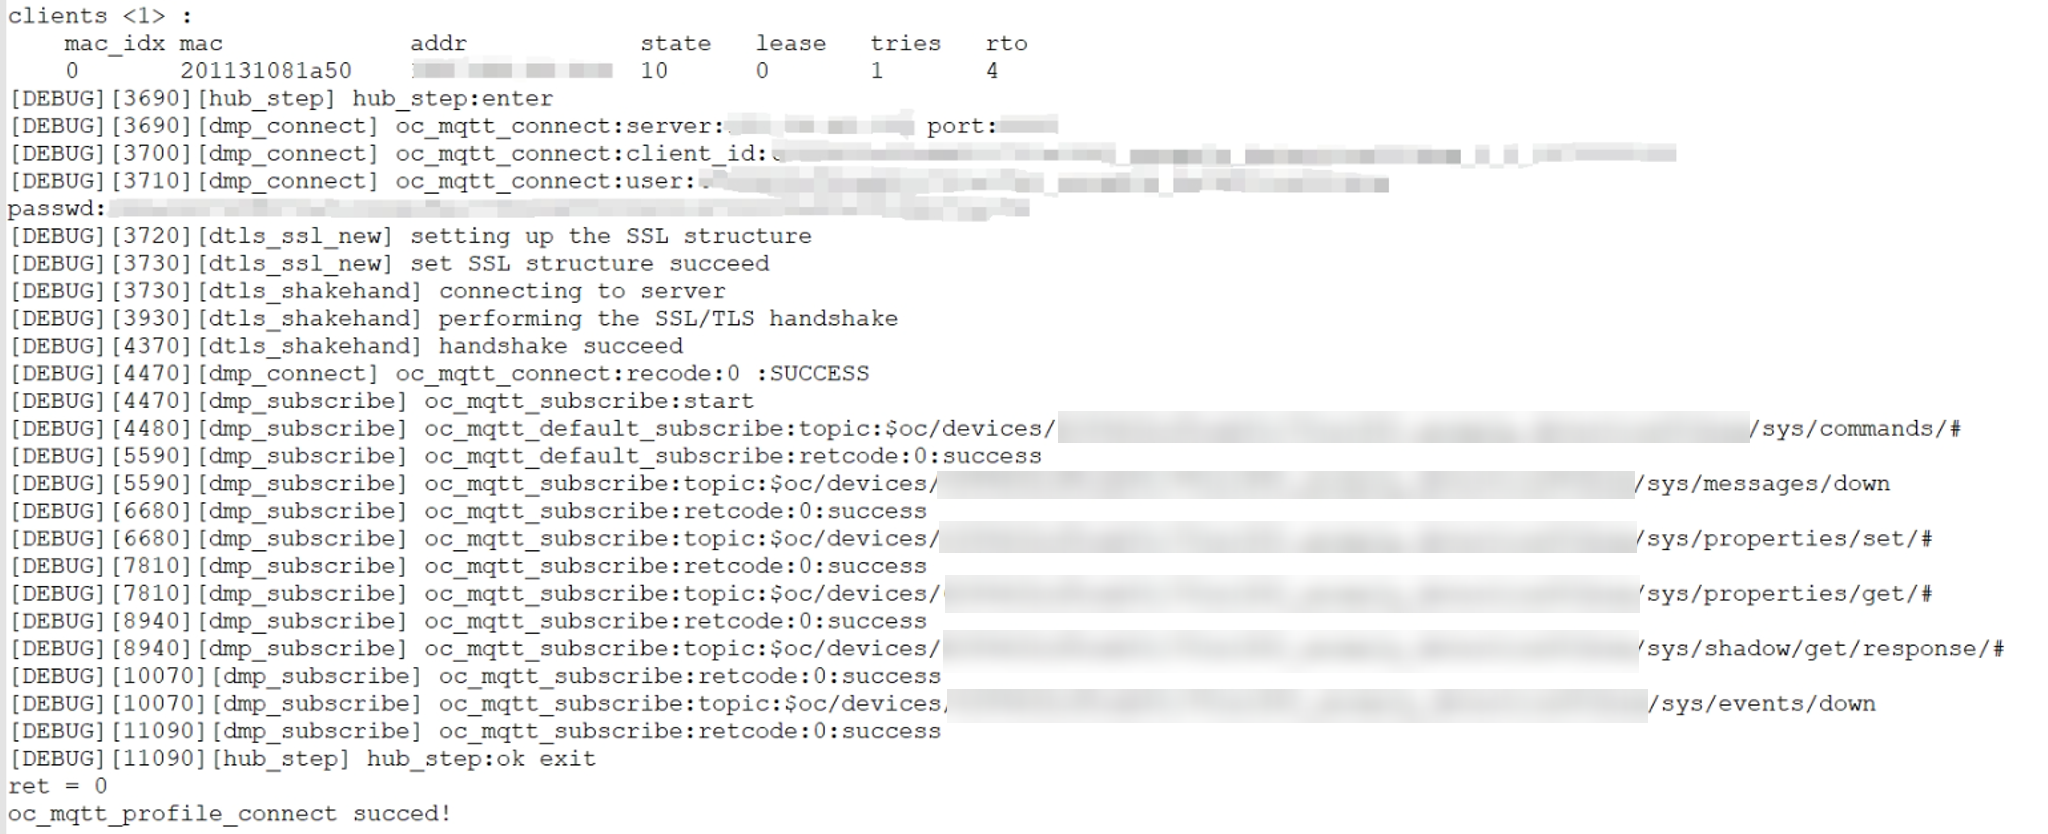
After the code is burnt to the device, restart the device. You need to restart the device twice for the first time. During the first burning, you may need to configure the internal information. After the device is restarted twice, it can connect to Huawei Cloud.
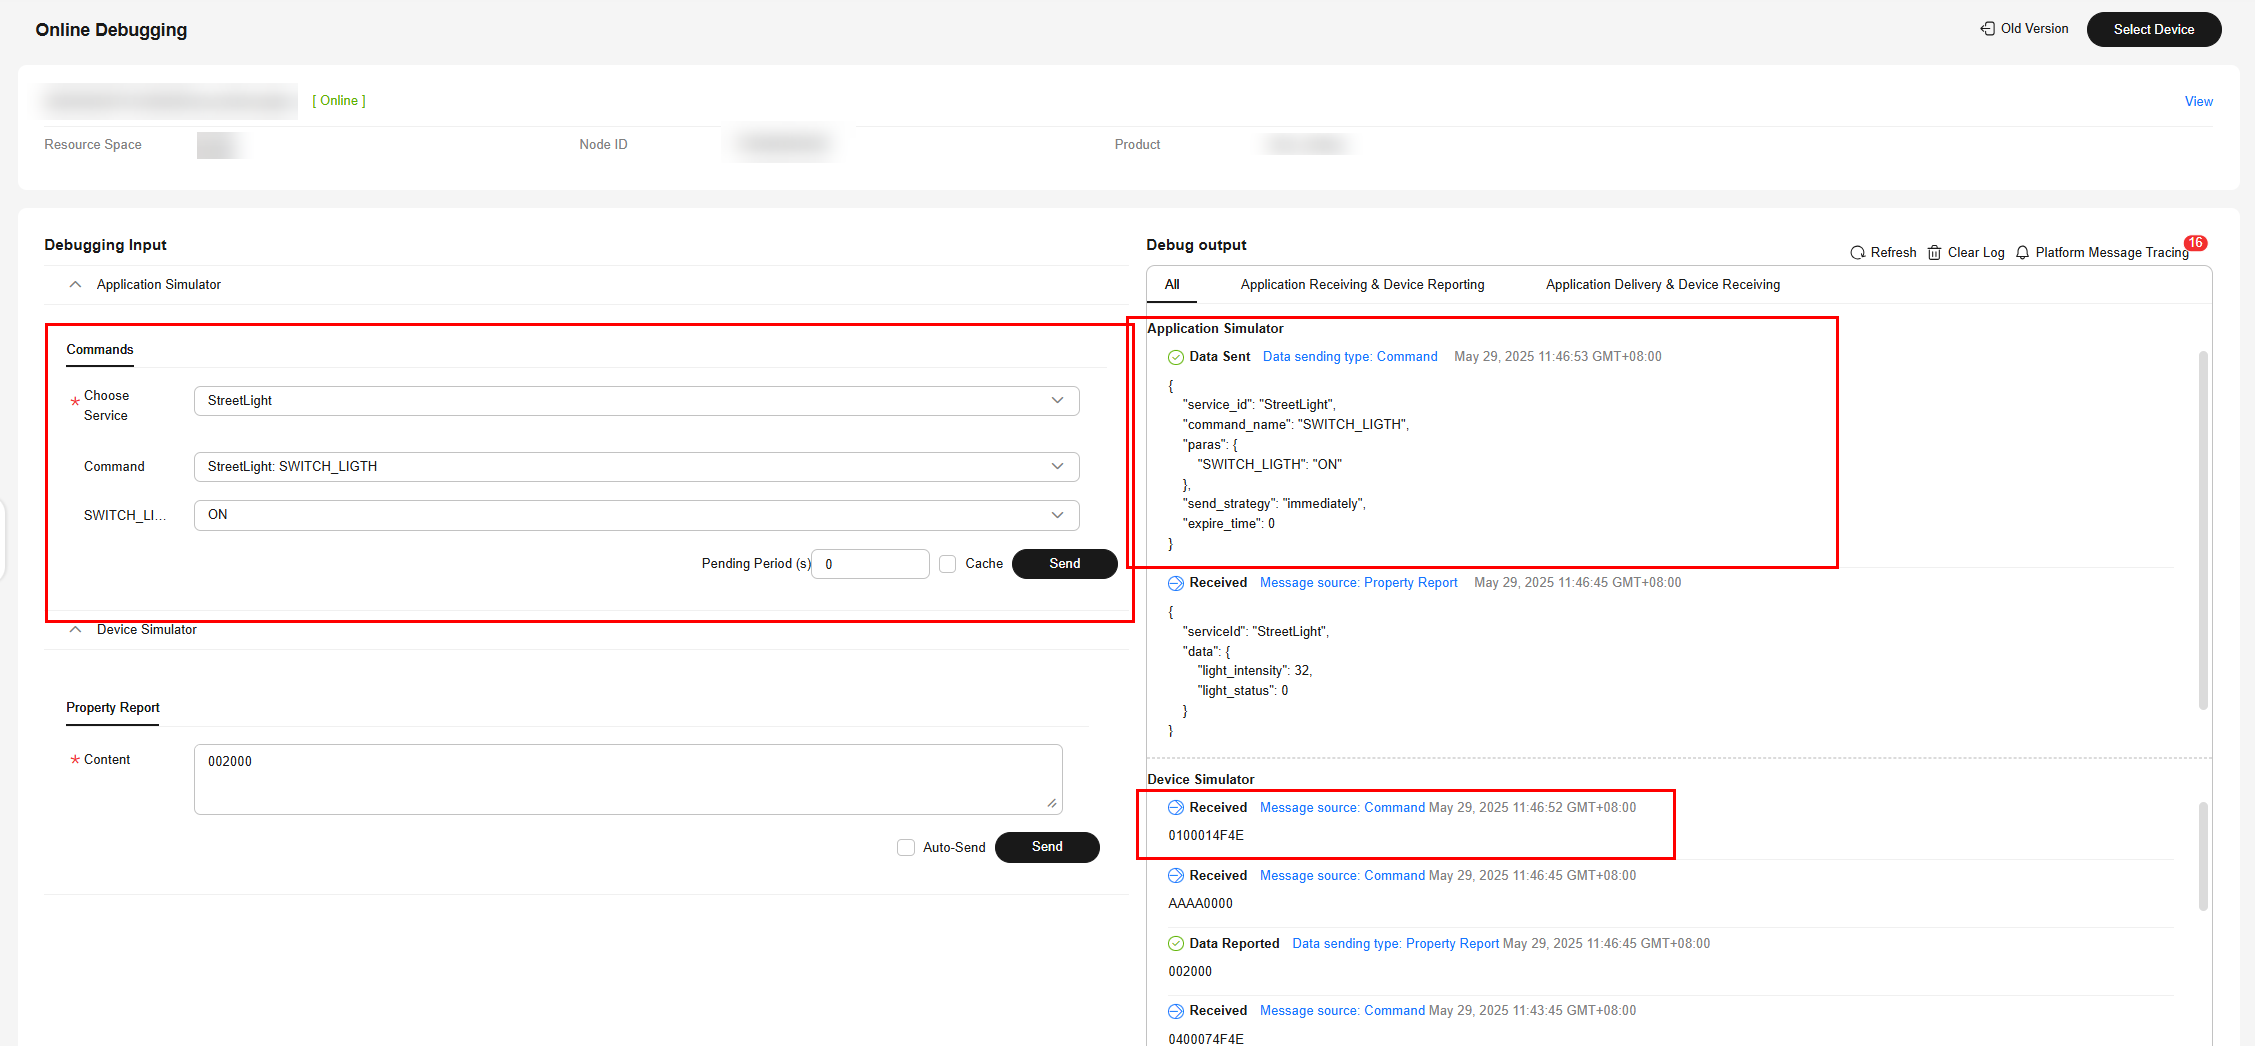
On the platform, you can view details about the reported data and deliver commands to control devices, as shown in the following figures.

Feedback
Was this page helpful?
Provide feedbackThank you very much for your feedback. We will continue working to improve the documentation.See the reply and handling status in My Cloud VOC.
For any further questions, feel free to contact us through the chatbot.
Chatbot

