Connecting a Device Simulator to IoTDA
This topic uses a device simulator as an example to describe how to connect devices to IoTDA using the native MQTT protocol. The simulator is an MQTT client that enables you to easily verify whether devices can interact with the platform to publish or subscribe to messages.
Prerequisites
Obtaining Device Access Information
Perform the following procedure to obtain device access information on the IoTDA console:
- Access the IoTDA service page and click Access Console.
- In the navigation pane, choose Overview and click Access Details in the Instance Information area to view device access information and record domain names and ports.
Figure 1 Obtaining access information
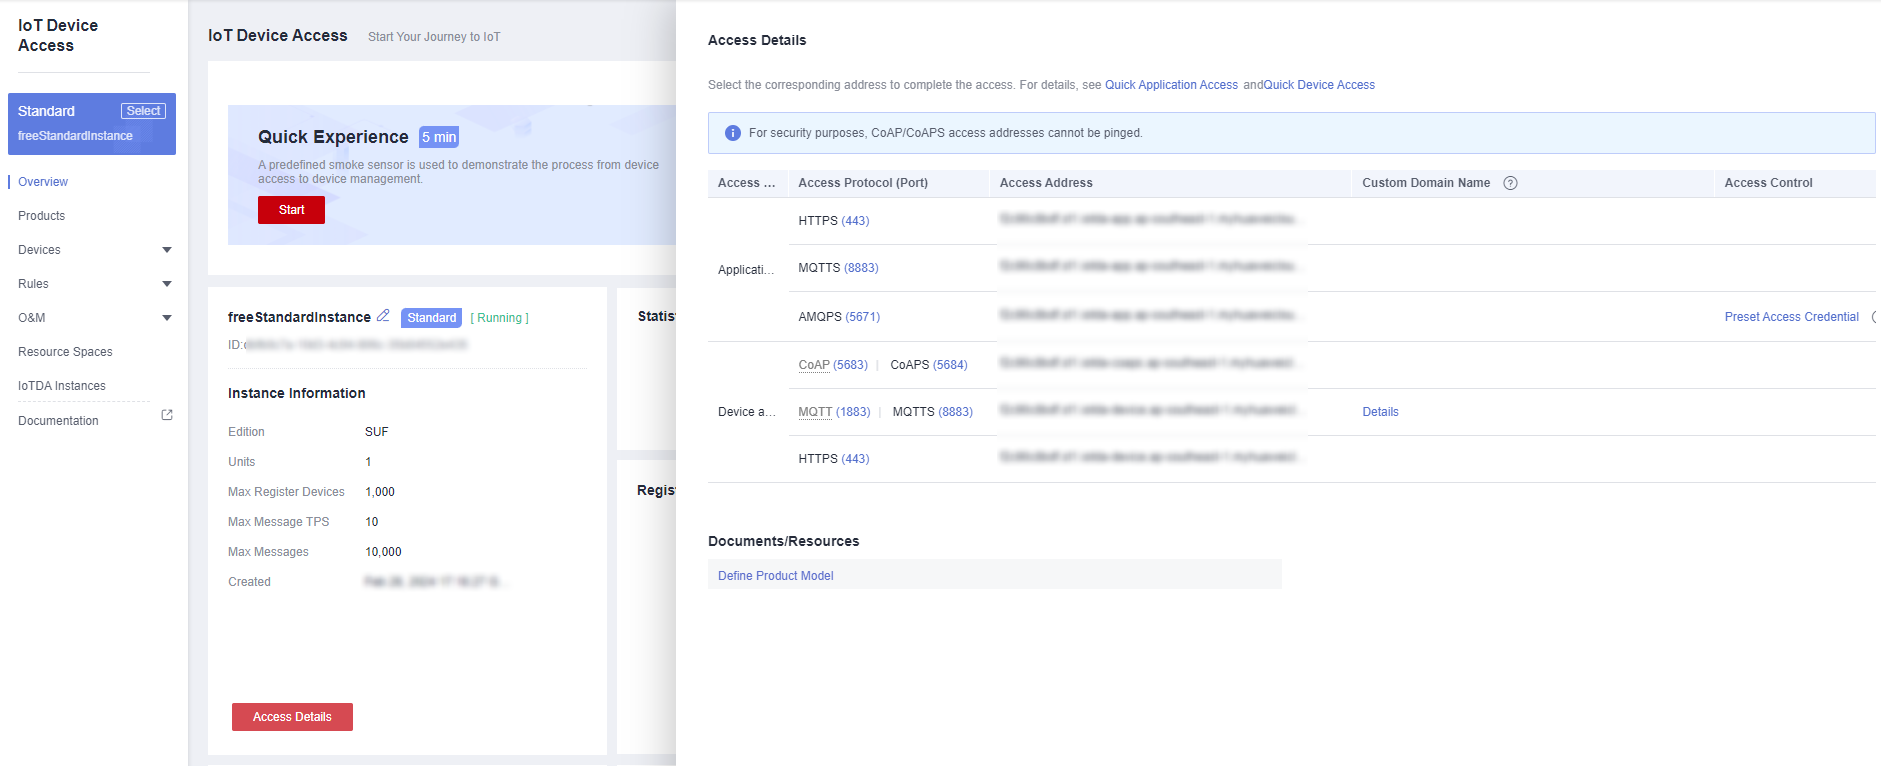

For devices that cannot be connected to IoTDA using a domain name, run the ping Domain name command in the CLI to obtain the IP address. The IP address is variable and needs to be set using a configuration item.
Creating a Product
- Create an MQTT product. (If an MQTT product already exists, skip this step.)
- Log in to the console, choose Products in the navigation pane, and click Create Product on the left.
Figure 2 Creating a product

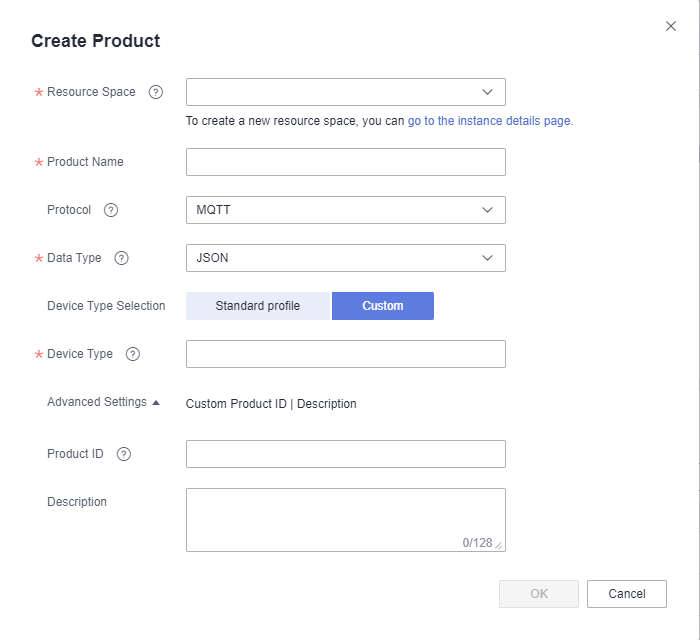
- Create a product whose protocol type is MQTT and device type is StreetLamp, set parameters as prompted, and click OK.
Figure 3 Creating an MQTT product
Registering a Device
- On the IoTDA console, choose Devices > All Devices in the navigation pane, and click Register Device in the upper right corner.
Figure 4 Registering a device

- Set the parameters as prompted and click OK.
Parameter
Description
Resource Space
Ensure that the device and its associated product belong to the same resource space.
Product
Select a corresponding product.
Node ID
Customize a unique physical identifier for the device. The value consists of letters and digits.
Device Name
Customize the device name.
Authentication Type
Select Secret.
Secret
If you do not set this parameter, IoTDA automatically generates a value.
Figure 5 Registering a device - MQTT
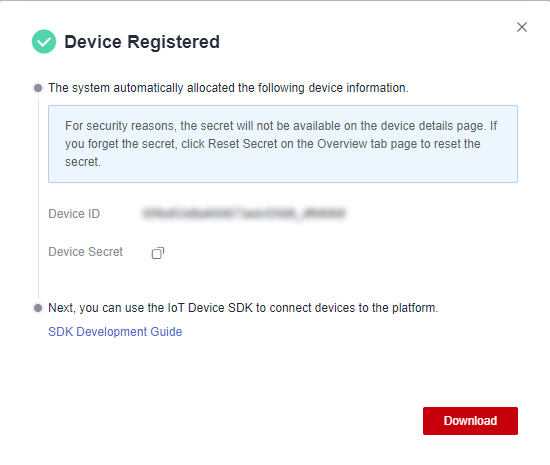
- After the device is registered, the platform automatically generates a device ID and secret. Save the device ID and secret for device access.
Figure 6 Device registered
Connecting a Device Simulator to IoTDA
- Download the simulator (for 64-bit operating system by default) and start it.

- Perform operations on the UI.
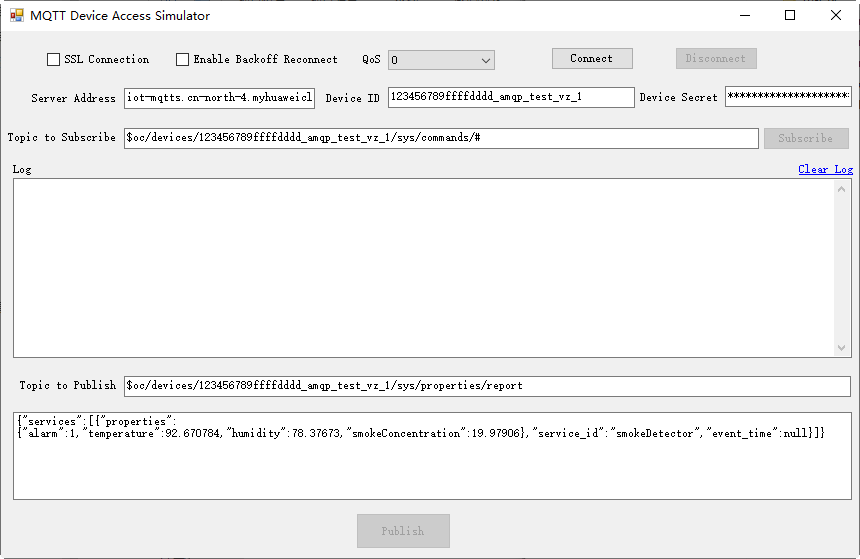
- On the simulator UI, enter the server address, device ID, and device secret. Set the parameters based on the actual device information.
- Server Address: domain name. Obtain it by referring to Platform Connection Information.
- Device ID and Device Secret: Obtain them from here.
- Use the corresponding certificates together with different server addresses during SSL-encrypted access. Obtain certificates by referring to Obtaining Resources and replace certificates in the certificate folder.

- Select SSL encryption or no encryption when establishing a connection on the device side and set the QoS mode to 0 or 1. Currently, QoS 2 is not supported. For details, see Constraints.
- On the simulator UI, enter the server address, device ID, and device secret. Set the parameters based on the actual device information.
- Establish a connection.
To connect a device or gateway to the platform, upload the device information to bind the device or gateway to the platform. Click Connect. If the domain name, device ID, and secret are correct, a device connection success is displayed in the log. Check the device status on IoTDA, as shown in the following figure.
Figure 7 Device online status
- Subscribe to a topic.
Only devices that subscribe to a specific topic can receive messages about the topic published by the broker. For details on the preset topics, see Topics.
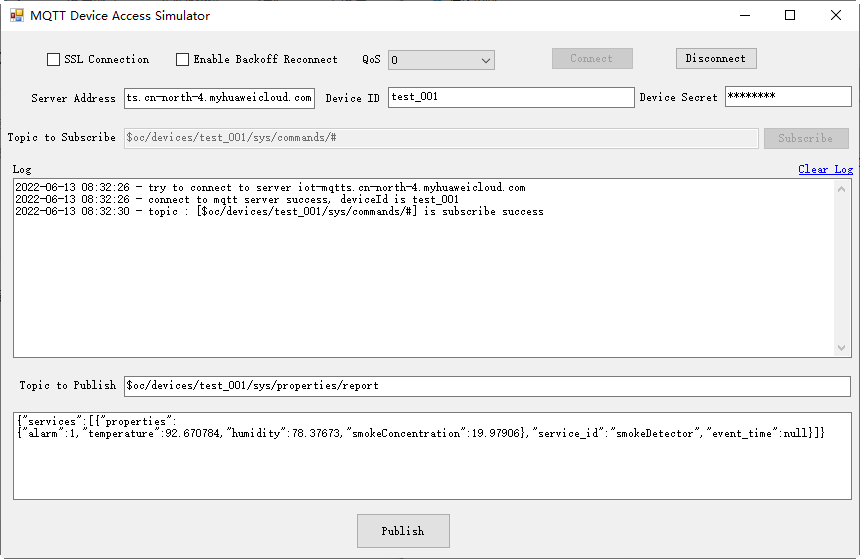
After the connection is established and a topic is subscribed, the following information is displayed in the log area on the home page of the demo:
- Publish a topic.
Publishing a topic means that a device proactively reports its properties or messages to the platform. For details, see the API Device Reporting Properties.
The simulator implements the property reporting topic and property reporting.
After a topic is published, the following information is displayed on the demo page:

If the reporting is successful, the reported device properties are displayed on the device details page.
Figure 8 Viewing reported data - MQTT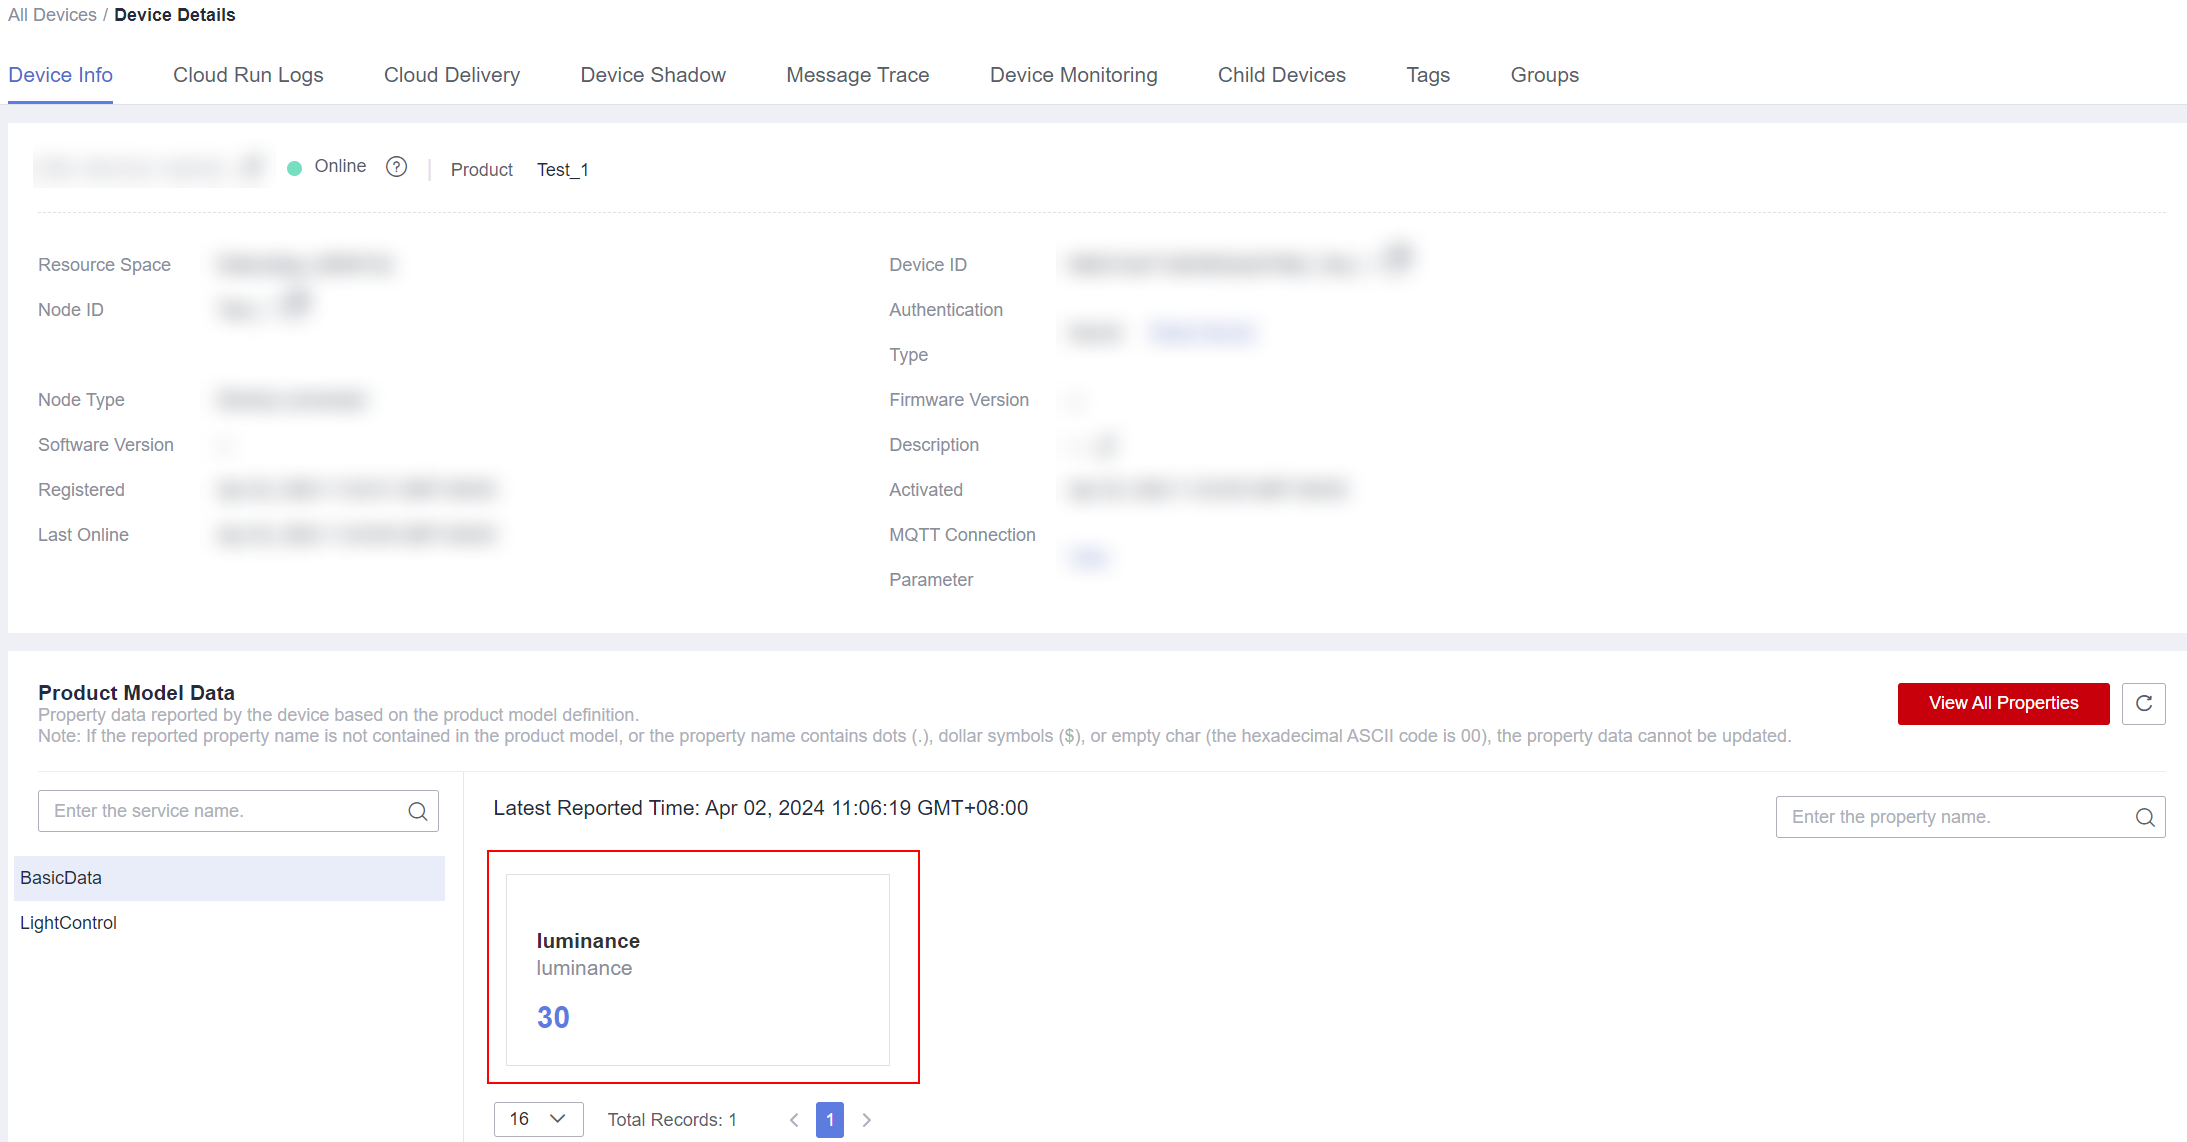
- Receive a command.
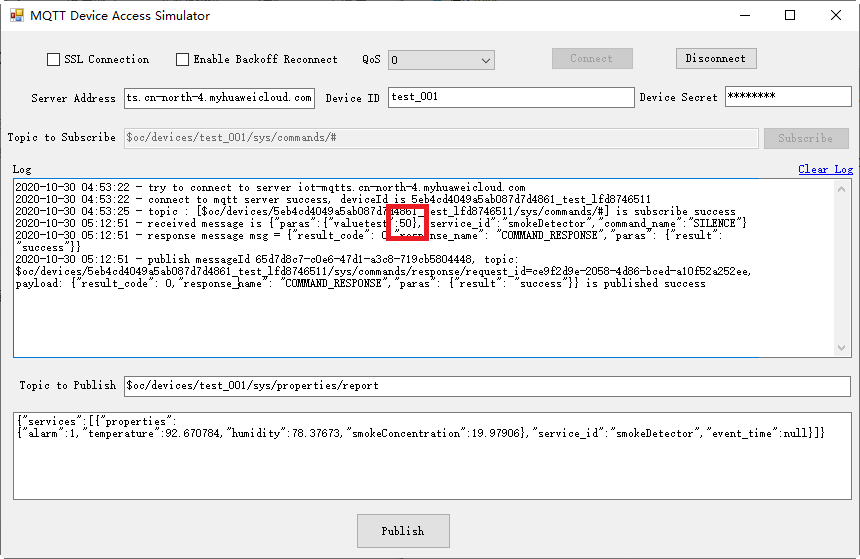
The simulator can receive commands delivered by the platform. After an MQTT connection is established and a topic is subscribed, you can deliver a command on the device details page of the IoTDA console. After the command is delivered, the MQTT callback receives the command delivered by the platform.
For example, deliver a command carrying the parameter name smokeDetector: SILENCE and parameter value 50.
Figure 9 Synchronous command delivery
After the synchronous command is delivered, the following information is displayed on the demo page:
Feedback
Was this page helpful?
Provide feedbackThank you very much for your feedback. We will continue working to improve the documentation.See the reply and handling status in My Cloud VOC.
For any further questions, feel free to contact us through the chatbot.
Chatbot


