
Help Center>
CodeArts Build>
Best Practices>
Graphical Build>
Using Maven to Create a Docker Image>
Preparations
Updated on 2024-04-18 GMT+08:00
Preparations
If you are using CodeArts Build for the first time, create a project before starting this example.
Preparing a Repository for the WebServer Project
- Create the WebServer directory for storing code and enter the directory.
- Create the pom.xml file in the WebServer directory. The file content is as follows:
<project xmlns="http://maven.apache.org/POM/4.0.0" xmlns:xsi="http://www.w3.org/2001/XMLSchema-instance" xsi:schemaLocation="http://maven.apache.org/POM/4.0.0 http://maven.apache.org/maven-v4_0_0.xsd"> <modelVersion>4.0.0</modelVersion> <groupId>com.xx.demo</groupId> <artifactId>server</artifactId> <packaging>jar</packaging> <version>1.0</version> <name>server</name> <url>http://maven.apache.org</url> <dependencies> <dependency> <groupId>junit</groupId> <artifactId>junit</artifactId> <version>3.8.1</version> <scope>test</scope> </dependency> </dependencies> <build> <pluginManagement> <plugins> <plugin> <groupId>org.apache.maven.plugins</groupId> <artifactId>maven-jar-plugin</artifactId> <version>2.6</version> <configuration> <archive> <manifest> <addClasspath>true</addClasspath> </manifest> <manifestEntries> <Main-Class> HelloWorld </Main-Class> </manifestEntries> </archive> </configuration> </plugin> </plugins> </pluginManagement> </build> </project> - Create the src\main\java directory.
- Create the HelloWorld.java file in the directory created in Step 3. The file content is as follows:
public class HelloWorld { public static void main(String[] args) { System.out.println("Hello World!"); } } - On the CodeArts Build homepage, click
 in the upper right corner and select Custom Build Environments.
 - On the Custom Build Environments page, click CentOS 7-based x86 Base Image to obtain the Dockerfile corresponding to the base image.
In this example, CentOS is used as the base image.
- View the coordinate definition of the build package in the pom.xml file of the WebServer project in Step 2.
The Maven build package name is <artifactId>-<version>.packaging. By default, the build package is generated in the ./target directory. The final build package path is ./target/server-1.0.jar.
- Use the build package path obtained in Step 6 to compile the Dockerfile. The content is as follows:
FROM centos
MAINTAINER <devcloud@demo.com>
USER root
RUN mkdir /demo
COPY ./target/server-1.0.jar /demo/app.jar
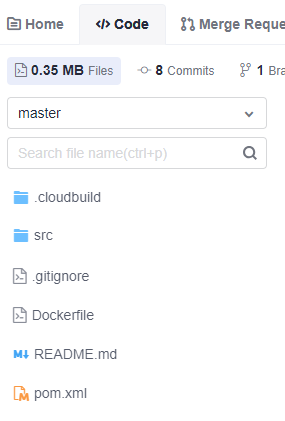
- On the navigation bar, choose . Create a repository named WebServer by referring to Creating a Repository, and upload the file created in Step 2, Step 3, and Step 7 to the repository by referring to Uploading Code to a Repository. After the code is uploaded, you can go to the repository to view the code.
Preparing a Repository for the WebUtil Project
- Create the WebUtil directory for storing code.
- Create the pom.xml file in the directory created in Step 1. The file content is as follows:
<project xmlns="http://maven.apache.org/POM/4.0.0" xmlns:xsi="http://www.w3.org/2001/XMLSchema-instance" xsi:schemaLocation="http://maven.apache.org/POM/4.0.0 http://maven.apache.org/maven-v4_0_0.xsd"> <modelVersion>4.0.0</modelVersion> <groupId>com.xx.demo</groupId> <artifactId>util</artifactId> <packaging>jar</packaging> <version>1.0</version> <name>util</name> <url>http://maven.apache.org</url> <dependencies> <dependency> <groupId>junit</groupId> <artifactId>junit</artifactId> <version>3.8.1</version> <scope>test</scope> </dependency> </dependencies> <build> <pluginManagement> <plugins> <plugin> <groupId>org.apache.maven.plugins</groupId> <artifactId>maven-jar-plugin</artifactId> <version>2.6</version> <configuration> <archive> <manifest> <addClasspath>true</addClasspath> </manifest> <manifestEntries> <Main-Class> HelloWorld </Main-Class> </manifestEntries> </archive> </configuration> </plugin> </plugins> </pluginManagement> </build> </project> - Create the src\main\java directory.
- Create the HelloWorld.java file in the directory created in Step 3. The file content is as follows:
public class HelloWorld { public static void main(String[] args) { System.out.println("Hello World!"); } } - On the navigation bar, choose . Create a repository named WebUtil by referring to Creating a Repository, and upload the file created in Step 2 and Step 4 to the repository by referring to Uploading Code to a Repository. After the code is uploaded, you can go to the repository to view the code.
Preparing a Self-hosted Repo Endpoint
- In the navigation pane, choose .
- Click Create Endpoint and select nexus repository.
- In the displayed dialog box, enter the required parameters.
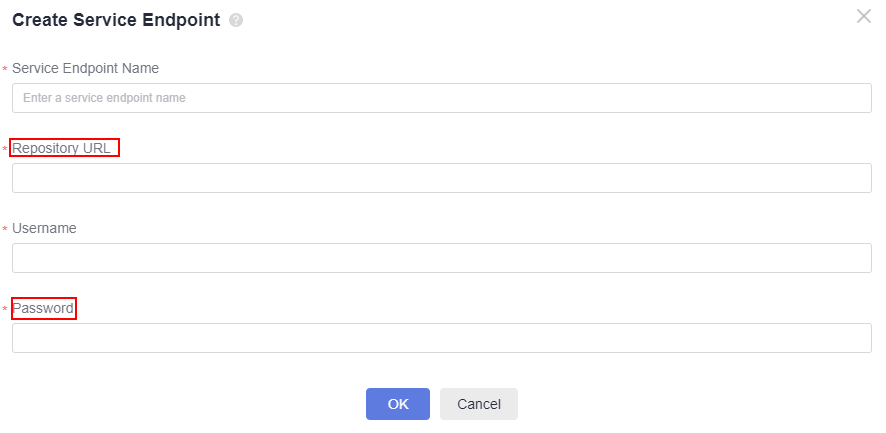
- Service Endpoint Name: Use the displayed self-hosted repo endpoint name.
- Repository URL: the address of the self-hosted repo.
- Username: the username in the configuration file downloaded from the self-hosted repo.
- Password: the password in the configuration file downloaded from the self-hosted repo.
The following describes how to obtain the parameters.
- In the navigation pane, choose and click
 next to the repository path to obtain the address of the self-hosted repo.
- Click Tutorial.
- Select Maven as the Dependency Manager and click Download Configuration File.

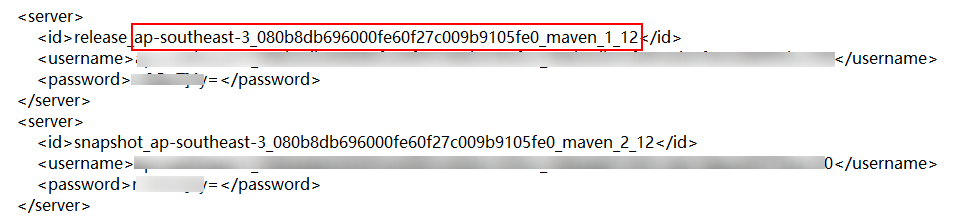
- Obtain the username and password for the file.
Use the username and password under a specific ID. The ID refers to the last parameter of the repository address.
- When creating an image and pushing it to the SWR repository, go to the SWR console, create an organization, and specify the SWR organization name.
Parent topic: Using Maven to Create a Docker Image
Feedback
Was this page helpful?
Provide feedbackThank you very much for your feedback. We will continue working to improve the documentation.See the reply and handling status in My Cloud VOC.
The system is busy. Please try again later.
For any further questions, feel free to contact us through the chatbot.
Chatbot


