
Releasing Dependencies to Self-Hosted Repos
This section describes how to release required dependencies to a self-hosted repo. Before using CodeArts Build, read the following precautions. Incorrect uses of dependencies may cause build errors.

The self-hosted repo and release repo are two different services. Pay attention to the differences and avoid releasing dependencies to the release repo. If you upload a dependency to the release repo, it cannot be downloaded during a build.
- The release repo is used to archive software packages for deployment or other purposes.
- The self-hosted repo is used to store tool packages for other projects, for example, WebUtil.jar.
In this example, the WebServer uses three dependencies:
- WebUtil: a self-developed common component that is released to the self-hosted repo through CodeArts Build.
- CommonUtil: a partner-provided component that contains JAR packages and pom files (the pom file of the CommonUtil project cannot be used as the pom file of the WebServer project). You can manually upload the package in POM mode.
- MessageSDK: a third-party component that contains only JAR packages. You need to consider whether the pom file can be obtained in other ways or whether the file can be uploaded in GAV mode.
Preparations
If you are using CodeArts for the first time, access the self-hosted repo homepage to initialize the self-hosted repos. For details, see Creating a Self-Hosted Repo.
Releasing WebUtil
- You can release tool packages in one-click during version iteration and avoid repetitive manual operations.
- Automatic continuous integration can be implemented based on functions such as scheduled building and code merging triggering in CodeArts Build and CodeArts Pipeline.
- Maven automatically generates content, which avoids missing or damaged files caused by manual operations and ensures the integrity and validity of the uploaded dependencies.
The configuration procedure is as follows:
- Create a build task. Select the repository WebUtil created in preparations as the code source, select Maven as the build template, and set the task name to Release WebUtil to the Self-hosted Repo.
The Maven template is preconfigured with the actions Build with Maven and Upload to Release Repos and default build commands. In most scenarios, you can directly use the preset actions to build and release the generated software package to the release repos.
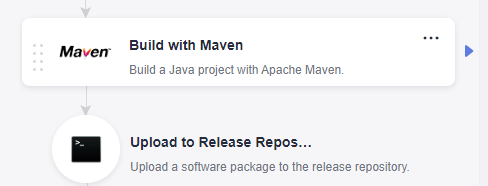
- Delete the action Upload to Release Repos.
This section describes how to release the tool package which the project requires to the self-hosted repo. Therefore, the action Upload to Release Repos is not needed. If you need to archive the software package to the release repo, retain this step. The build package is automatically generated in the ./target directory by default.
- Configure the action Build with Maven.
- Comment out the default mvn package command and enable the mvn deploy command that has been commented out.

- Check the build commands. The template provides default parameter settings. Only verify that the parameters are correct.
- By default, the command reads the pom file from the root directory. In this example, the pom file of the WebUtil project is in the root directory and requires no changes.
- WebUtil project requires JDK 1.8 for compilation and running. Ensure that the tool version is maven3.5.3-jdk8-open.
- This build aims to release a dependency. The default command is mvn deploy, which has been enabled.
- mvn deploy command is used to package the project and release it to the specified self-hosted repo for other projects to reference. If the project does not need to be released to the self-hosted repo or the self-hosted repo is faulty, you can run the mvn install to package the project and cache it. The project can also be directly referenced by other projects. (The cache is required during the build. The cache content does not ensure data durability. If the cache content is lost, the project needs to be rebuilt.)
- For details about the default command parameters, see What Do Default Commands in Build with Maven Indicate?
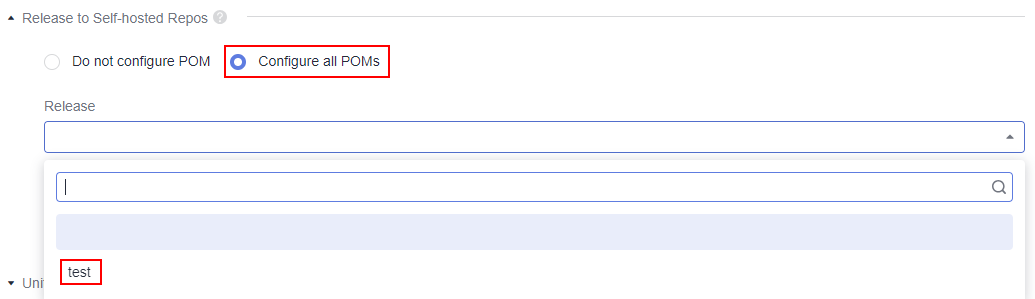
- Choose Release to Self-hosted Repos > Configure all POMs, and select the self-hosted repo to be released to.
Check cache setting:
- CodeArts Build supports caches to accelerate your build. You can determine whether to use the cache by Cache Setting.
- Network jitter, concurrent builds, or other extreme conditions may result in abnormal cache. Consequently, build errors may occur and you need to clear the cache by referring to the Cache Clearing.
- Comment out the default mvn package command and enable the mvn deploy command that has been commented out.
- After the task is executed successfully, go to the Artifact > Self-hosted Repos to view the uploaded dependency.
Manually Releasing CommonUtil in POM Mode
Some dependencies are released through systemPath or manually released to a self-built self-hosted repo using the JAR package provided by a third party (It is the CommonUtil package in this example). These dependencies cannot be downloaded from public repositories. You need to manually upload these dependencies to self-hosted repos in POM mode. The procedure is as follows:
- Choose and select a repository type according to the type of the dependency to be uploaded.
- Obtain the pom file.
- Method 1: Download the pom file from the repository.
Some dependencies may come from a third-party repository that CodeArts cannot access. You can download the dependencies from the repository. In this scenario, the private Maven repository provides both JAR packages and pom files. You can download the pom file from the repository.
- Method 2: Obtain the pom file from the JAR package.
If only the JAR package, not the repository, source code, or pom file, can be found for some dependencies, perform the following steps to obtain the pom file (the WebUtil package is used as an example):
- Decompress the util-1.0.jar package. If the package cannot be decompressed, change the file name extension to a supported format.
- Enter the directory generated after the decompression, open the META-INF/maven/{groupid}/{artifactid} directory (META-INF/maven/com.xx.demo/util in this example), open the pom file, and verify that the file is correct.
- If the pom file cannot be found, check whether the file can be uploaded in GAV mode.
- Method 1: Download the pom file from the repository.
- Click Upload in the upper right corner, select POM, and select the pom and jar files to upload.
Pay attention to the following when manually uploading WebUtil:
The WebServer project depends on the WebUtil project. When uploading the WebUtil project, you must use the pom file of the WebUtil project. If the pom file of the WebServer project and the JAR package of the WebUtil project are uploaded by mistake, the uploaded dependency coordinates are inconsistent with the expected ones. As a result, the dependency download fails.
Uploading MessageSDK in GAV Mode
You are advised to manually upload the dependency in POM mode. If the pom file cannot be found, upload the dependency in GAV mode. However, this mode has potential risks. Evaluate the risks before using this mode.
The following describes the application scenarios and risks of GAV mode:
- When the GAV mode is used, the self-hosted repo automatically generates a pom file based on the entered coordinate information. The file content contains only the coordinate definition of the dependency.
- Take WebUtil as an example. If the WebUtil project uses the tool package lib.jar, after WebUtil is uploaded in GAV mode, the lib.jar package cannot be downloaded for the build of WebServer project. As a result, the build package is not as expected.
- If the WebUtil project does not require any dependency (the node of the pom file is empty), you can upload the file in this mode.
If you have carefully read the preceding risk description and ensure that the to-be-uploaded dependency does not have the preceding risks or you accept the risks, perform the following steps:
- Choose and select a repository type according to the type of the dependency to be uploaded.
- Click Upload in the upper right corner, select GAV, edit the coordinate information as prompted, select the JAR package, and upload it.
Feedback
Was this page helpful?
Provide feedbackThank you very much for your feedback. We will continue working to improve the documentation.See the reply and handling status in My Cloud VOC.
For any further questions, feel free to contact us through the chatbot.
Chatbot


