Uploading and Recognizing ID Card Images with a Connector
Expected Results
Huawei Cloud Astro Zero encapsulates various connectors to integrate with external services, enabling their use within applications. For example, using a connector to link with OCR enables the recognition of text in ID card images uploaded by users to the Object Storage Service (OBS).

Procedure
- Make preparations.
- To access OBS, you need a HUAWEI ID or an IAM user account. This involves registering with Huawei Cloud, completing real-name authentication, creating an IAM user account, funding your account, and purchasing the necessary resource packages. For details, see Using OBS Console.
- Obtain the access key ID (AK) and secret access key (SK). For details, see Obtaining an AK/SK .
- Create a bucket (for example, appcubecn4) in OBS. For details, see Creating a Bucket. Record the region selected during bucket creation.
- Create a low-code application.
- Apply for a free trial or purchase a commercial instance by referring to Authorization of Users for Huawei Cloud Astro Zero Usage and Instance Purchases.
- After the instance is purchased, click Access Homepage on Homepage. The application development page is displayed.
- In the navigation pane, choose Applications. On the displayed page, click Low-Code or
 .
.
When you create an application for the first time, create a namespace as prompted. Once it is created, you cannot change or delete it, so check the details carefully. Use your company or team's abbreviation for the namespace.
- In the displayed dialog box, choose Standard Applications and click Confirm.
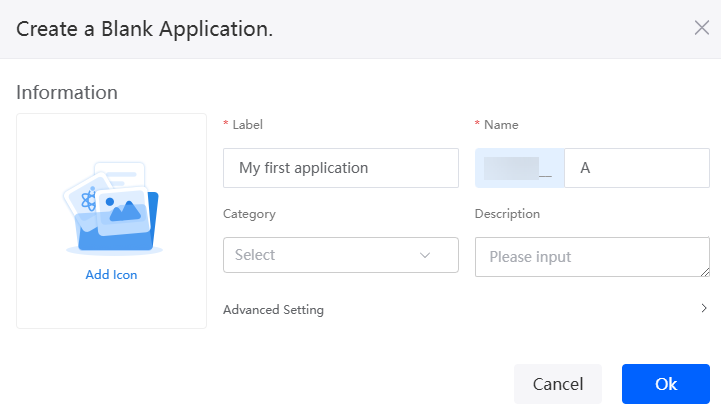
- Enter a label and name of the application, and click the confirm button. The application designer is displayed.
Figure 3 Creating a blank application
- Create an OBS connector.
- In the application designer, choose Integrations > Connector > Connector Instance.
- Choose OBS under Storage and click + to create an OBS connector.
- Configure basic information, add the bucket, and click Save.
Figure 4 Setting basic information
 Figure 5 Adding a bucket
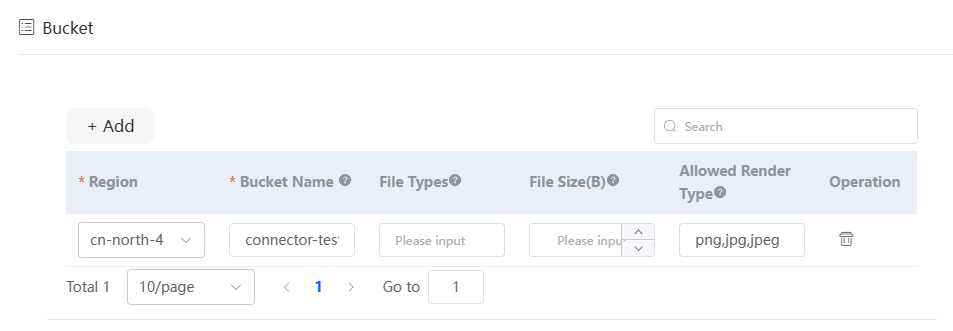
Table 2 Parameters for creating an OBS connector Parameter
Description
Example
Name
Name of the OBS connector to be created. Naming rules:
- Max. 64 characters, including the prefix namespace.
The content that is blurred in front of the ID is a namespace. To prevent duplicate data names among different tenants, each tenant must define a unique namespace when first creating an application. A tenant can only create one namespace, and once it is created, it cannot be modified.
- Start with a letter and can contain only letters, digits, and an underscore (_). Do not end with an underscore (_).
uploadMod
Auth Mode
Select an authentication mode.
- AK/SK: You need to obtain the access key and manually enter the AK/SK.
- Agency: Select the agency authorization mode. You do not need to enter the access key.
AK/SK
Access Key
Configure the access key (AK) of the user.
Access key ID value obtained in 1
Secret Key
Configure the obtained SK.
Secret access key value obtained in 1
Bucket
Set the region where the bucket resides and the bucket name.
Region: cn north-4; Bucket Name: appcubecn4 (the bucket created in 1)
- Max. 64 characters, including the prefix namespace.
- Create the orcTry object to store information such as the image URL.
- In the navigation pane on the left, choose Data, and click + next to Object.
- Set Object Name and Unique ID of the object to orcTry and click Confirm.
Figure 6 Creating the object orcTry

Table 3 Parameters for creating orcTry Parameter
Description
Example
Object Name
Name of the new object, which can be changed after the object is created.
Value: 1–80 characters.
orcTry
Unique ID
ID of a new object in the system, which cannot be modified after being created. Naming rules:
- Max. 63 characters, including the prefix namespace.
- Start with a letter and use only letters, digits, and underscores (_). Do not end with an underscore (_).
orcTry
- Click
 to go to the object details page.
 - On the Fields tab page, click Add and add the pictureName field to the object.
Figure 7 Adding the pictureName field

Table 4 Parameters for adding a field Parameter
Description
Example
Display Name
Name of the new field, which can be changed after the field is created.
Value: 1–63 characters.
pictureName
Unique ID
ID of a new field in the system. The value cannot be changed after the field is created. Naming rules:
- Max. 63 characters, including the prefix namespace.
- Start with a letter and can contain only letters, digits, and an underscore (_). Do not end with an underscore (_).
pictureName
Field Type
Click
 . On the page that is displayed, select the type of the new field based on the parameter description.
Text
- Repeat the preceding operations to add the fields in Table 5 to the object.
- Create an OCR connector.
- In the application designer, choose Integrations > Connector > Connector Instance.
- Choose OCR under AI and click + to create an OCR connector.
- Configure basic information, and click save.
Figure 8 Setting basic information
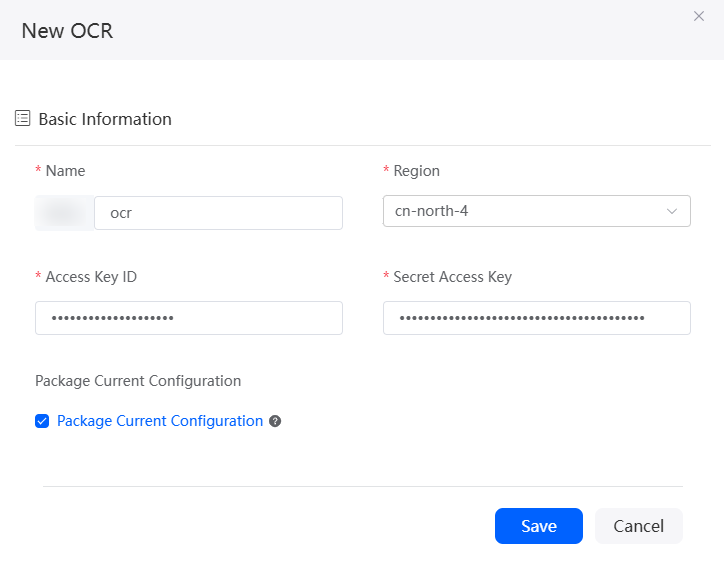
Table 6 Parameters for creating an OCR connector Parameter
Description
Example
Name
Name of the OCR connector to be created. Naming rules:
- Max. 63 characters, including the prefix namespace.
- Start with a letter and can contain only letters, digits, and an underscore (_). Do not end with an underscore (_).
newOcr
Region
Region where OCR is deployed.
cn-north-4
Access Key ID
It is used together with the SK to sign requests.
AK obtained by referring to 1
Secret Access Key
The SK and AK are used together to encrypt and sign a request to identify the sender and prevent the request from being modified.
SK obtained by referring to 1
- Create a script for submitting image information and using the OCR API to recognize images.
- In the navigation pane, choose Logic and click + next to Script.
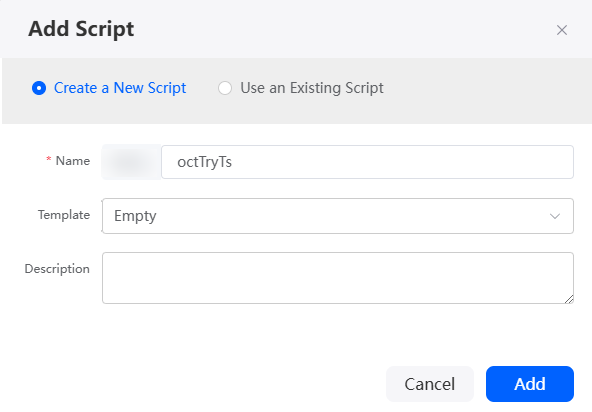
- Create a blank script named octTryTs.
Figure 9 Creating an octTryTs script
- In the script editor, enter the following code:
//This script is used to submit image information and call the OCR API to recognize images. import * as db from 'db';//Import the standard library related to the object. import * as context from 'context';//Import the standard library related to the context. import * as ocr from 'ocr'; //Define the input parameter structure. @action.object({ type: "param" }) export class ActionInput { @action.param({ type: 'String', required: true, label: 'String' }) proId: string; @action.param({ type: 'String', required: true, label: 'String' }) proName: string; @action.param({ type: 'Any', required: true, label: 'Any' }) url: any; } //Define the output parameter structure. The output parameter contains one parameter, that is, the record ID of workOrder. @action.object({ type: "param" }) export class ActionOutput { @action.param({ type: 'String' }) id: string; @action.param({ type: 'String', required: true, label: 'String' }) url: string; } //Use the data object namespace__orcTry__CST. @useObject (['Namespace__orcTry__CST']) @action.object({ type: "method" }) export class CreateWorkOrder { //Define the API class. The input parameter of the API is ActionInput, and the output parameter is ActionOutput. @action.method({ input: 'ActionInput', output: 'ActionOutput' }) public createWorkOrder(input: ActionInput): ActionOutput { let cli = ocr.newClient(" Namespace__newOcr"; //Create a connector instance. let out = new ActionOutput(); //Create an instance of the ActionOutput type as the return value. let error = new Error(); //Create an instance of the error type to save the error information when an error occurs. try { let url = "https://appcubecn4.obs.cn-north-4.myhuaweicloud.com/" + input.url[0]['originalUrl']; // Combine a complete image URL. let resp = cli.idCardWithURL(url, "front"); // Call the OCR API. Front indicates that the front of the ID card will be recognized. let productData = new Object(); productData['Namespace__pictureName__CST'] = input.proName; //Assign the input parameter to the productData variable for future use. productData['Namespace__pictureId__CST'] = input.proId; productData['Namespace__picUrl__CST'] = url; productData['Namespace__result__CST'] = JSON.stringify(resp['result']); let s = db.object('BJ4__orcTry__CST'); //Obtain the operation instance of the Namespace__orcTry__CST object. let id = s.insert(productData); if (id) { out.id = id; out.url = url; } else { error.name = "WOERROR"; error.message = "Unable to create pic!"; throw error; } } catch (error) { console.error(error.name, error.message); context.setError(error.name, error.message); } return out; } } - Click
 to save the script. After the script is saved, click
  to activate it.
- Create a page model.
- In the navigation pane, choose Page, and click + next to Standard Page.
- At the bottom of the standard page, click Model View.
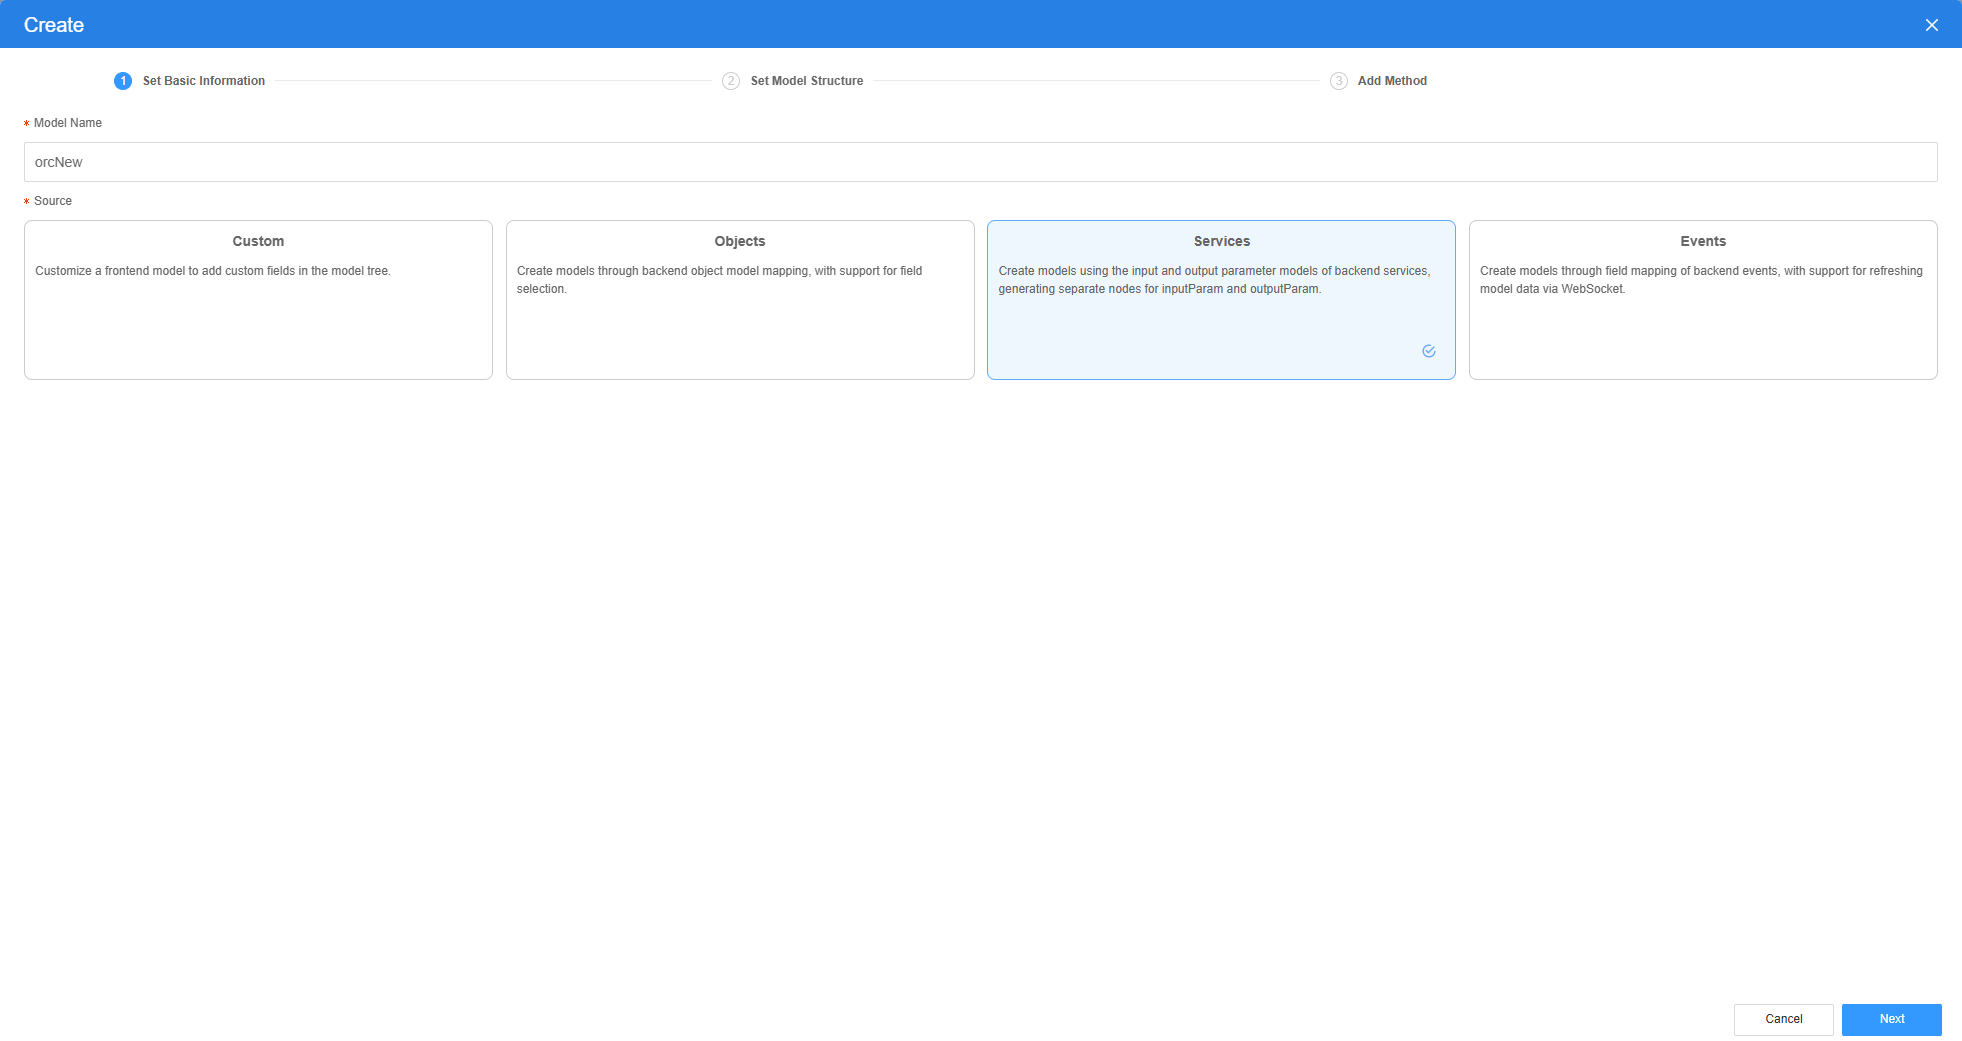
- Click New, specify Model Name (for example, orcNew), select Services for Source, and click Next.
Figure 10 Creating a model
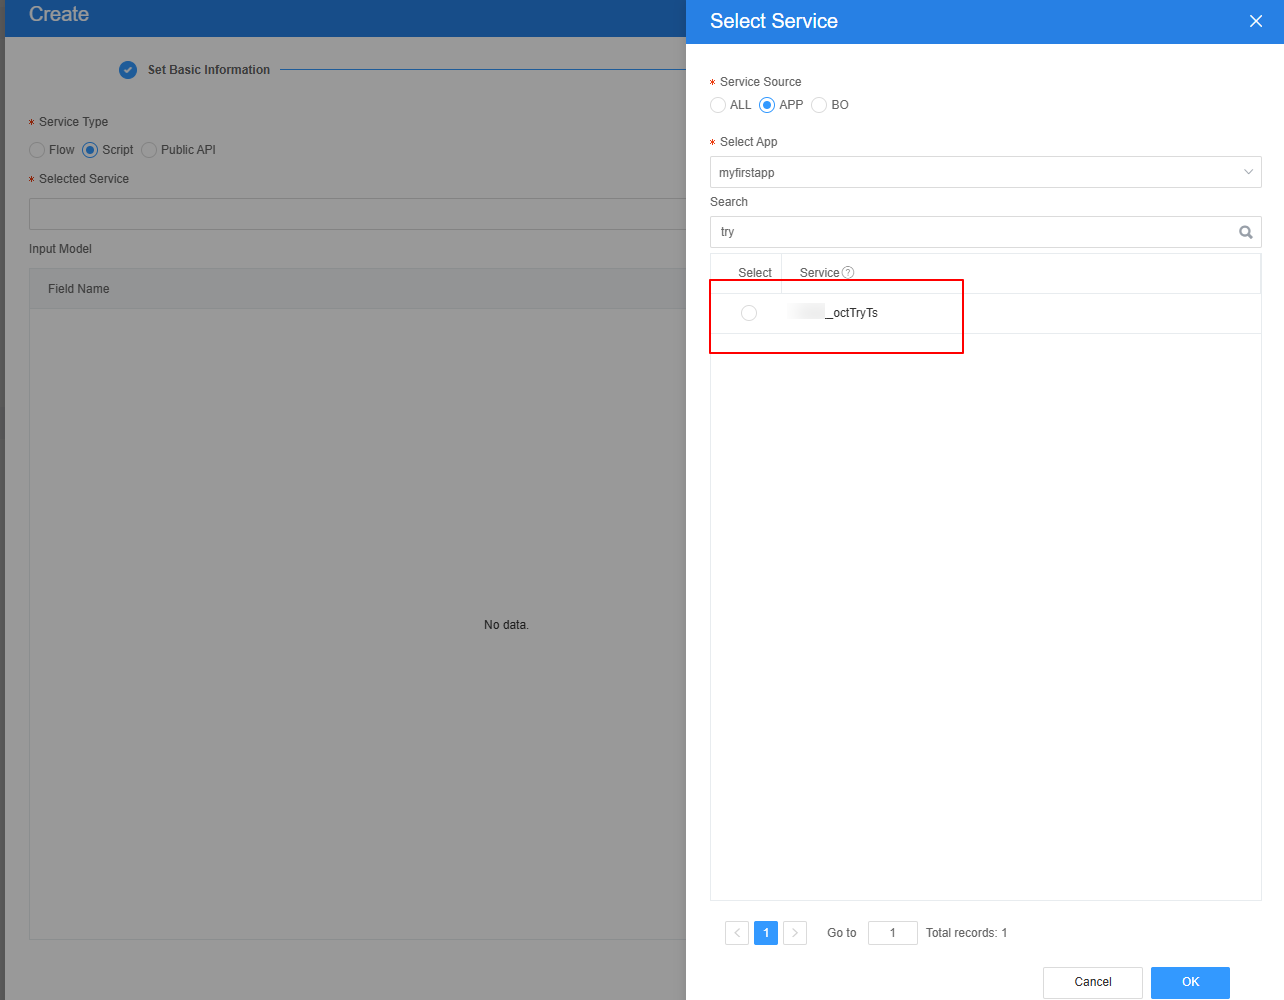
- Select the script created in 6 and click OK. Then click Next.
Figure 11 Selecting the script
- Click OK.
- Create an image upload form page.
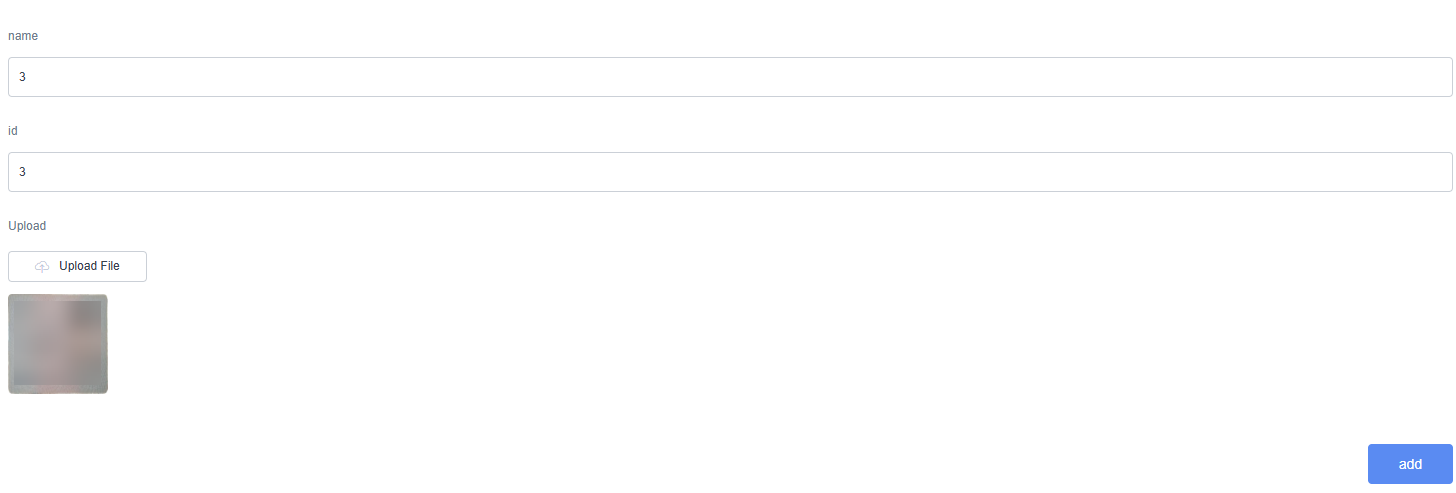
- On the standard page, drag two Input widgets, one Button widget, and one Upload widget to the canvas.
- Change the Label of two Input widgets to name and id, and set the button's display name to Add.
Figure 12 Final form setting effect

- Select the name input widget, choose Properties > Data Binding and click
 next to Value Binding.
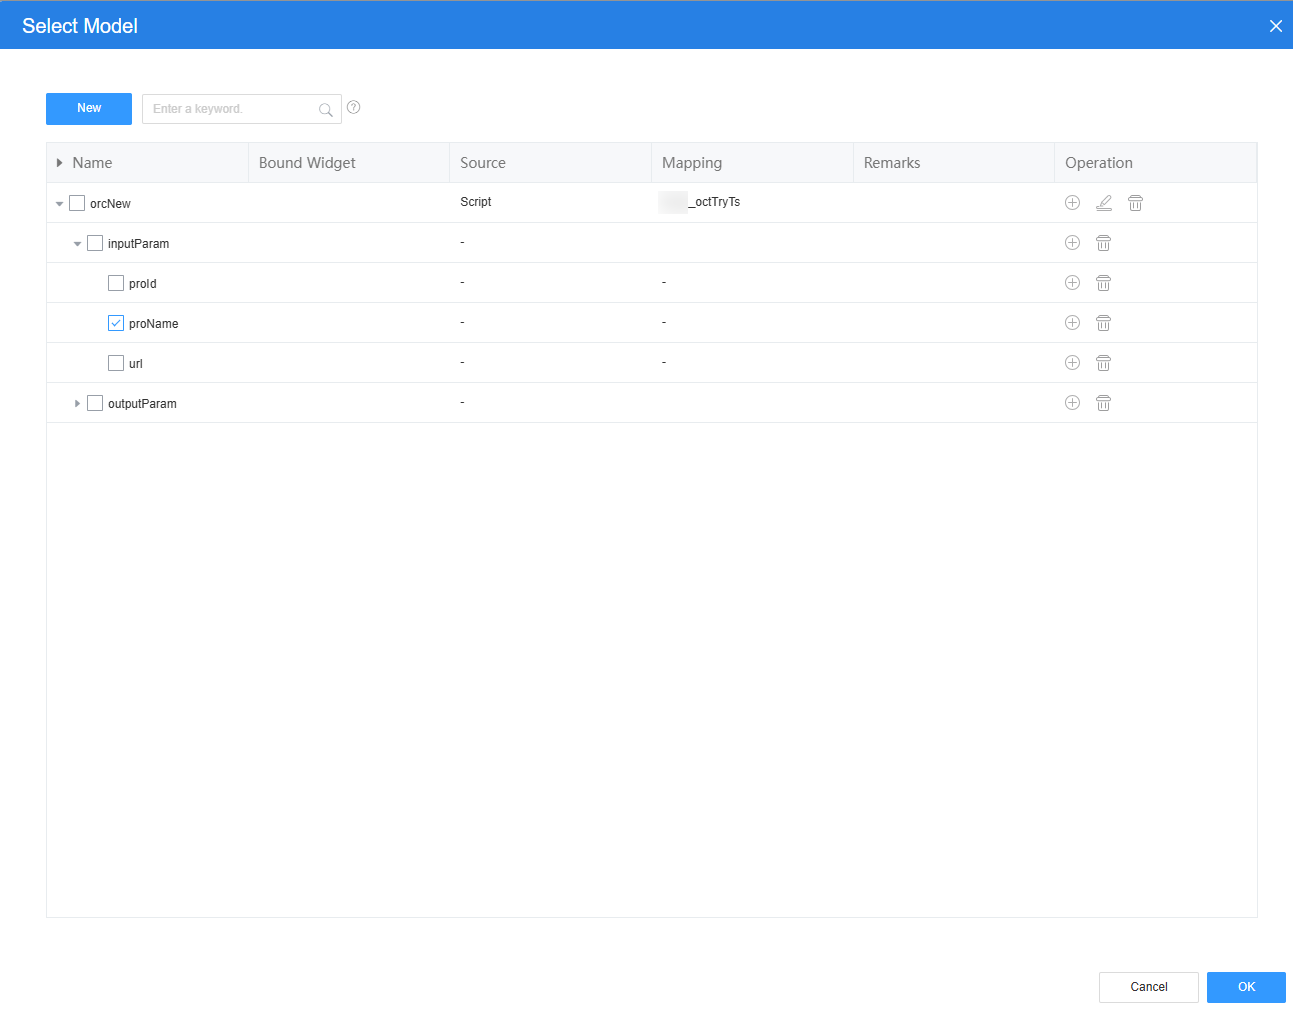
 - Select the proName field in the model created in 7 and click OK.
Figure 13 Selecting the proName field
- Select the id input widget, choose Properties > Data Binding and click
 next to Value Binding.
 - Select the proId field in the model created in 7 and click OK.
Figure 14 Selecting proId
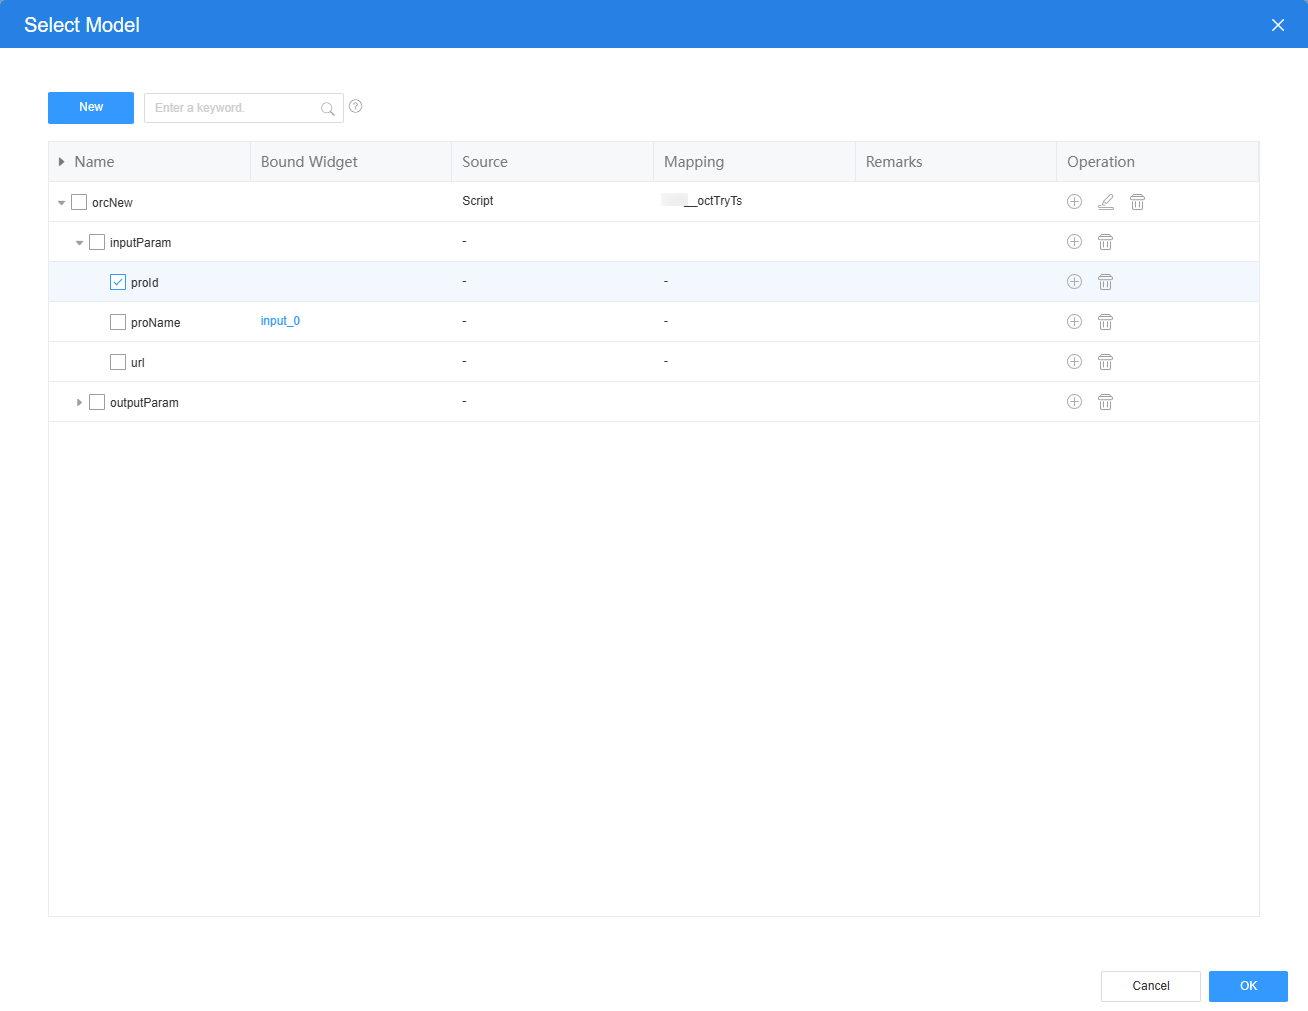
- Repeat the preceding operations to bind a model to the Upload widget and set storage information.
Figure 15 Binding a model to the upload widget
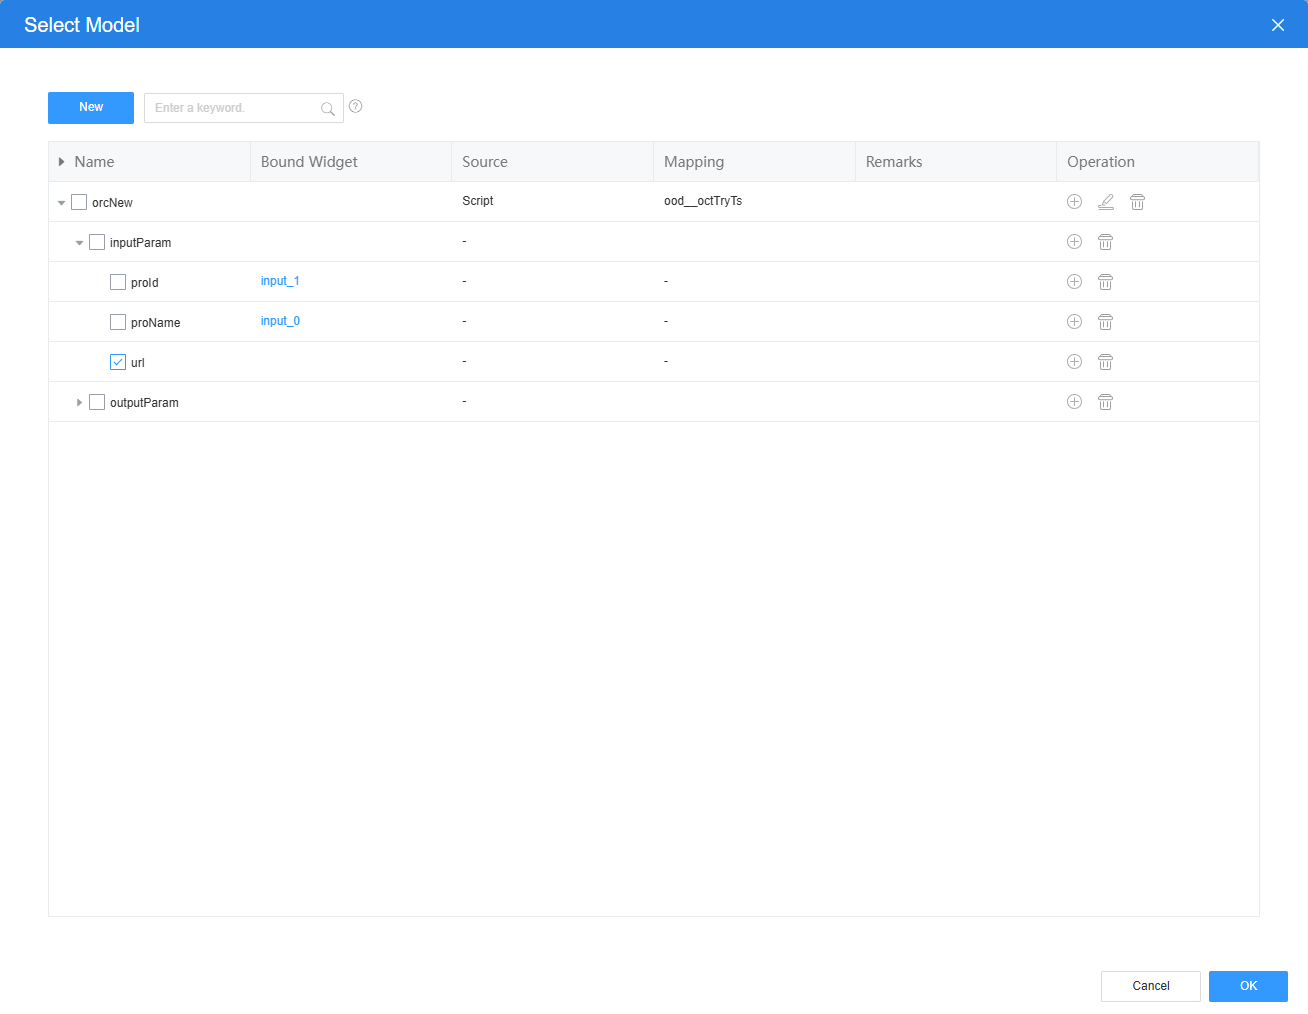 Figure 16 Setting storage information
- Add an event for the Add button.
- Select the Add button widget and click the Events tab.
- Click + next to on-click. The page for adding an action is displayed.
- Under Custom Action, enter the custom code and click Create.
Figure 17 Customizing an action

orcNew in the command is the name of the model created in 7.
$model.ref('orcNew').run().then(function(data){
    console.log(data);
}).catch(function(error){
    console.log('error is', error);
});
- Return to the standard page and click
 to save the page settings. After the page is saved, click
  to preview the effect.
Feedback
Was this page helpful?
Provide feedbackThank you very much for your feedback. We will continue working to improve the documentation.See the reply and handling status in My Cloud VOC.
For any further questions, feel free to contact us through the chatbot.
Chatbot


