
Enterprise's Authentication System
Scenarios
The administrator can configure the interconnection with an enterprise's authentication system so that end users can use the system to perform the second authentication when logging in to desktops from Huawei Cloud Workspace client using accounts and passwords.
Prerequisites
- You have purchased desktops.
- The network between the customer's data center (where the enterprise authentication server is) and the VPC has been configured by referring to Direct Connect - Getting Started or Virtual Private Network Administrator Guide.

A random port has been enabled on the cloud desktop to connect to the third-party service plane. If the cloud desktop is also interconnected with the Windows AD, ensure that the Windows AD port does not conflict with the port of the authentication server.
- The following information about the enterprise authentication server has been obtained:
- (Optional) Domain name of the authentication server
- Authentication server IP address
- Access key (AK) of the authentication server
- Secret access key (SK) of the authentication server
- SSL/TLS certificate file in PEM or CER format of the authentication server
Constraints
The emergency mode is disabled.
The emergency mode is disabled by default.
If the emergency mode is enabled, multi-factor authentication cannot be used. Enter the service ticket information, obtain the emergency mode status of the current tenant, and disable the emergency mode as required.
Procedure
Enabling interconnection with the enterprise's authentication system
- Log in to the console.
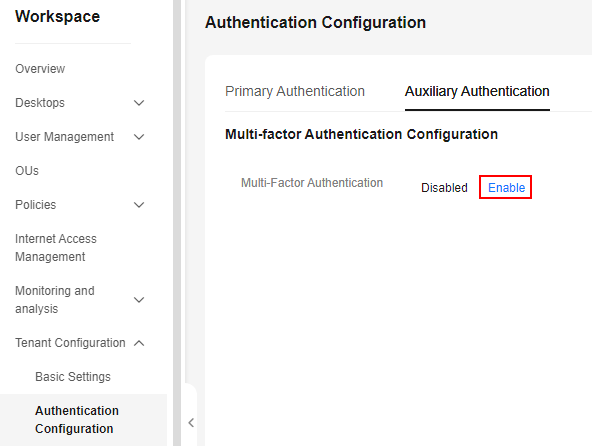
- In the navigation pane, choose Tenant Configuration > Authentication Configuration.
The Authentication Configuration page is displayed.
- Click the Auxiliary Authentication tab. Under Multi-Factor Authentication Configuration, click Enable. Figure 1 Enabling MFA
- In the dialog box displayed, click OK. The page for modifying the MFA configuration is displayed.
- Configure parameters by referring to Table 1.
Table 1 Parameters for interconnecting with an enterprise's authentication system Parameter
Description
Example Value
Authentication Server
Select Enterprise's authentication system.
Enterprise's authentication system
Server address
Enter the IP address of the enterprise authentication server prepared in Prerequisites.
If Access mode is set to Internet, enter the domain name of the enterprise authentication server.
192.168.0.0
APP ID
Enter the AK of the enterprise authentication server prepared in Prerequisites.
The AK can contain a maximum of 24 characters.
-
APP Secret
Enter the SK of the enterprise authentication server prepared in Prerequisites.
The SK can contain a maximum of 128 characters.
-
SSL/TLS Certificate
- Click Upload Certificate and select the SSL/TLS certificate of the enterprise authentication server prepared in Prerequisites.
- Click Open.
-
Access Method
Set this parameter based on the network condition of the user's authentication server.
- If only the public network is accessible, select Internet access user.
- If only the private network is accessible, select Direct Connect access user.
Internet access user
Target Object
Set Target Object to All users, Users, or User groups.
NOTE:By default, All users is selected. You can choose specific users or user groups as target objects. Once selected, the default All users object can be removed so that only the specified objects take effect.
-
- Click OK.
When the enterprise's authentication system is used for authentication, end users do not need to bind devices. For details, see Logging In to a Desktop Using an SC, Logging In to a Desktop Using a TC, or Logging In to a Desktop Using a Mobile Terminal.
Managing the configuration of auxiliary authentication
- In the navigation pane, choose Tenant Configuration > Authentication Configuration.
The Authentication Configuration page is displayed.
- Click the Auxiliary Authentication tab.
- Perform the operations in Table 2 as required.
Table 2 Operations for auxiliary authentication configuration Operation
Procedure
Description
Adding target objects
- Click Select on the right of the target object. The Select Target Object page is displayed.
- Select target objects as required. The target objects can be users, user groups, or all users.
- Click OK.
The administrator can add target objects to enable multi-factor authentication for individual users or users in a user group.
Removing target objects
- Single removal
- Locate the target object and click Remove in the Operation column. The Remove Target Object dialog box is displayed.
- Confirm the operation, and enter DELETE or click Auto Enter.
- Batch removal
Select users or user groups to be removed from the target object list.
- Click Remove above the list. The Remove Target Object dialog box is displayed.
- Confirm the operation, and enter DELETE or click Auto Enter.
- Click OK. NOTE:
Removing a target object will disable auxiliary authentication for its users and user groups.
The administrator can remove users who do not need to be connected for multi-factor authentication.
Modifying the configuration of auxiliary authentication
- Click Modify on the right of the Huawei Cloud MFA service
- Modify the following configurations as required:
- Multi-Factor Authentication: You can change the authentication server to Huawei Cloud multi-factor authentication if needed. For details, see Huawei Cloud Multi-Factor Authentication Service (Virtual MFA).
- Access Method: Select Internet access user or Direct Connect access user as required. NOTE:
You must select either of the access methods.
- Target Object: You can add or remove target objects.
- Click Save Configuration.
The administrator can modify the auxiliary authentication configuration as required.
Feedback
Was this page helpful?
Provide feedbackThank you very much for your feedback. We will continue working to improve the documentation.See the reply and handling status in My Cloud VOC.
For any further questions, feel free to contact us through the chatbot.
Chatbot


