
ER Modeling
A physical model is a physical description about the conversion of elements such as entities, attributes, attribute constraints, and relationships from a logical model to a table relationship diagram that can be identified by database software using certain rules and methods.
On the ER Modeling page, you can create an SDI and a DWI layer. The models are implemented through physical modeling. In addition to converting a logical model to a physical model, you can directly create a physical model.
The following parts are included in this topic:
- Considerations in Physical Model Design
- Creating a Physical Model
- Creating and Publishing a Table
- Importing a Physical Table by Reversing a Database
Considerations in Physical Model Design
- Physical models must ensure that the required functions are available and their performance is as good as expected.
- Physical models must ensure data consistency and quality.
- Few or no changes are made to the physical models when new services or functions are added.
Creating a Physical Model
Functions related to data warehouse layers and model management have been migrated to the Data Warehouse Layer page. For details about how to create a physical model, see Data Warehouse Planning.
Creating and Publishing a Table
After creating an ER model on the Data Warehouse Layer page, you can create physical tables on the ER Modeling page.
- On the DataArts Architecture page, choose in the left navigation pane.
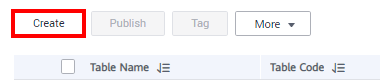
- In the middle of the page, select a physical model from the drop-down list box on the top or click a physical model in data warehouse planning to go to the physical model list page. Then click Create. Figure 1 Entry for creating a table
- On the Create Table page, set the parameters as required.
- Set the basic parameters. Figure 2 Basic Settings tab page

Table 1 Parameters on the Basic Settings tab page Parameter
Description
*Subject
Select a subject from the drop-down list box.
*Table Name
The name of the table to create.
Newline characters and the following characters are not allowed: \ < > % " ' ;
NOTE:The name of a physical model table can contain a maximum of 200 characters.
*Table Code
Code of the table to create. Table codes cannot start with numbers. Only letters, numbers, and the following special characters are allowed: _${}
The system can automatically generate the table code through translation based on a configured naming dictionary.
*Data Connection Type
Data connection type configured in the data warehouse layer by default. The value cannot be changed.
Data Connection
The name of the data connection. Select the required data connection. You are advised to use the same data connection for an ER model.
If no data connection is available, access Management Center to create one. For details, see Configuring DataArts Studio Data Connection Parameters.
Database
The name of the database. Select a database from the drop-down list box.
Queue
DLI queue. This parameter is available only for DLI tables.
Schema
Schema of DWS or PostgreSQL This parameter is available only for DWS and PostgreSQL tables.
*Table Type
DLI models support the following table types:- MANAGED: Data is stored in a DLI table.
- EXTERNAL: Data is stored in an OBS table. When Table Type is set to EXTERNAL, you must set OBS Path. The OBS path format is /bucket_name/filepath.
DWS models support the following table types:
- DWS_ROW: Tables are stored to disk partitions by row.
- DWS_COLUMN: Tables are stored to disk partitions by column.
- DWS_VIEW: Tables are stored to disk partitions by view.
The MRS Hive model supports HIVE_TABLE and HIVE_EXTERNAL_TABLE.
The MRS Spark model supports HUDI_COW and HUDI_MOR.
The PostgreSQL model supports only POSTGRESQL_TABLE.
The MRS_CLICKHOUSE model supports only CLICKHOUSE_TABLE.
The Oracle model supports only ORACLE_TABLE.
The MySQL model supports only MYSQL_TABLE.
The Doris model supports only DORIS_TABLE.
Path
This parameter is available only when the data source is MRS Hive and table type is HIVE_EXTERNAL_TABLE.
The path can contain only letters, digits, slashes (/), periods (.), hyphens (-), underscores (_), and colons (:).
Compression Level
This parameter is available when the data connection type is DWS.
The following compression levels are available for different table types:
- DWS_ROW: NO and YES
- DWS_COLUMN: NO, LOW, MIDDLE, and HIGH.
- DWS_VIEW: The compression level is not supported.
Data Format
This parameter is available only for DLI tables. DLI models support the following table types:
- Parquet: DLI can read non-compressed data or Parquet data that is compressed using Snappy and GZIP.
- CSV: DLI can read non-compressed data or CSV data that is compressed using GZIP.
- ORC: DLI can read non-compressed data or ORC data that is compressed using Snappy.
- JSON: DLI can read non-compressed data or JSON data that is compressed using GZIP.
- Carbon: DLI can read non-compressed Carbon data.
- Avro: DLI can read non-compressed Avro data.
Advanced Settings
Set custom items to describe the table. The custom items can be viewed in the table details.
For example, if you want to identify the source of the table, you can add item source and set its value to the table source information. Then you can view the table source information in the table details.
Tag
Tags are custom identifiers that help you classify and search for data assets. After adding a tag, you can search for related data assets in the DataArts Catalog module with ease.
Click
 . In the dialog box displayed, select one or more existing tags, or enter a new tag name and press Enter. Then press OK. You can also go to the Tags page of the DataArts Catalog module to add a tag. Then, return to this page and select the newly added tag from the drop-down list box. For details, see Managing Asset Tags.
If you want to modify the tag of a table in ER modeling, you must suspend the table first. After modifying the tag, you can publish the table again.
Owner
You can enter an owner name or select an existing owner.
*Description
A description of the table. It allows 1 to 200 characters.
Associated Logical Entity
Select the logical entity to be associated with the table and the source model of the logical entity.
You can also click the refresh button on the right. The system will automatically synchronize the source model with the same name as the physical table subject and the logical entity with the same name as the physical table. A logical entity can be associated with multiple physical tables.
- Click Add to add required fields on the Table Fields page. Figure 3 Adding required table fields

Table 2 Parameters on the Table Fields tab page Parameter
Description
Name
Newline characters and the following characters are not allowed: \ < > % " ' ;
Code
Only letters, numbers, and underscores (_) are allowed. A field code must start with a letter.
Data Type
Field data type. If the required data type does not exist, you can add one. See Field Types.
Associated Logical Attribute
If the table configuration has been associated with a logical entity, you can select a logical attribute from the drop-down list box to associate it with the table field.
Data Standard
If you have created data standards, click
 to select one to associate with the field. If Create Data Quality Jobs is selected for Model Design Process on the Function Settings tab page in Configuration Center and a field is associated with a data standard, a quality job is automatically generated after a table is published. A quality rule is generated for each field associated with the data standard. The quality of the field is monitored based on the data standard. You can access the Quality Job page of DataArts Quality to view the job details.
If no data standard is available, create one. See Creating Data Standards for details.
Primary Key
If this parameter is selected, the field is a primary key.
NOTE:If an MRS Spark connection is used to connect to MRS Hudi data sources, data can be written to the database only if fields have primary keys. Otherwise, table synchronization fails.
Partition
If this parameter is selected, the field is a partition field.
Not Null
Whether the parameter value can be left empty.
Tag
Click
 to add a tag.
- In the dialog box displayed, select one or more existing tags. If no tag has been added, you can go to the Tags page of the DataArts Catalog module to add a tag. For details, see Managing Asset Tags.
- In the dialog box displayed, enter a new tag name and press Enter. Tag names can contain letters, numbers, and underscores (_), but cannot start with underscores (_).
Security Level
You can click
 to add a security level for the logical entity attribute.
If you cannot find the security level you want, click go to to go to the DataArts Security console and create a security level.
You can disable this function on the Models tab page on the Configuration Center page.
Description
A description of the field to add.
Audit Status
Whether to audit the data standard
Click Audit Data Standard to audit data standards.
Operation
Related operations
- (Optional) On the Relationships tab page, click Add to create a relationship.
A relationship refers to the association between a parent and a child table (also called a primary and a secondary table). It describes how a table is associated with another table, or the impact of a table's behavior on another table. Relationships between tables in a data model are particularly important and must be accurately defined. Otherwise, the actual business rules cannot be accurately described in the data model, and data consistency is greatly damaged.
For example, if the student ID attribute of a score table is the primary key for a student table, the relationship between the two tables designed according to the third normal form (3NF) is as follows:- Child table: score table
- Child table field FK: student ID
- Child to parent:

- Parent table: student table
- Parent table field PK: student ID
- Parent to child:

Figure 4 (Optional) Adding a relationship
Table 3 Parameters on the Relations tab page Parameter
Description
Name
Name of the relationship
Child Table
Select a table from the drop-down list box. Click
 to set the current table as a child table.
For example, if the student ID attribute of a score table is the primary key for a student table, the child table is the score table, and the corresponding parent table is the student table.
Child Table Field FK
Foreign key of the child table. The field of the child table must be the foreign key of the parent table.
For example, if the student ID attribute of a score table is the primary key for a student table, the child table field FK is the student ID in the score table.
Child to Table
 indicates that each piece of data in the child table corresponds to only one piece of data in the parent table.
 indicates that each piece of data in the child table corresponds to at most one piece of data in the parent table.
 indicates that one piece of data in the child table corresponds to multiple pieces of data in the parent table.
 indicates that each piece of data in the child table corresponds to at least one piece of data in the parent table.
Parent to Child
 indicates that each piece of data in the parent table corresponds to only one piece of data in the child table.
 indicates that each piece of data in the parent table corresponds to at most one piece of data in the child table.
 indicates that one piece of data in the parent table corresponds to multiple pieces of data in the child table.
 indicates that one piece of data in the parent table corresponds to at least one piece of data in the child table.
Parent Table
Select the parent table corresponding to the selected child table.
For example, if the student ID attribute of a score table is the primary key for a student table, the parent table is the student table, and the corresponding child table is the score table.
Parent Table Field PK
Primary key of the parent table. The field of the parent table must be the primary key of the parent table.
For example, if the student ID attribute of a score table is the primary key for a student table, the parent table field PK is the student ID in the student table.
Role
You can customize a role name to identify the relationship.
Operation
Click
 to delete a relationship. Click
  to edit the relationship.
 - (Optional) On the Mappings tab page, click Create to create a mapping and design a data source based on the created mapping.
- If the table field comes from different relationship models, you must create multiple mappings.
Currently, table data can be obtained from ER models of different connection types. In each mapping, you only need to set the source field for the field that comes from the current mapping. Other fields do not need to be set.
For example, if the data of the first five fields and the last five fields in the current table comes from two different models, create the following mappings:
- map1: Create a table named table01 from ER model A. In the Field Mapping area, set the source fields of the first to fifth fields to the corresponding fields with the same meaning in table01. The last five fields do not need to be set.
- map2: Create a table named table02 from ER model B. In the Field Mapping area, set the source fields of the sixth to tenth fields to the corresponding fields with the same meaning in table02. The first five fields do not need to be set.
- If the field data in a table comes from multiple tables in the same ER model, you can create a mapping.
In the source table of the mapping, you can set JOIN conditions for multiple tables, and then set source fields for the fields in the table. The selected source fields must have the same meanings as the fields in the table.
For example, all fields in the current table come from ER model d1, the first, second, and third fields come from the vendor, payment_type, and rate tables respectively, and other fields come from the dwd_taxi_trip_data table.
You can create a mapping, as shown in Figure 5. Join the dwd_taxi_trip_data table with the vendor, payment_type, and rate tables, and set the source fields in sequence in the field mapping.
For details on the parameters for creating a mapping, see Table 4.
Table 4 Parameters of mappings Parameter
Description
*Mapping
Only letters, numbers, and underscores (_) are allowed.
*Model
Select a created relationship model from the drop-down list box. If no relationship model has been created, create one. See ER Modeling.
*Table
Select a table from which data is obtained. If data is obtained from multiple tables, click
 next to the table name to set the JOIN condition between the table and other tables.
- Select a JOIN mode. The JOIN mode includes left JOIN, right JOIN, inner JOIN, and outer JOIN from left to right.
- Set the JOIN condition in the JOIN field. Generally, select the fields with the same meaning in the source table and joined table. Click
 or
or  to add or delete a JOIN condition. The relationship between JOIN conditions is AND.
 - Click OK.
- If you want to delete a joined table after setting the JOIN condition, click
 next to the table name.
Figure 6 Join Condition dialog box
Field Mapping
Select a source field with the same meaning as the current mapping field. If a table field comes from multiple models, you must create multiple mappings. In each mapping, you only need to set the source field for the field that comes from the current mapping. Other fields do not need to be set.
In the upper right corner of the Mappings area, click
 to delete a mapping or click
  to collapse the mapping area.
 - If the table field comes from different relationship models, you must create multiple mappings.
- (Optional) If the type of the new table is DWS_VIEW, click Create to create a view. Figure 7 Creating a view

Table 5 Parameters Parameter
Description
Mapping
Only letters, numbers, and underscores (_) are allowed.
Table
Select a table from which data is obtained. If data is obtained from multiple tables, click
 next to the table name to set the JOIN condition between the table and other tables.
- Select a JOIN mode. The JOIN mode includes left JOIN, right JOIN, inner JOIN, and outer JOIN from left to right.
- Set the JOIN condition in the JOIN field. Generally, select the fields with the same meaning in the source table and joined table. Click
 or
or  to add or delete a JOIN condition. The relationship between JOIN conditions is AND.
 - Click OK.
- If you want to delete a joined table after setting the JOIN condition, click
 next to the table name.
Figure 8 Join Settings dialog box
Field Mapping
Select a source field with the same meaning as the current mapping field. If a table field comes from multiple models, you must create multiple mappings. In each mapping, you only need to set the source field for the field that comes from the current mapping. Other fields do not need to be set.
In the upper right corner of the Mappings area, click
to delete a mapping or click to collapse the mapping area.
- Set the basic parameters.
- Click Publish, select a reviewer, and click Submit.

In enterprise mode, you can choose to publish tables to the production or development environment. By default, it is published to the production environment. If you do not choose an environment, the table cannot be published.
If you select multiple reviewers, the status of the table changes to Published only after all reviewers have approved the publishing request. If any reviewer rejects the request, the status is Rejected.
- Wait for the reviewer to approve the application. After the application is approved, return to the ER Modeling page to view the table status and synchronization status. Publishing is an asynchronous operation. You can click
 to refresh the status. After table publishing application is approved, the system performs operations such as creating tables and synchronizing technical assets and business assets based on the configurations of Model Design Process on the Function Settings tab page in Configuration Center. The synchronization status is displayed in the Sync Status column of the table on the Information Architecture page.
 - If the synchronization is successful, the table is successfully published. Move the cursor to
 in the Sync Status column. If the message indicating "creation succeeded" is displayed, the table has been successfully created in the corresponding data source.
 - If one or more items fail to be synchronized, you can refresh the status. If the fault persists, choose and click the Publish Log tab to view logs.
Troubleshoot the problem based on the logs. After the error is rectified, click Resynchronize on the History tab page to issue the synchronization command again. If the synchronization still fails, contact technical support for assistance.
- If Synchronize logical assets is enabled and Physical Table Synchronize Logical Assets is disabled, when you move the cursor to the icon for synchronizing logical assets in Sync Status, Unsynchronized is displayed.
In enterprise mode, you can choose to synchronize tables to the production or development environment. By default, it is synchronized to the production environment. If you do not choose an environment, the table cannot be synchronized.
- If the synchronization is successful, the table is successfully published. Move the cursor to

Importing a Physical Table by Reversing a Database
By reversing databases, you can import one or more created database tables from other data sources into a physical table directory to turn them into physical tables.
- In the left navigation pane on the DataArts Architecture console, choose Models > ER Modeling. In the middle of the page, select a physical model from the drop-down list box on the top or click a physical model in data warehouse planning to go to the physical model list page.
- Above the physical table list, click Reverse Database.
- In the displayed dialog box, set required parameters and click OK.
Table 6 Parameters for reversing the database Parameter
Description
*Subject
Select a subject from the drop-down list.
*Data Connection Type
The data connection types supported by the reverse database are displayed in the drop-down list box. Select the required data connection type.
*Data Connection Name
Select a data connection.
If you want to reverse a database from other data sources to a physical table directory, you must create a data connection in Management Center to connect to the data source. For details on how to create data connections, see Configuring DataArts Studio Data Connection Parameters.
*Database
Select a database.
*Schema
Select a value from the drop-down list box. This parameter is available only for DWS and PostgreSQL tables.
*Queue
DLI queue. This parameter is available only when Data Connection Type is set to DLI.
Update Table
When Yes is selected, if the name of the reversed table is the same as that of an existing physical table, the existing physical table is updated.
Name Source
Source of the table name or field name after the reverse. The value can be Description or Name. If no description is specified for a table or field, the name is used.
- Description
- Name NOTE:
If you select Description, field comments of a table must be unique.
*Data Table
You can select All or Partial.
Figure 9 Reverse Database dialog box
- You can view the result on the Last Reverse tab page. If the reverse operation is successful, click Close. If the reverse operation fails, you can view the failure cause. After the fault is rectified, select the table again and click Reverse to retry. Figure 10 Last Reverse tab page

More Operations on Physical Tables
- Synchronizing physical tables
In the physical table list, select physical tables, click More above the list, select Synchronize, and click OK. This operation can be performed only on published tables.
After a physical table is associated with a quality rule and published, you can click Synchronize Subjects from DataArts Architecture as Directories on the Quality Jobs page on the DataArts Quality console. The quality jobs automatically generated in DataArts Architecture will be synchronized to the corresponding directories in DataArts Quality based on the subject structure.
- Publishing physical tables In the physical table list, select physical tables and click Publish above the list or in the Operation column. In the displayed dialog box, select a reviewer and click Submit. The physical tables will be published when the publishing request is approved.
In enterprise mode, you can choose to publish the table to the production or development environment. By default, it is published to the production environment. If you do not choose an environment, the table cannot be published.
If you select multiple reviewers, the statuses of the physical tables change to Published only after all reviewers have approved the publishing request. If any reviewer rejects the request, the statuses are Rejected.
If you select Auto-review, the request will be automatically approved. This function is for trial use only and not recommended.
- Suspending physical tables
In the physical table list, select physical tables, click More above the list, and select Suspend. Alternatively, click More in the Operation column and select Suspend. This operation can be performed only on published tables.
- Changing the subject of physical tables
In the physical table list, select physical tables, click More above the list, and select Modify Subject to change the subject of the physical tables.
- Deleting physical tables
In the physical table list, select physical tables, click More above the list, and select Delete. This operation can be performed only on draft, rejected, and suspended tables.
- Adding tags
In the physical table list, select physical tables and click Tag above the list. In the displayed dialog box, add tags and click OK.
Enter your text and press Enter to temporarily add a tag. A tag can be created only after the information on the entire page is submitted. A maximum of 20 tags can be added.
Physical tables can be queried in fuzzy mode by tag.
- Importing physical tables
Click Import above the physical table list and select Import EXCEL. In the displayed Import Table dialog box, set Update Table, select and upload a file, and click Close. You can click the Last Import tab to view the import result.
Figure 11 Importing an Excel file
- Exporting physical tables
In the physical table list, select tables and click Export above the list. In the displayed Export Model dialog box, select Table or DDL for Export. If you select DDL, select ALL or Partial for Scope. Database name is selected by default. Then click OK.
- Editing a physical table
In the physical table list, locate a physical table and click Edit in the Operation column.
- Viewing the publishing history
In the physical table list, locate a physical table, click More in the Operation column, and select View History to view the publishing history and version comparison of the physical table.
- Previewing SQL information of a physical table
In the physical table list, locate a physical table, click More in the Operation column, and select Preview SQL to preview the SQL information of the physical table.
Feedback
Was this page helpful?
Provide feedbackThank you very much for your feedback. We will continue working to improve the documentation.


