Step 6: Develop Data
DataArts Studio DataArts Factory provides a one-stop big data development environment and fully-managed big data scheduling capabilities. It manages various big data services, making big data more accessible than ever before and helping you effortlessly build big data processing centers.
With DataArts Factory, you can perform a variety of operations such as data management, data integration, script development, job development, version management, job scheduling, O&M, and monitoring, facilitating data analysis and processing.
In the DataArts Factory module, perform the following steps:
- Managing data
- Developing a Script
- Developing a Batch Job
- Use DataArts Migration to import historical data from OBS to the source data table of the SDI layer.
- Use an MRS Hive SQL script to cleanse the source data table and import the data to a standard business table at the DWI layer.
- Insert basic data into a dimension table.
- Import the standard business data at the DWI layer to a fact table at the DWR layer.
- Use Hive SQL to summarize data in the taxi trip order fact table and write the data into a summary table.
- O&M Scheduling
Managing data
The data management function helps you quickly establish data models and provides you with data entities for script and job development. It includes creating data connections, creating databases, and creating data tables.
In this example, related data management operations have been performed in Step 2: Prepare Data.
Developing a Script
- On the DataArts Studio console, locate a workspace and click DataArts Factory.
- In the navigation pane on the left, choose Develop Script. Right-click Scripts and choose Create Directory from the shortcut menu. In the dialog box displayed, enter the directory name, for example, transport, and click OK.
- In the script directory tree, right-click the transport directory and choose Create Hive SQL Script from the shortcut menu.
- In the created HIVE_untitled script, select mrs_hive_link for Connection, select demo_dwr_db for Database, and enter the script content.
Figure 1 Editing a script
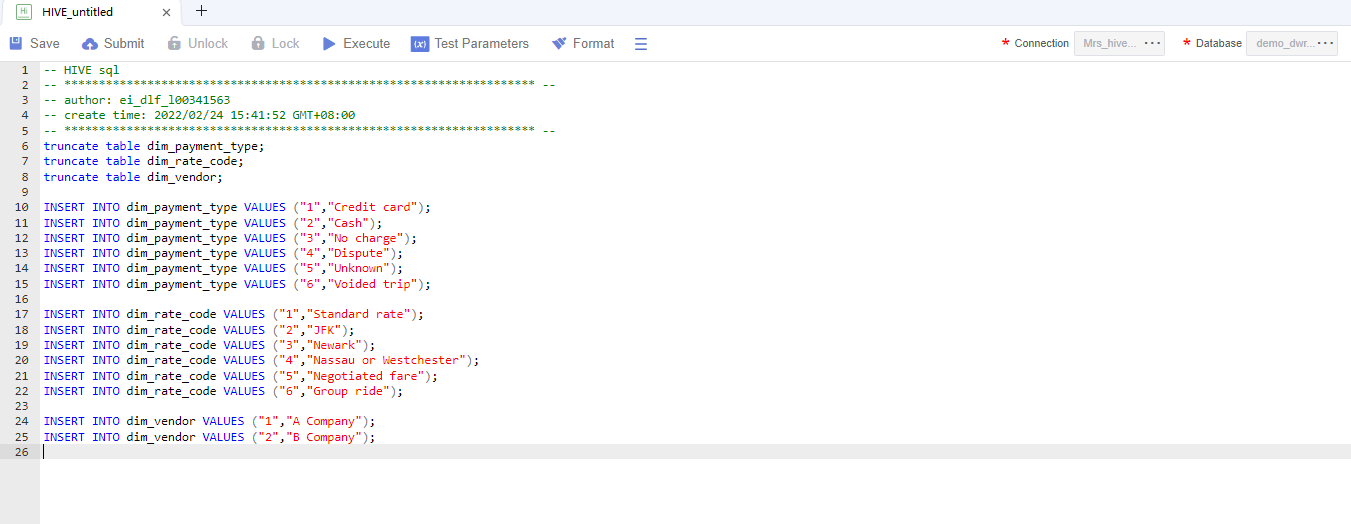
This script is used to write the payment method, rate code, and vendor to the corresponding dimension table. The script content is as follows:
 1
 2
 3
 4
 5
 6
 7
 8
 9
10
11
12
13
14
15
16
17
18
19
20
truncate table dim_payment_type;
truncate table dim_rate_code;
truncate table dim_vendor;

INSERT INTO dim_payment_type VALUES ("1","Credit card");
INSERT INTO dim_payment_type VALUES ("2","Cash");
INSERT INTO dim_payment_type VALUES ("3","No charge");
INSERT INTO dim_payment_type VALUES ("4","Dispute");
INSERT INTO dim_payment_type VALUES ("5","Unknown");
INSERT INTO dim_payment_type VALUES ("6","Voided trip");

INSERT INTO dim_rate_code VALUES ("1","Standard rate");
INSERT INTO dim_rate_code VALUES ("2","JFK");
INSERT INTO dim_rate_code VALUES ("3","Newark");
INSERT INTO dim_rate_code VALUES ("4","Nassau or Westchester");
INSERT INTO dim_rate_code VALUES ("5","Negotiated fare");
INSERT INTO dim_rate_code VALUES ("6","Group ride");

INSERT INTO dim_vendor VALUES ("1","A Company");
INSERT INTO dim_vendor VALUES ("2","B Company");
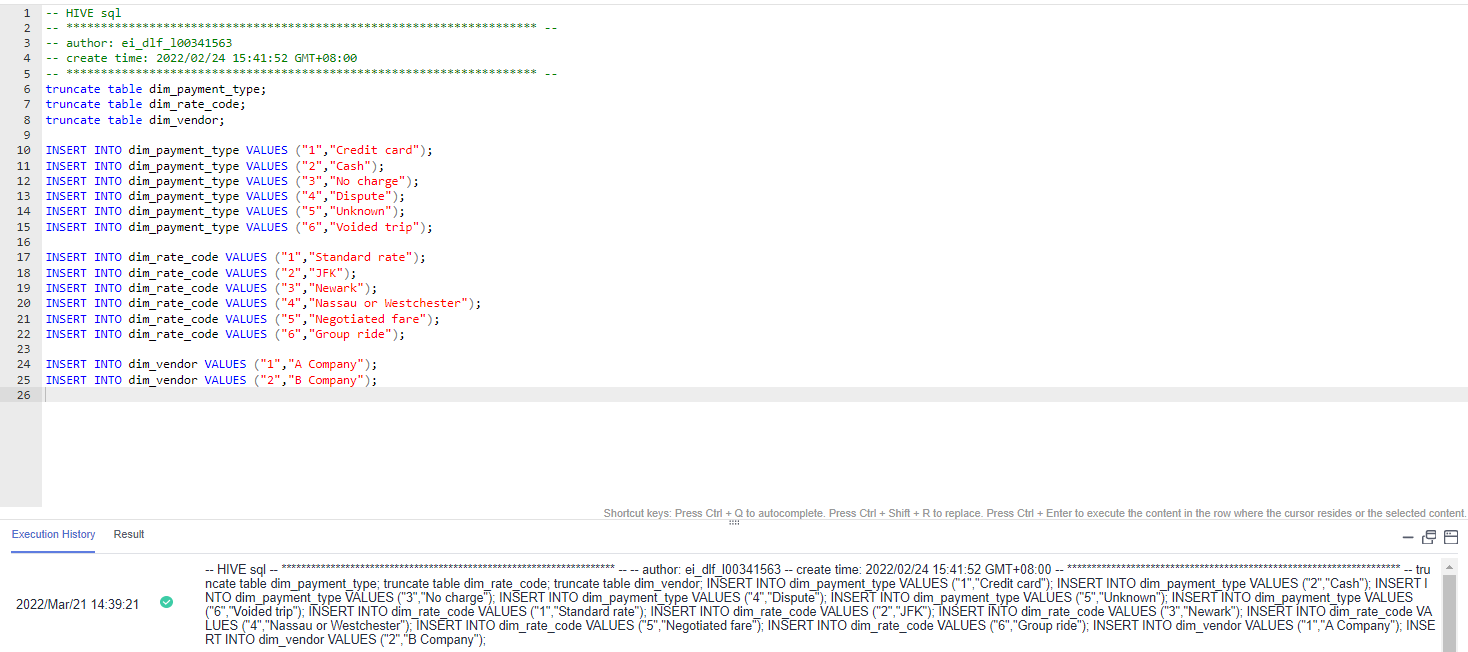
- Click Execute and check whether the script is correct.
Figure 2 Executing the script
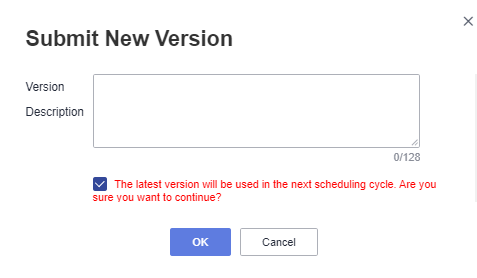
- After the test is successful, click Save. In the displayed dialog box, enter the script name, for example, demo_taxi_dim_data, select the directory for saving the script, and click OK. Then click Submit.
Figure 3 Saving the script
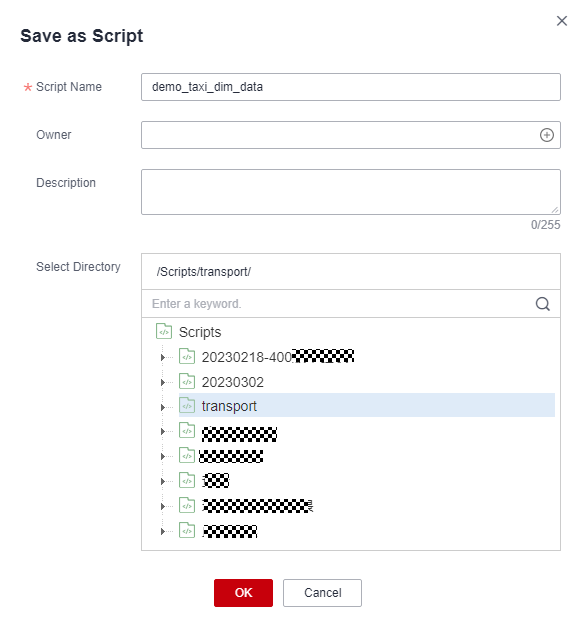 Figure 4 Submitting the script version
- Repeat 4 to 6 to create the following scripts.
- Script demo_etl_sdi_dwi: This script is used to write original data at the SDI layer to a standard business table at the DWI layer. The script content is as follows:
 1
 2
 3
 4
 5
 6
 7
 8
 9
10
11
12
13
14
15
16
17
18
19
20
21
22
23
24
25
26
27
28
29
30
31
32
33
34
35
36
37
38
39
40
41
42
43
44
45
46
47
48
49
INSERT INTO
  demo_dwi_db.dwi_taxi_trip_data
SELECT
  `vendorid`,
  cast(
    regexp_replace(
      `tpep_pickup_datetime`,
      '(\\d{2})/(\\d{2})/(\\d{4}) (\\d{2}):(\\d{2}):(\\d{2}) (.*)',
      '$3-$1-$2 $4:$5:$6'
    ) as TIMESTAMP
  ),
  cast(
    regexp_replace(
      `tpep_dropoff_datetime`,
      '(\\d{2})/(\\d{2})/(\\d{4}) (\\d{2}):(\\d{2}):(\\d{2}) (.*)',
      '$3-$1-$2 $4:$5:$6'
    ) as TIMESTAMP
  ),
  `passenger_count`,
  `trip_distance`,
  `ratecodeid`,
  `store_fwd_flag`,
  `pulocationid`,
  `dolocationid`,
  `payment_type`,
  `fare_amount`,
  `extra`,
  `mta_tax`,
  `tip_amount`,
  `tolls_amount`,
  `improvement_surcharge`,
  `total_amount`
FROM
  demo_sdi_db.sdi_taxi_trip_data
WHERE
  trip_distance > 0
  and total_amount > 0
  and payment_type in (1, 2, 3, 4, 5, 6)
  and vendorid in (1, 2)
  and ratecodeid in (1, 2, 3, 4, 5, 6)
  and tpep_pickup_datetime < tpep_dropoff_datetime
  and tip_amount >= 0
  and fare_amount >= 0
  and extra >= 0
  and mta_tax >= 0
  and tolls_amount >= 0
  and improvement_surcharge >= 0
  and total_amount >= 0
  and (fare_amount + extra + mta_tax + tip_amount + tolls_amount + improvement_surcharge) = total_amount;
- Script demo_etl_dwi_dwr_fact: This script is used to write the standard business data at the DWI layer to a fact table at the DWR layer. The script content is as follows:
 1
 2
 3
 4
 5
 6
 7
 8
 9
10
11
12
13
14
15
16
17
18
19
INSERT INTO
  demo_dwr_db.fact_stroke_order
SELECT
  rate_code_id,
  vendor_id,
  payment_type,
  tpep_dropoff_datetime,
  tpep_pickup_datetime,
  pu_location_id,
  do_location_id,
  fare_amount,
  extra,
  mta_tax,
  tip_amount,
  tolls_amount,
  improvement_surcharge,
  total_amount
FROM
  demo_dwi_db.dwi_taxi_trip_data;
- Script demo_etl_sdi_dwi: This script is used to write original data at the SDI layer to a standard business table at the DWI layer. The script content is as follows:
Developing a Batch Job
- In the navigation pane of DataArts Studio DataArts Factory console, choose Develop Job. Right-click Jobs and choose Create Directory from the shortcut menu. In the directory tree, create a job directory as required, for example, transport.
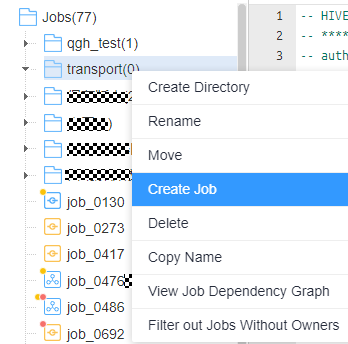
- Right-click the job directory and choose Create Job from the shortcut menu.
Figure 5 Creating a job
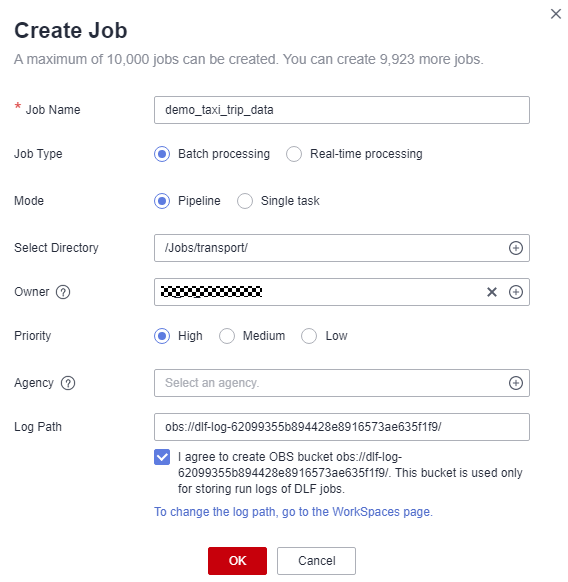
- In the dialog box displayed, enter a job name, for example, demo_taxi_trip_data, set Processing Mode to Batch processing, retain the default values for other parameters, and click OK.
Figure 6 Creating a batch processing job
- Orchestrate a batch job, as shown in the figure below.
Figure 7 Orchestrating a job
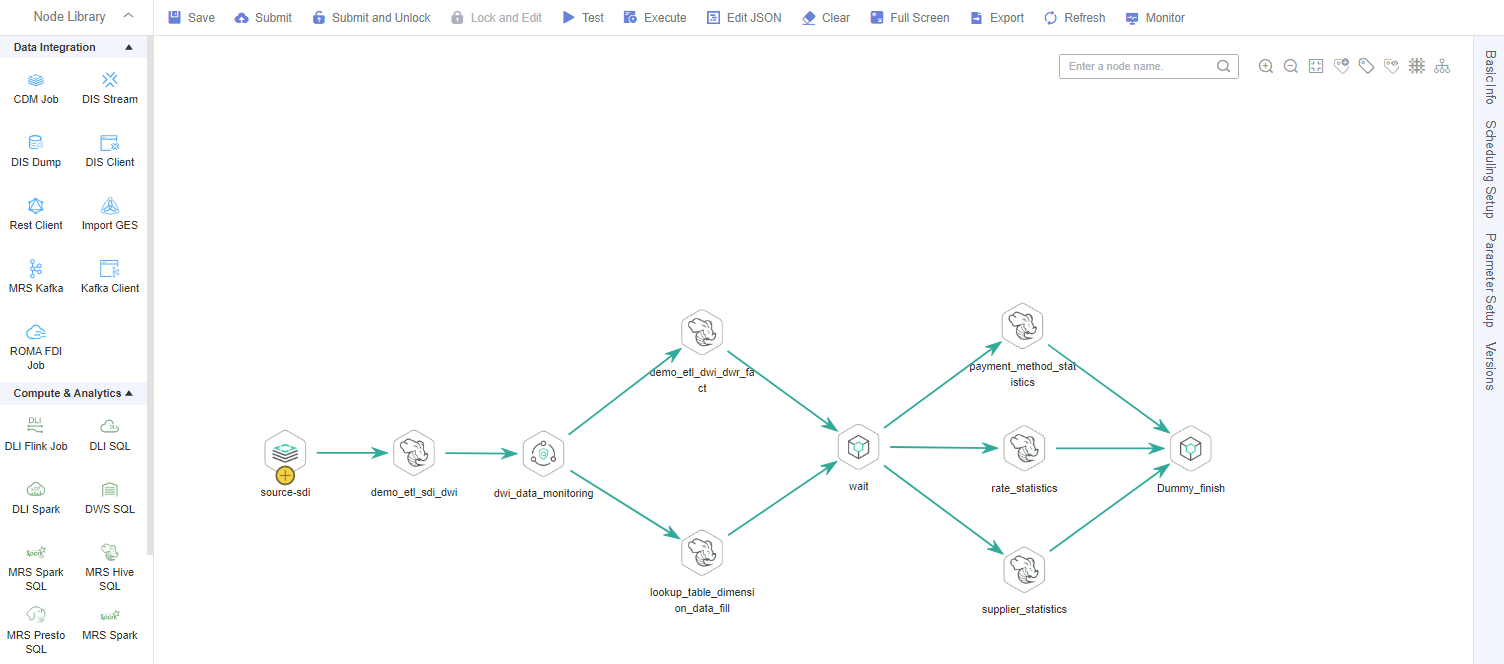
The node configurations are as follows:
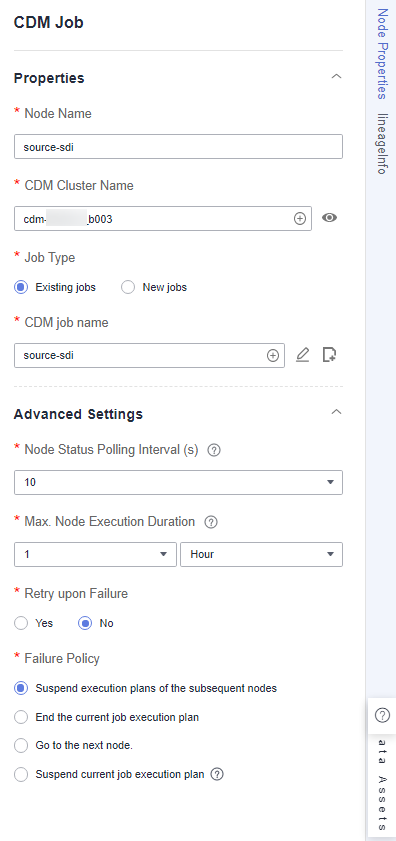
- source_sdi: a CDM Job node, which is used to import data from OBS to the original table in MRS Hive. Set CDM Cluster Name and CDM job name to the cluster and job created in Step 3: DataArts Migration, respectively. (The following figure shows an example.)
Figure 8 source_sdi node properties
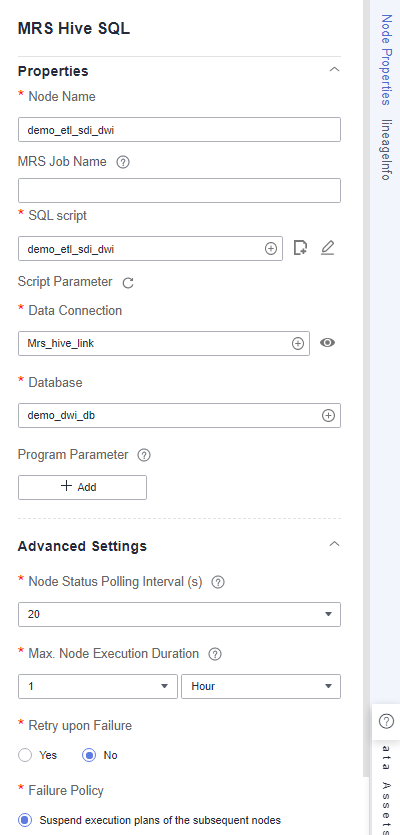
- demo_etl_sdi_dwi: an MRS Hive SQL node, which is used to cleanse and filter data in an original table at the SDI layer and write valid data into the standard business table dwi_taxi_trip_data at the DWI layer in DataArts Architecture. Set SQL script to the demo_etl_sdi_dwi script created in Developing a Script.
Figure 9 demo_etl_sdi_dwi node properties
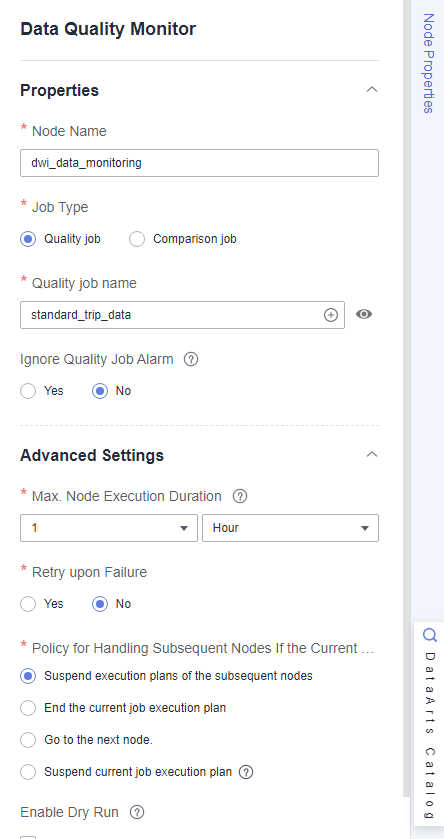
- dwi_data_monitoring: a Data Quality Monitor node, which is used to monitor the quality of standard business data at the DWI layer. Set Quality Rule Name to standard business data, which is automatically generated when the standard business table at the DWI layer is published.
Figure 10 dwi_data_monitoring node
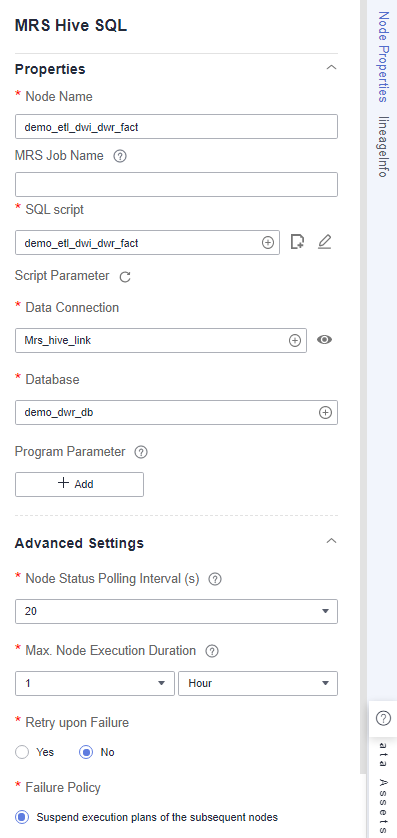
- demo_etl_dwi_dwr_fact: an MRS Hive SQL node, which is used to write source data at the DWI layer to fact table fact_stroke_order at the DWR layer. Set SQL script to the demo_etl_dwi_dwr_fact script created in Developing a Script.
Figure 11 demo_etl_dwi_dwr_fact node properties
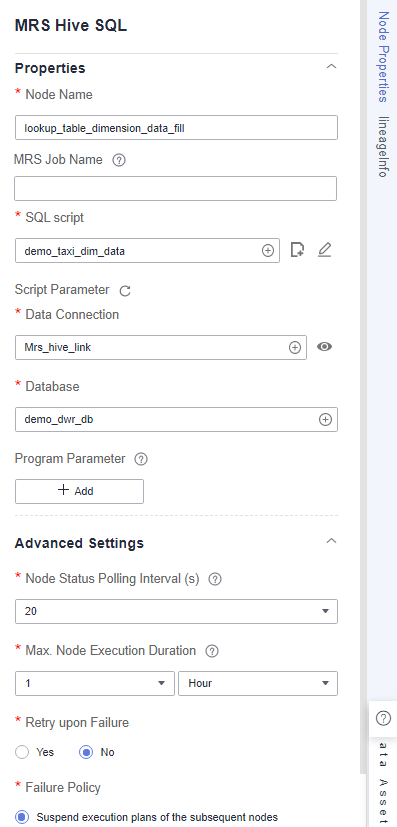
- demo_lookup_dimension_dwr: an MRS Hive SQL node, which is used to write the payment type, rate code, and vendor information to the corresponding dimension table at the DWR layer. Set SQL script to the demo_taxi_dim_data script created in Developing a Script.
Figure 12 demo_lookup_dimension_dwr node properties
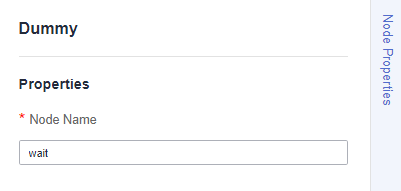
- dummy_pending: a Dummy node, which does not perform any operation but waits until the previous node stops running.
Figure 13 dummy_pending node
- summary_by_payment_type: an MRS Hive SQL node, which collects statistics on the total revenue till the current date by payment type. This node is a data development job automatically generated when summary table summary_by_payment_type is published. The job name is prefixed with demo_dm_db_dws_payment_type_ and followed by Database name_Summary table code. After the node is copied, set Data Connection and Database for the node. You must set Database to the database where the fact table is located.

To enable a data development job to be automatically generated, ensure that you have selected Create data development jobs in Configuration Center Management.
Figure 14 summary_by_payment_type node properties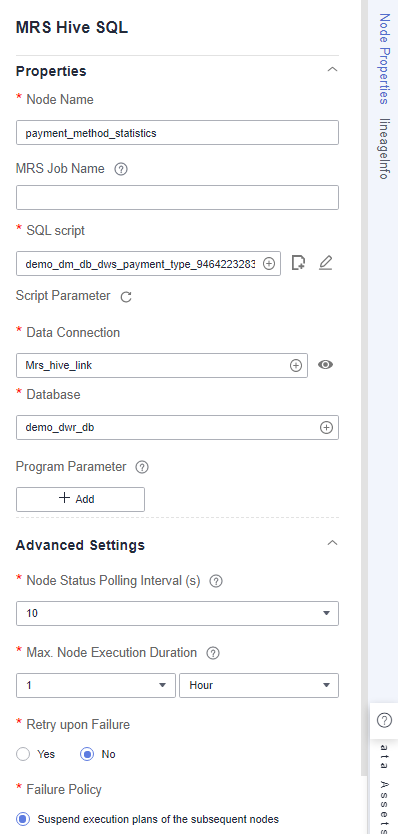
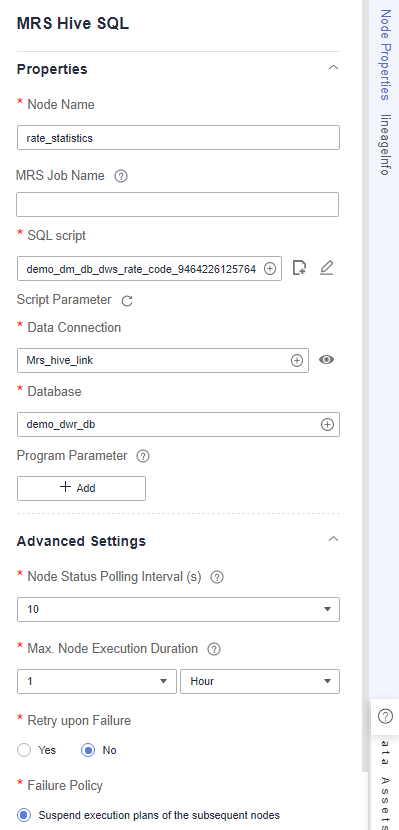
- summary_by_rate_code: an MRS Hive SQL node, which collects statistics on the total revenue till the current date by rate code. This node is a data development job automatically generated when summary table summary_by_rate_code is published. The job name is prefixed with demo_dm_db_dws_rate_code_ and followed by Database name_Summary table code. After the node is copied, set Data Connection and Database for the node. You must set Database to the database where the fact table is located.
Figure 15 summary_by_rate_code node properties
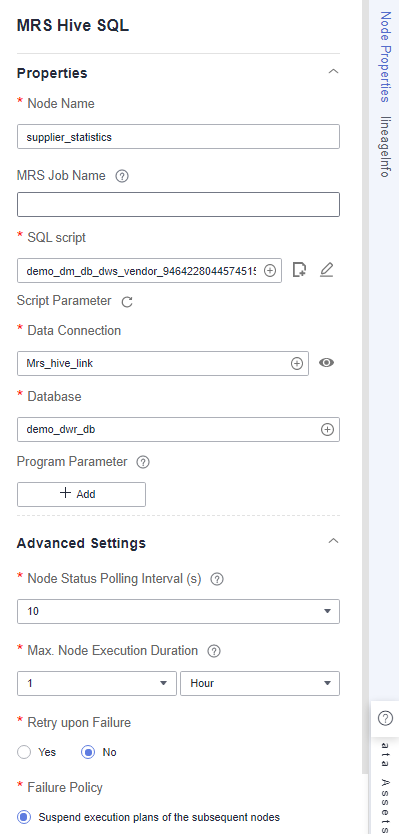
- summary_by_vendor: an MRS Hive SQL node, which collects statistics on the total revenue of each time dimension till the current date by vendor. This node is a data development job automatically generated when summary table summary_by_vendor is published. The job name is prefixed with demo_dm_db_dws_vendor_ and followed by Database name_Summary table code. After the node is copied, set Data Connection and Database for the node. You must set Database to the database where the fact table is located.
Figure 16 summary_by_vendor node properties
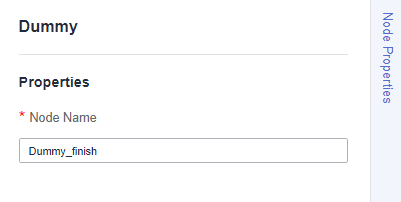
- Dummy_finish: a Dummy node, which marks the end of a job.
Figure 17 Dummy_finish node
- source_sdi: a CDM Job node, which is used to import data from OBS to the original table in MRS Hive. Set CDM Cluster Name and CDM job name to the cluster and job created in Step 3: DataArts Migration, respectively. (The following figure shows an example.)
- After the job orchestration is complete, check whether the job orchestration is correct by clicking Test.
- Configure the job scheduling mode as required. Click Scheduling Setup in the right pane. Currently, three scheduling types are available: Run once, Run periodically, and Event-based.
Figure 18 Configuring the job scheduling mode
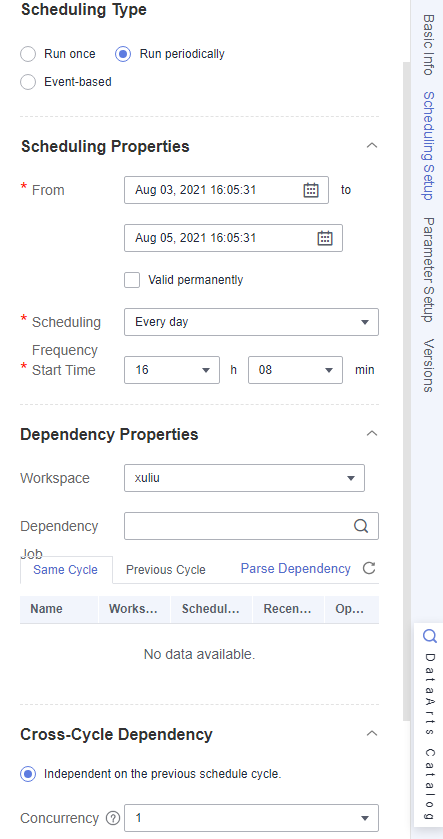
- After configuring the scheduling parameters, click Save to save the job and click Submit to submit the job version. Then, click Execute to start job scheduling.
Figure 19 Saving, submitting, and executing the job

O&M Scheduling
You can use the O&M scheduling function to view the running statuses of jobs and job instances.
- In the left navigation pane of DataArts Factory, choose .
- Click the Batch Job Monitoring tab.
- On this page, you can view the scheduling start time, frequency, and status of batch jobs. Select jobs and click Execute, Stop Scheduling, or Configure Notification to perform operations on the jobs.
Figure 20 Processing jobs in batches

- In the left navigation pane, choose Monitoring > Monitor Instance.
On the Monitor Instance page, you can view the running details and logs of job instances.Figure 21 Monitoring instances

- After the job is successfully executed, you can preview the data in the summary table on the DataArts Studio DataArts Catalog page. For details, see Step 8: View Data Assets. You can also create a Hive SQL script on the Develop Script page of DataArts Factory and run the following command to query the result. If the execution is successful, a result similar to the following is displayed:
1SELECT * FROM demo_dm_db.dws_payment_type;
Figure 22 Querying results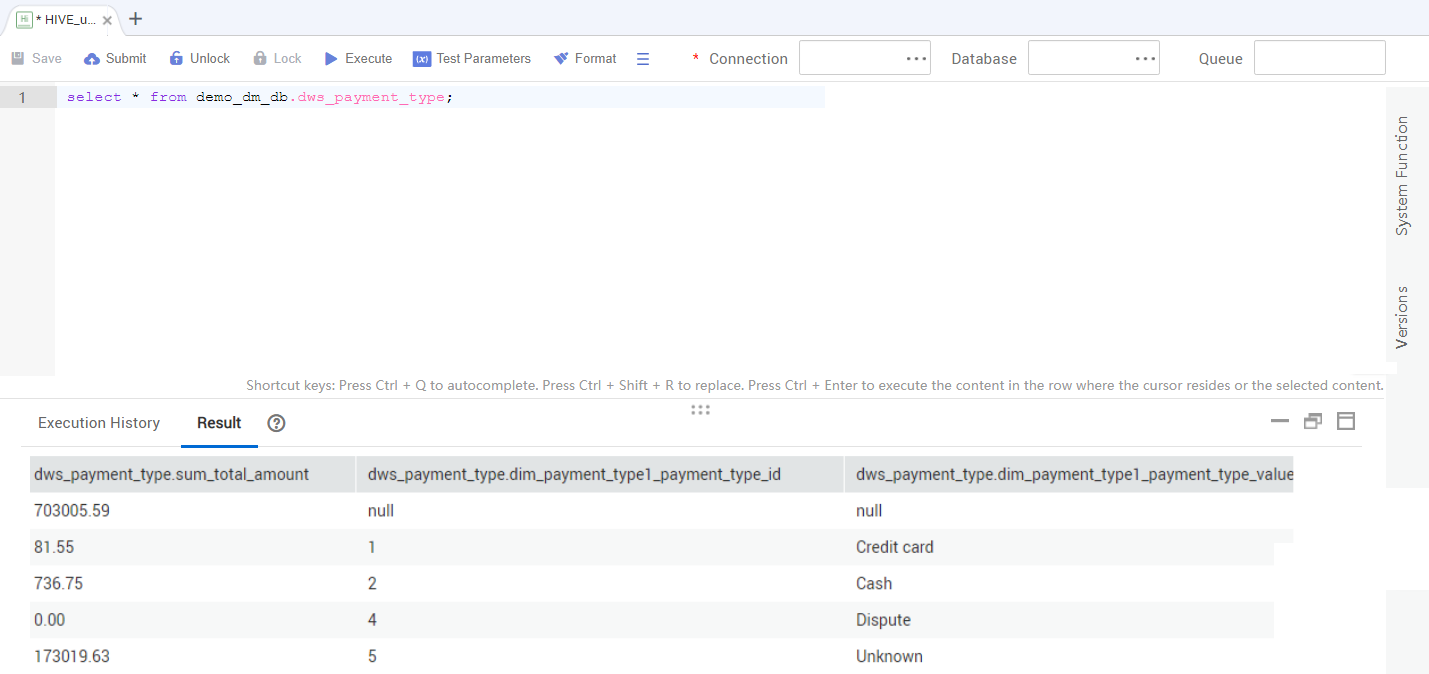
Feedback
Was this page helpful?
Provide feedbackThank you very much for your feedback. We will continue working to improve the documentation.


