
Managing Automated Tasks
Enabling an Automated Task
If an automated task is not enabled, you can enable it by performing the following operations. The automated task will be triggered only when the preset conditions are met.
- Log in to the no-code workbench by referring to Logging In to the No-Code Workbench.
- In All Apps, hover over the target application's … and choose Edit.
- Click
 in the upper right corner of the page.
 - In the automated task list, click
 next to a disabled automated task. Figure 1 Editing an automated task
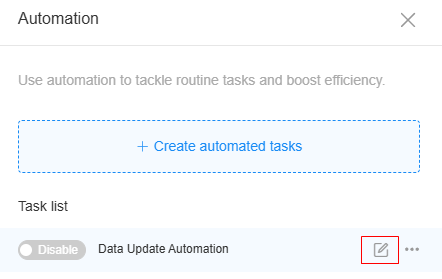
- On the design page, click Closed in the upper right corner to enable the automated task. If the status of Closed changes to Running, the automated task is enabled.Figure 2 Clicking Closed
 Figure 3 Automated task enabled
Testing an Automated Task
After enabling an automated task, a test button appears. Click it to check if the task executes correctly when the trigger condition is met.
- After an automated task is enabled, the Test button is displayed. Figure 4 Testing an automated task

When the trigger condition is triggered by a process event (as shown in Figure 5), the test function is not supported. That is, the test button is not available.
- On the page that is displayed, select a record and click the start button. Figure 6 Selecting a record

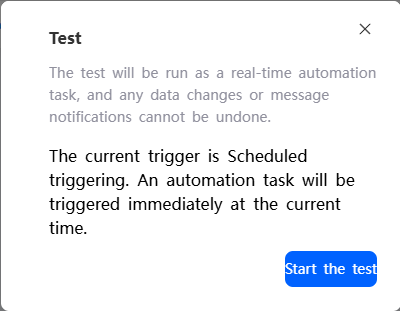
If the trigger condition is scheduled (as shown in Figure 7), you can perform the test immediately without selecting a record (as shown in Figure 8).
- After the execution is successful, click Run History to view the test and running results of the automated task. Figure 9 Checking the results


Stopping an Automated Task
Stop the automated task if it's no longer needed, if there's an exception, or if the service requirements change.
- Log in to the no-code workbench by referring to Logging In to the No-Code Workbench.
- In All Apps, hover over the target application's … and choose Edit.
- Click
 in the upper right corner of the page.
 - In the automated task list, click
 next to an enabled automated task. Figure 10 Editing an automated task
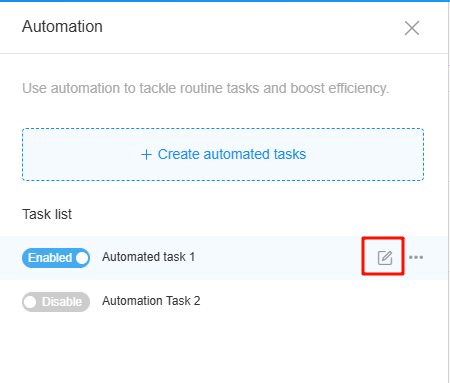
- On the design page, click Running in the upper right corner to stop the automated task. If the status of Running changes to Closed, the automated task is stopped.Figure 11 Enabling an automated task

Deleting an Automated Task
Before deleting an automated task, you need to stop the automated task.
- Log in to the no-code workbench by referring to Logging In to the No-Code Workbench.
- In All Apps, hover over the target application's … and choose Edit.
- Click
 in the upper right corner of the page.
 - In the automated task list, click
 next to a stopped automated task and click the delete button. Figure 12 Deleting an automated task
- In the displayed dialog box, confirm the deletion.
Deleted tasks cannot be recovered. Exercise caution when performing this operation.
Checking Run Logs of Automated Tasks
After enabling an automated task, you can view the task's execution results to quickly resolve issues. Note that only records from the last week are available for viewing.
- Log in to the no-code workbench by referring to Logging In to the No-Code Workbench.
- In All Apps, hover over the target application's … and choose Edit.
- Click
 in the upper right corner of the page.
 - In the automated task list, click
 next to the target task. The automated task editing page is displayed. Figure 13 Clicking the edit button
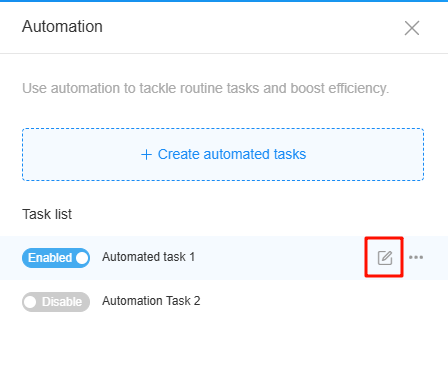
- Click Run History in the upper right corner of the page. The log tracing page is displayed.
- Check the execution records of the automated task from the past week. Figure 14 Checking the execution records

Feedback
Was this page helpful?
Provide feedbackThank you very much for your feedback. We will continue working to improve the documentation.See the reply and handling status in My Cloud VOC.
For any further questions, feel free to contact us through the chatbot.
Chatbot


