
Creating a View
When you create an application form on the no-code workbench, a table view called All is created. It shows all form data. You can customize it to better display and manage form data.
Prerequisites
- You have created a no-code application. If not, see Creating a No-Code Application.
- You have created a form. If not, see Creating a Form or Process.
Adding a View to a Form
A form can have many views. All views of the same form share the same data. Any changes to the data will update across all these views.
- Log in to the no-code workbench by referring to Logging In to the No-Code Workbench.
- In All Apps, hover over the target application's … and choose Edit.
- Add a personal view to the form.
- Select the target form, click + on the right of All, and choose Table View > Personal View. The view development page is displayed. Figure 1 Selecting Personal View

- In the upper left corner, delete the default view name and enter a new one.
- In the upper middle area, select a terminal view type.
Choose PC or mobile view so the process works best on each device.
- Drag a widget from the left to the middle area and set the widget properties. For example, drag a title widget to the top of the canvas, change the widget name to "2025 Annual Appraisal View" and set the title size to large and position to center, as shown in Figure 3. For details about other widgets, see Setting Form Widget Properties.
- Click Save in the upper left corner of the page.
- Select the target form, click + on the right of All, and choose Table View > Personal View. The view development page is displayed.
- Set the data to show in the view.
- On the right menu bar, choose Data Scope.
- Choose Hidden Field Settings to decide which fields to show or hide in the view. By default, all fields are shown. Figure 4 Setting the fields displayed in the view

Table 1 Parameters for hiding fields Parameter
Description
Match from field order
If checked, the field order in the view matches the form's field order.
Customize column order
If checked, you can set the column order in the view as you like.
Drag
 next to a field under Display Fields to adjust the field sequence. For example, you can drag the company type to the first column in the view, as shown in Figure 5.
Display all
If checked, all form fields are shown in the view.
Hide all
If checked, all form fields are hidden in the view.
- Choose Filter Settings and set filter criteria to display data as required. For example, you can display data where the creator is the current user and the company type is listed company, as shown in the following figure.Figure 6 Setting filter criteria

- Choose Sorting Settings to sort the data in the view. For example, you can display data sorted alphabetically by company type (A to Z), as shown in the following figure.Figure 7 Setting sorting

- Set the view appearance.
- On the menu bar on the right, choose Display Settings.
- Choose Basic to set the view operation mode and row height. Figure 8 Basic settings

Table 2 Basic parameters Parameter
Description
Operation Mode
Set the operation mode of the view table.- Edit: You can create, export, or delete view table data.
- Read-only: You can only read data in the view table.
- Checkbox: You can select data in the view table.
Table View
Set the display of the view table.- Header: Whether to display the table header.
- Index: Whether to display row numbers. If selected, row numbers appear in the first column of the table and continue across pages. The sequence numbers can be sorted either in ascending or descending order.
- Single-answer: If selected, a radio button appears to the left of each row, allowing you to choose only one row of data.
- Multiple-answer: If selected, a checkbox appears before each row, allowing you to select multiple rows of data.
Row Height
Set the row height of the view table, for example, compact, medium, high, very high, and adaptive.
- Choose Pagination to set the pagination style and number of records to be displayed in the view table. Figure 9 View pagination settings

For example, if you set the pagination style to Complete with 5 records per page, the effect is shown in the following figure.
Figure 10 Effect
Table 3 Pagination parameters Parameter
Description
Pagination
Whether data is displayed on multiple pages in the view table.
Style
You can set the page style to Concise or Complete.
Default Records per Page
Number of records displayed on each page.
Value range: [1,100]
- Choose Mobile Display and set the style of the view table displayed on the mobile client. Figure 11 Collapsed company name
 Figure 12 Effect of setting the company name as the main title
 Figure 13 Effect of setting the company name as the subtitle
- Add operation buttons to the view.
- On the menu bar on the right, choose Operation Settings.
- Choose Button Bar and set the buttons displayed in the view operation bar. Figure 14 Setting the button bar

- Choose Toolbar and set the tools to be displayed in the view. Figure 15 Setting the view toolbar
 Figure 16 Effect
- Choose Operation Column and set the operation buttons in the data row of the view. Figure 17 Setting the operation buttons displayed in the view
 Figure 18 Effect
- Set operation permissions for the view.
- On the menu bar on the right, choose Permissions Settings.
- Set who can check the view table. For example, if you set the view to be visible only to specific roles, like the enterprise member role, only users with that role can check the view.Figure 19 Setting who can check the view table

Table 4 Parameters for setting permissions Parameter
Description
Visible to all roles
All roles in the configuration center can check the view form, including preset roles and custom roles. For details about roles, see Configuring Application Role Permissions.
Visible to selected roles
Only specified roles can view the view form.
- After the settings are complete, click Save in the upper part of the page to save the view.
- Check whether the view meets the expectation.
- Click
 in the upper left corner of the page to return to the application development page. You can view the created view. Figure 20 Viewing the created view
- Click an operation button in the view to perform the corresponding operation.
- Click
 next to the application name and choose Share. Figure 21 Sharing an application
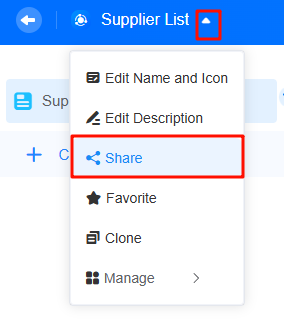
- Copy the application's access link and send it to a user (for example, Zhang San) with the enterprise member role. When the user opens the link, the "Supplier Annual Assessment View" will be displayed. Figure 22 Copying the application link
 Figure 23 Displaying the Supplier Annual Assessment View
- On the application development page, click
 next to "Supplier Annual Assessment View" and choose Share View to obtain the view access address and share it with portal users. Figure 24 Selecting Share View
 Figure 25 Obtaining the access address
- After receiving the shared link, the portal user can open the link using a browser to view the appraisal view, as shown in Figure 26.
- Click


Feedback
Was this page helpful?
Provide feedbackThank you very much for your feedback. We will continue working to improve the documentation.See the reply and handling status in My Cloud VOC.
For any further questions, feel free to contact us through the chatbot.
Chatbot


