
Managing Views
You can edit, share, clone, or delete views.
Renaming a View
You can rename a view as required. This helps users understand its new purpose.
- Log in to the no-code workbench by referring to Logging In to the No-Code Workbench.
- In All Apps, hover over the target application's … and choose Edit.
- Click
 next to All or a created view and choose to change the view name. Figure 1 Changing the view name
- Enter a new name, and it takes effect instantly without needing to save. Figure 2 Entering a new view name
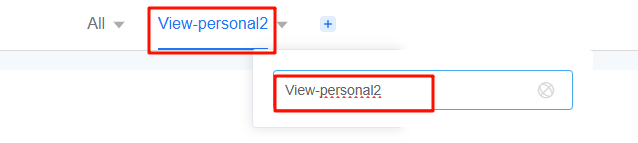
Go back to the application editing page. The view name is updated.
Figure 3 Viewing the new view name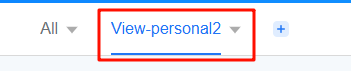
Editing a View
After creating a view, you can change its content, like updating the logic, data structure, or display effect.
- Log in to the no-code workbench by referring to Logging In to the No-Code Workbench.
- In All Apps, hover over the target application's … and choose Edit.
- Click
 next to All or a created view and choose to edit the view. Figure 4 Entry for editing a view
- See Creating a View to edit the view.
For example, add a title widget to the view and set it by referring to Figure 5.
- Click the save button in the upper part of the page.
- Check the modification effect.
- Check the effect in the development environment. On the view editing page, click
 to return to the application development page. Select the corresponding form to check the modification effect. Figure 6 Checking the modification effect (development)
- Check the effect in the runtime environment. Click
 next to "Personal view 1" and choose Share View to share the view access address with other users. After opening the link, other users can check the modified view, as shown in Figure 9. Figure 7 Selecting Share View
 Figure 8 Obtaining the view access link
- Check the effect in the development environment. On the view editing page, click


Hiding a View
You can hide views with sensitive information like employee salaries or customer privacy, so only users with specific roles can access them.
- Log in to the no-code workbench by referring to Logging In to the No-Code Workbench.
- In All Apps, hover over the target application's … and choose Edit.
- Click
 next to the target view and choose Hide.
 After the setting is successful, a hidden icon is displayed before the view, as shown in Figure 10.
Figure 11 Viewing the hiding effect (development)
- Check the hidden view.
On the application development page, click
 to return to the no-code workbench. Choose All Apps > Mine, move the cursor to the target application's ..., and choose Share. Share the application access address with other users. After other users open the link, "Personal view 1" cannot be viewed, as shown in Figure 9.Figure 12 Obtaining the application access link
 Figure 13 View after being hidden (runtime)

Sharing a View
You can share a view with your team or others for cross-role data collaboration and sharing.
- Log in to the no-code workbench by referring to Logging In to the No-Code Workbench.
- In All Apps, click the target application. The application development page is displayed.
- Click
 next to the view to be shared and choose Share View. Figure 14 Sharing a view (runtime)
 You can also click the edit button in the upper right corner of the application development page to go to the page for editing the application. On the application editing page, click
 next to the view to be shared and select Share View. Figure 15 Sharing a view (development)
- On the displayed page, click
 to obtain the view access address and share it with others. You can also click
 to open the view in a new window. Figure 16 Copying a link
Cloning a View
If the service scenarios are similar, you can clone a view to create a new one quickly. When you clone a view, only the metadata structure is copied, not the instance data.
- Log in to the no-code workbench by referring to Logging In to the No-Code Workbench.
- In All Apps, hover over the target application's … and choose Edit.
- Click
 next to the view to be cloned and choose to clone the view. Figure 17 Cloning a view
After the clone is successful, the page for editing the cloned view is displayed.
Figure 18 Viewing the cloned view page
Deleting a view
If you do not use a view anymore, delete it. This frees up space and keeps your view list up-to-date.
- Log in to the no-code workbench by referring to Logging In to the No-Code Workbench.
- In All Apps, hover over the target application's … and choose Edit.
- Click
 next to the view to be deleted and click the delete button. Figure 19 Deleting a view
- In the displayed dialog box, confirm the deletion.
Feedback
Was this page helpful?
Provide feedbackThank you very much for your feedback. We will continue working to improve the documentation.See the reply and handling status in My Cloud VOC.
For any further questions, feel free to contact us through the chatbot.
Chatbot


