Managing Component Labels
Labels are key-value pairs and can be attached to workloads. Workload labels are often used for affinity and anti-affinity scheduling. You can add labels to multiple workloads or a specified workload.
You can manage the labels of stateless workloads, stateful workloads, and Daemon sets based on service requirements. This section uses Deployments as an example to describe how to manage labels.
In the following figure, three labels (release, env, and role) are defined for workload APP 1, APP 2, and APP 3. The values of these labels vary with workload.
- APP 1: [release:alpha;env:development;role:frontend]
- APP 2: [release:beta;env:testing;role:frontend]
- APP 3: [release:alpha;env:production;role:backend]
If you set key to role and value to frontend when using workload scheduling or another function, APP 1 and APP 2 will be selected.


Labels cannot be added to components that are abnormal.
Adding Component Labels
- Log in to ServiceStage.
- Use either of the following methods to go to the component Overview page.
- On the Application Management page, click the application to which the target component belongs, and click the component in Component List.
- On the Component Management page, click the target component.
- Click Manage Label.
Figure 2 Managing labels

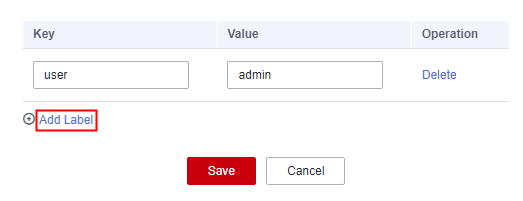
- Click Add Label.
- Enter the key and value.
The key must be unique.
- Click Save.
Figure 3 Adding a label
- Enter the key and value.
Deleting a Component Label
- Log in to ServiceStage.
- Use either of the following methods to go to the component Overview page.
- On the Application Management page, click the application to which the target component belongs, and click the component in Component List.
- On the Component Management page, click the target component.
- Click Manage Label.
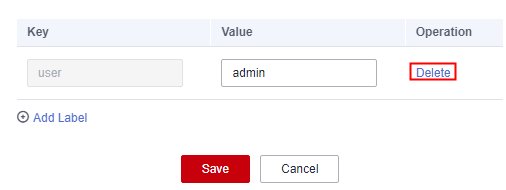
- Select the label to be deleted and click Delete in the Operation column.
Figure 4 Deleting a label

- Click Save.
Feedback
Was this page helpful?
Provide feedbackThank you very much for your feedback. We will continue working to improve the documentation.See the reply and handling status in My Cloud VOC.
For any further questions, feel free to contact us through the chatbot.
Chatbot


