
Managing No-Code Applications on PCs
Modifying an Application
You can modify an application as required.
- Log in to the no-code workbench by referring to Logging In to the No-Code Workbench.
- In All Apps, hover over the target application's … and choose Edit. Figure 1 Editing an application on the workbench
 You can also click the target application to open its details page, then click Edit App in the upper right corner to access the editing page.Figure 2 Editing an application on its details page
Sharing an Application
You can share an application with other portal users.
- Log in to the no-code workbench by referring to Logging In to the No-Code Workbench.
- In All Apps, hover over the target application's … and choose Share. Figure 3 Sharing an application on the workbench

You can also click the application name in the upper left corner of the application details page and choose Share.
Figure 4 Sharing an application on its details page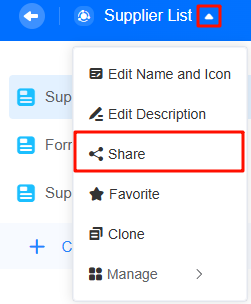
- Click
 of the link to share the application with other users. Click
 to open the application in a new window, or share its QR code so WeLink users can scan and access it. Figure 5 Obtaining the link for sharing
Favoriting an Application
You can add an application to Favorites.
- Log in to the no-code workbench by referring to Logging In to the No-Code Workbench.
- In All Apps, hover over the target application and click
 to favorite it. Figure 6 Favoriting an application on the workbench
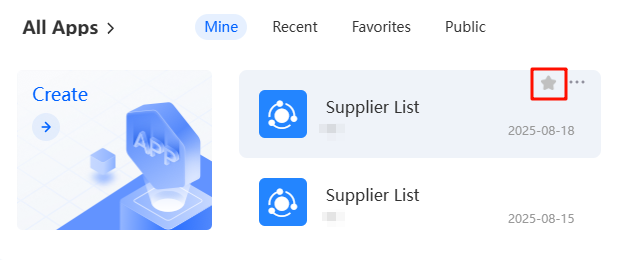 You can also click the application name in the upper left corner of the application details page and choose Favorite.Figure 7 Favoriting an application
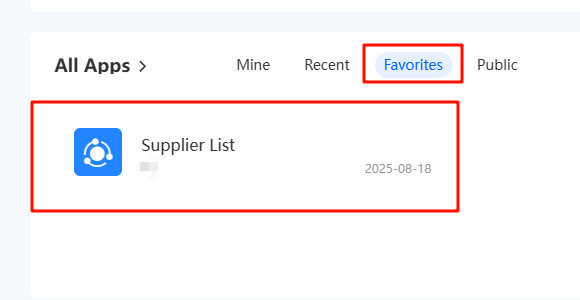
- Choose All Apps > Favorites to view your favorite applications. Figure 8 Viewing favorite applications
Modifying an Application Name and Icon
You can modify the name and icon of an application.
- Log in to the no-code workbench by referring to Logging In to the No-Code Workbench.
- In All Apps, hover over the target application's … and choose Edit.
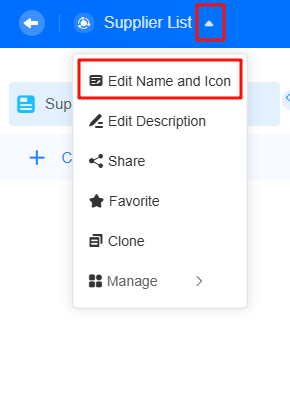
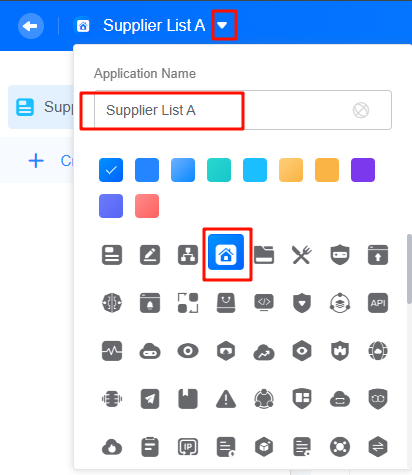
- In the upper left corner of the page, click the application name and choose Edit Name and Icon. Figure 9 Selecting Edit Name and Icon
- Modify the application name, icon, and icon color as required. Figure 10 Modifying the name and icon
 After the modification, return to the application editing page. The application name and icon have been updated.Figure 11 Viewing the modified name and icon
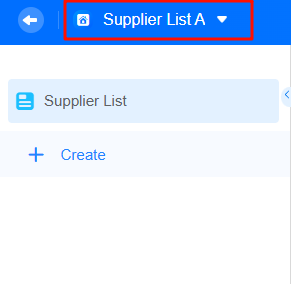
Editing the Application Description
You can write a short line that explains what your application does so others see what it is for.
- Log in to the no-code workbench by referring to Logging In to the No-Code Workbench.
- In All Apps, hover over the target application's … and choose Edit.
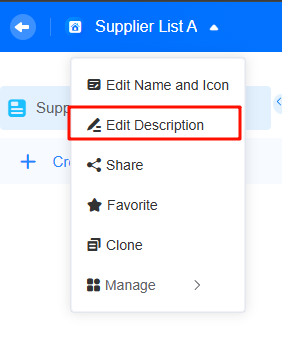
- In the upper left corner of the page, click the application name and choose Edit Description. Figure 12 Editing the application description
- Edit the application description and click Save. Figure 13 Editing the application description

- Other users can click
 next to the application name to view the application description. Figure 14 Viewing the application description
Disabling an Application
After an application is disabled, it cannot be accessed, and data collection stops. To resume data collection, enable the application by referring to Enabling an Application.
- Log in to the no-code workbench by referring to Logging In to the No-Code Workbench.
- In All Apps, click the target application.
- On the application details page, click Edit App in the upper right corner.
- Click App Settings on the right. In the Publish Settings tab page, click Disable. Figure 15 Disabling an application

- In the displayed dialog box, click the confirm button.
Enabling an Application
By default, applications built on the platform are enabled and ready to collect data. To enable an application, perform the following steps:
- Log in to the no-code workbench by referring to Logging In to the No-Code Workbench.
- In All Apps, click the target application.
- On the application details page, click Edit App in the upper right corner.
- Click App Settings on the right. In the Publish Settings tab page, click Enable. The application is enabled for collecting data.Figure 16 Enabling an application

Setting the Email Address
Email management lets a tenant set the sender address for notifications. This address is the tenant-wide default. Only the tenant can change it; other members can only view and use it.
- Log in to the no-code workbench by referring to Logging In to the No-Code Workbench.
- In All Apps, hover over the target application's … and choose Edit.
- Choose App Settings > Basic Settings.
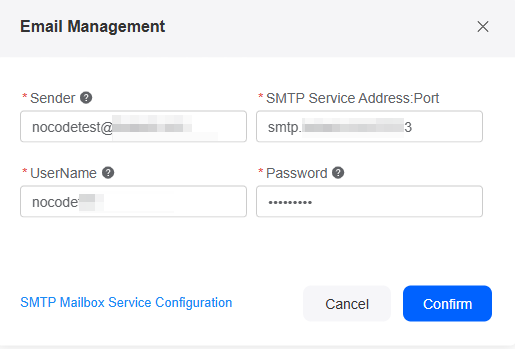
- Under Email Management, click Set up of Sender to configure the mailbox. Figure 17 Email Management

- Set the email information as prompted and click the confirm button. Figure 18 Setting the email information
- Check whether the email address is set successfully.
When you set an automated task (see Creating an Automated Task) to send email, the address set here appears as the sender.
Figure 19 Sender email address
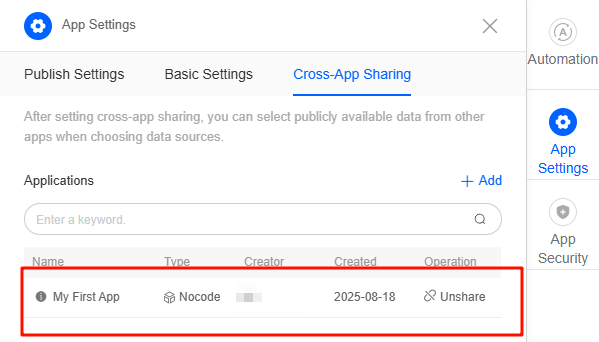
Cross-Application Sharing
You can turn on cross-application sharing to pull in public data from other applications.
- Log in to the no-code workbench by referring to Logging In to the No-Code Workbench.
- In All Apps, hover over the target application's … and choose Edit.
- Choose App Settings > Cross-App Sharing.
- Click Add. The page for adding applications to be shared is displayed.
- Specify the application type, and click Next. Figure 20 Enabling cross-application sharing

- Select a no-code or low-code application and click the confirm button. Figure 21 Viewing the added applications
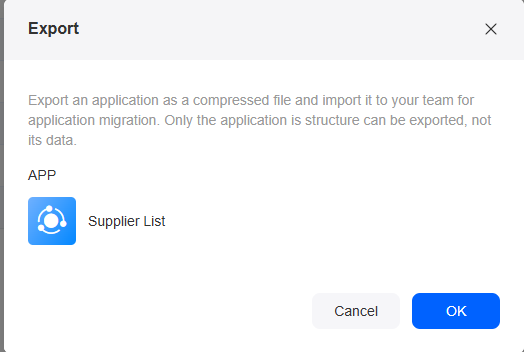
Exporting an Application
You can save your application to a compressed file. Import this file to any no-code workbench. Only the setup is copied; the data stays. Limits:
- Only tenant administrators can export application packages.
- If a form in an application is linked to a form in another application, the link breaks on export. Re-link it after import.
- Free and professional editions do not support this feature.
- Log in to the no-code workbench by referring to Logging In to the No-Code Workbench.
- In All Apps, hover over the target application's … and choose Edit.
- On the application editing page, click the arrow icon next to the application name and choose Manage > Export. Figure 22 Exporting an application

- On the displayed dialog box, click OK. Figure 23 Confirming the operation
- Import the application to other no-code workbenches.
Deleting an Application
When you delete an application, its forms, reports, and data are deleted and cannot be restored. Proceed with caution. Currently, only service administrators and developers can delete applications.
- Log in to the no-code workbench by referring to Logging In to the No-Code Workbench.
- In All Apps, hover over the target application's … and choose Delete. Figure 24 Deleting an application on the workbench

You can also access the application's details page, click the arrow icon next to the application name, and choose Manage > Delete.
Figure 25 Deleting an application on its details page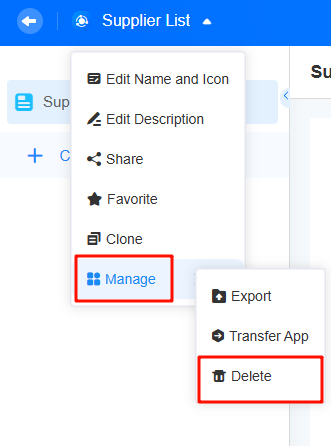
- In the displayed dialog box, enter the application name and click Delete.
Transferring an Application
The application owner has the highest permissions and is not restricted by role permissions.
- Log in to the no-code workbench by referring to Logging In to the No-Code Workbench.
- In All Apps, hover over the target application's … and choose Edit.
- On the application editing page, click the arrow icon next to the application name and choose Manage > Transfer. Figure 26 Selecting Transfer
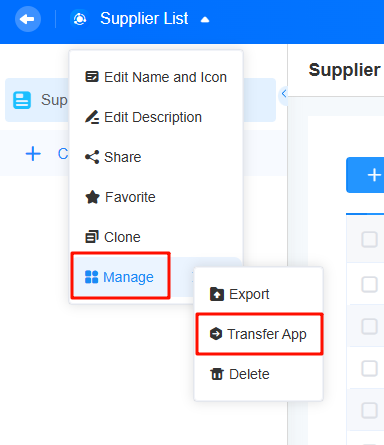
- On the displayed page, select the new application owner and confirm the operation. Figure 27 Transferring an application

- Verify whether the application is successfully transferred.
Return to the no-code workbench. On the Mine tab page, the application owner has been changed (for example, to Zhang San).

Feedback
Was this page helpful?
Provide feedbackThank you very much for your feedback. We will continue working to improve the documentation.See the reply and handling status in My Cloud VOC.
For any further questions, feel free to contact us through the chatbot.
Chatbot


