Setting Up a File Server
Scenario
Set up a file server.
Prerequisites
- A Windows Server ECS is available. For details, see Purchasing an ECS.
- The VPC of the ECS must be the same as that of the Workspace tenant. If different VPCs are used, you need to configure a VPC peering connection and ensure that the IP address segments do not conflict.
Procedure
- Log in to the Workspace console.
- In the navigation pane on the left, click
 and choose Elastic Cloud Server.
 - Locate the row that contains the target ECS, click Remote Login in the Operation column, and enter the username and password created during ECS purchase.
Installing the IIS management console
- Click
 in the lower left corner of the ECS and choose Server Manager. The Server Manager page is displayed.
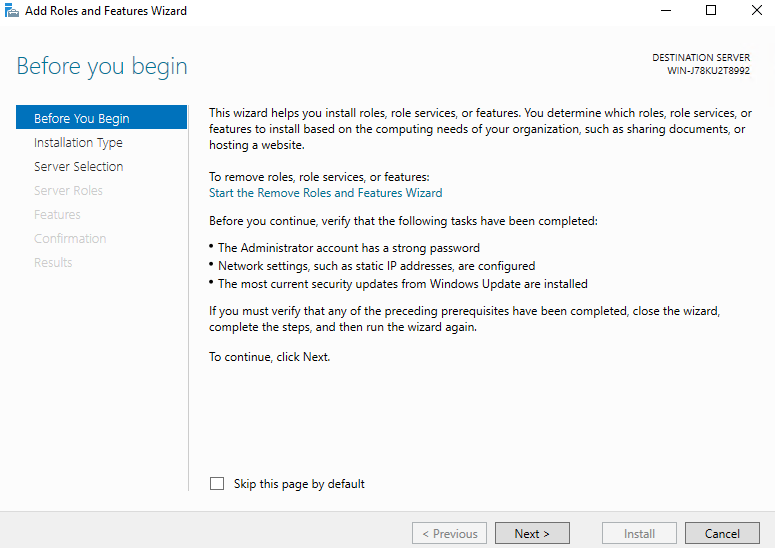
 - On the Server Manager page, click Add role and features. The Add Roles and Features Wizard dialog box is displayed, as shown in Figure 1.
- Click Next as prompted. On the Server Roles page, select Web Server (IIS). In the displayed Add features that are required for Web Server (IIS) dialog box, click Add Features, as shown in Figure 2.
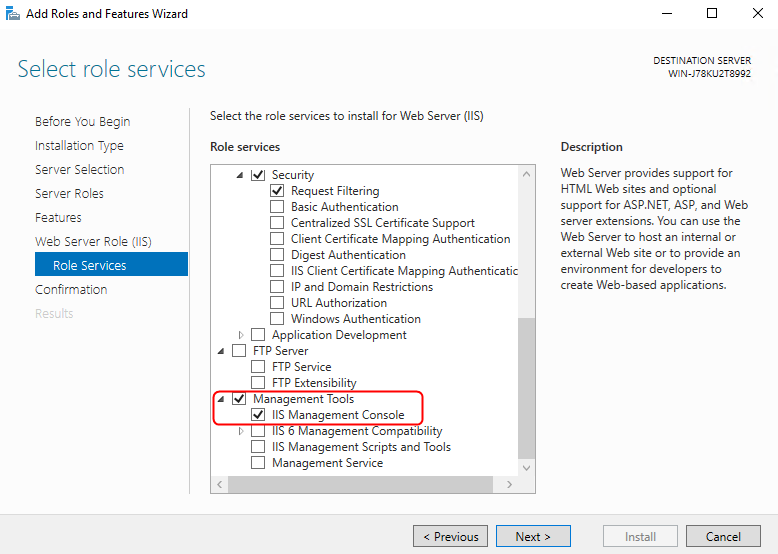
- Click Next. On the Role Services page, ensure that IIS Management Console under Management Tools has been selected, as shown in Figure 3.
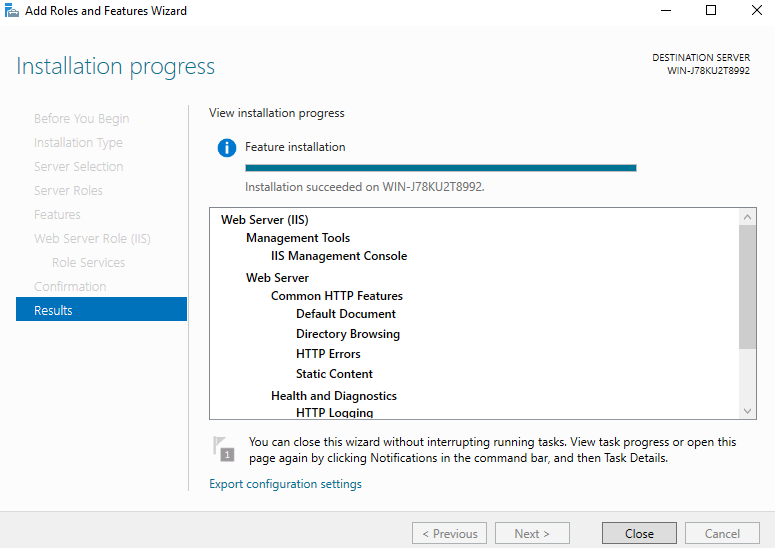
- Click Next to switch to the confirmation page. Confirm the information and click Install. Wait for the installation result. If the information shown in Figure 4 is displayed, the installation is successful.
Configuring the IIS console (Configuring applications)
- Click
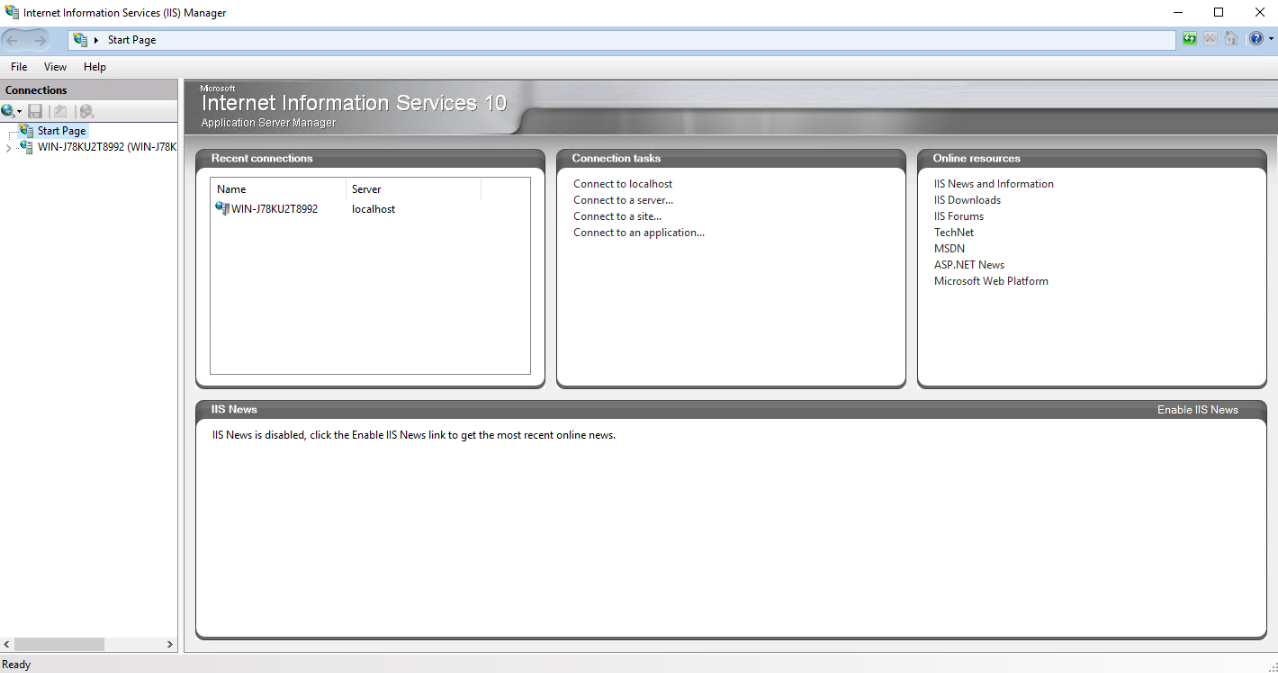
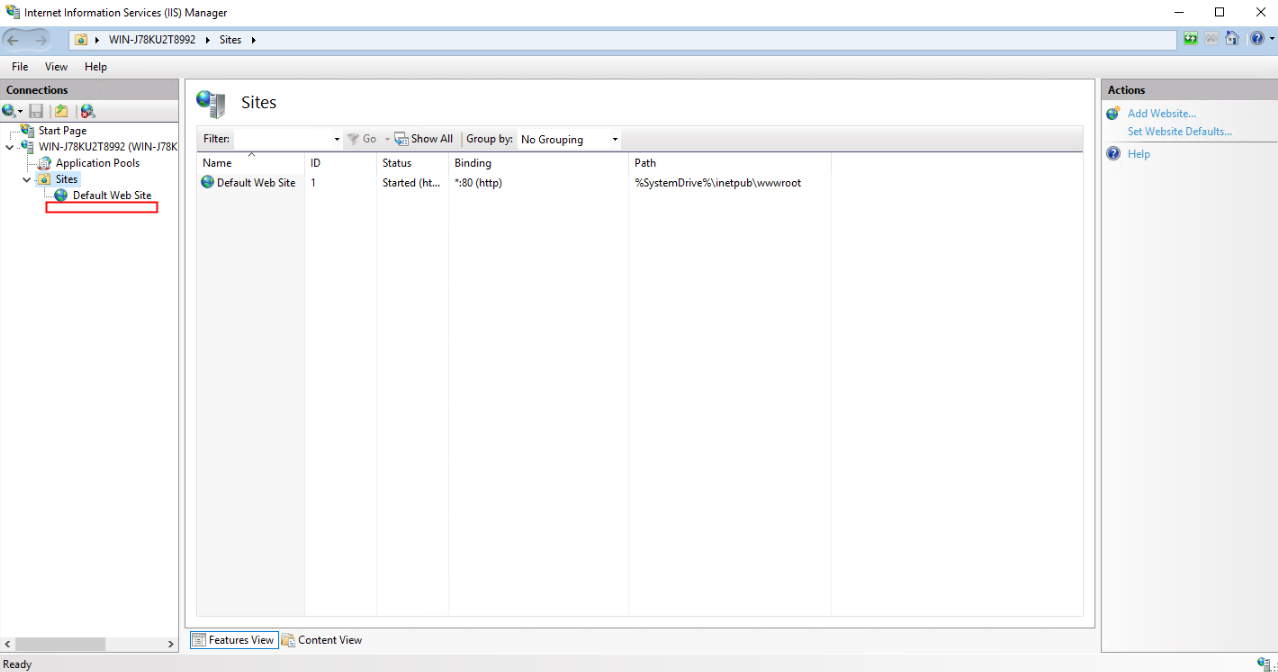
 in the lower left corner of the ECS and choose Administrative Tools > Internet Information Service (IIS) Manager. The Internet Information Service (IIS) Manager page is displayed, as shown in Figure 5.
- On the Internet Information Services (IIS) Manager page, expand the server name and Sites, right-click Default Web Site and select Remove from the shortcut menu.
- Right-click Sites and choose Add Website from the shortcut menu to configure website information.
- Site Name: This parameter is user-defined.
- Physical path: path for storing the local application installation package.
- Type: Select http.
- IP address: Select the ECS IP address from the drop-down list box.
- Port: Configure this parameter as required.
- Host name: This parameter is left blank by default.
- After the configuration is complete, click OK. The website has been added, as shown in Figure 6.
- Click the website added in 12. On the home page of the website, double-click Configuration Editor.
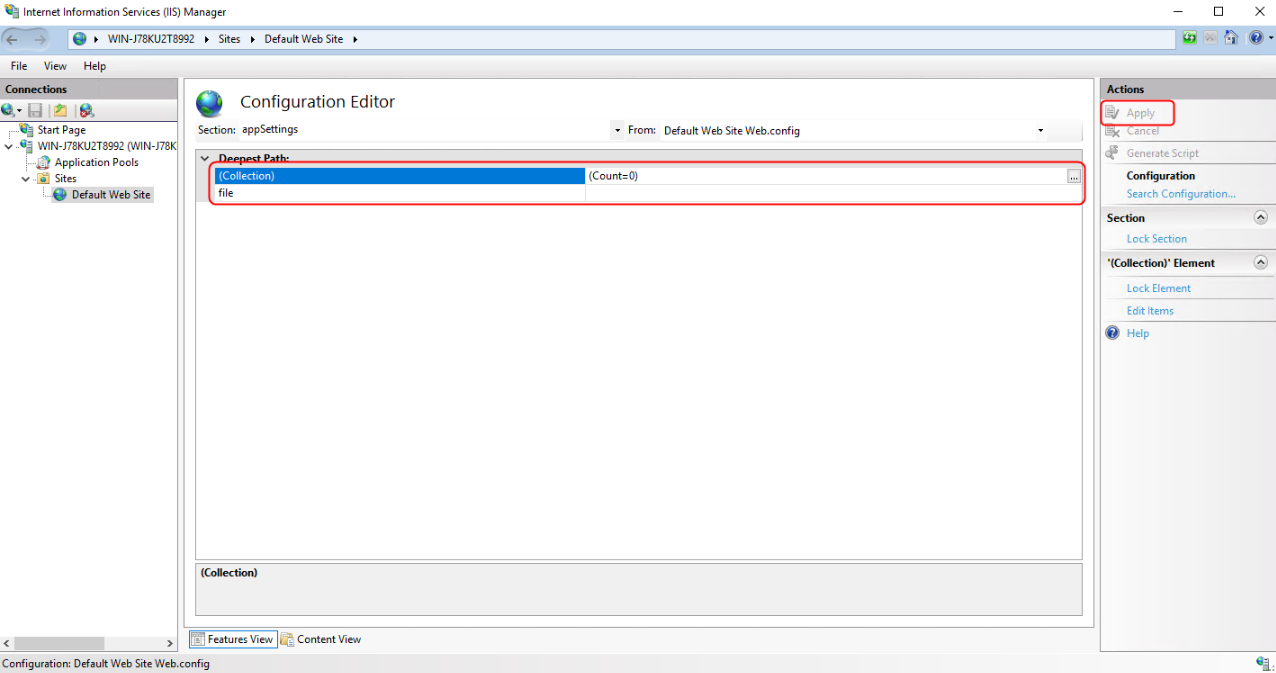
- On the Configuration Editor page, click
 on the right of Section:. Choose system.webServer > directoryBrowse, change the value of enabled from False to True, and click Apply, as shown in Figure 7.
Verifying (applications)
- On the ECS, click
 to open Internet Explorer. In the address box, enter the server address (the type and IP address configured in 11, for example, http://192.168.1.1) to open the application, as shown in Figure 8.
Adding an application
- Log in to the Workspace console.
- In the navigation pane, choose App Center.
The App Center page is displayed.
- Click Add App in the upper right corner.
The Add App page is displayed.
- On the displayed page, configure application parameters by referring to Table 1. Set App Source to Link. The link address is the server address obtained in 11.

The link address must end with the file name extension. The format is https://Absolute path of the .exe file, for example, https://xxx/7z2201-x64.exe.
- Click OK.
(Optional) IP and domain restrictions
- Log in to the management console.
- In the navigation pane on the left, click
 and choose Elastic Cloud Server.
 - Locate the row that contains the target ECS, click Remote Login in the Operation column, and enter the username and password created during ECS purchase.
- Click
 in the lower left corner of the ECS and choose Server Manager. The Server Manager page is displayed.
 - On the Server Manager page, click Add role and features. The Add Roles and Features Wizard dialog box is displayed. Click Next as prompted.
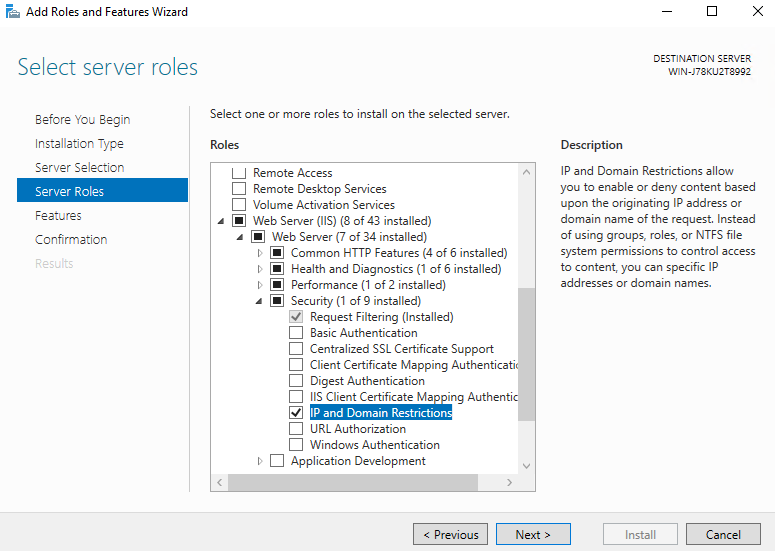
- On the Server Roles page, select Web Server (IIS), choose Web Server > Security, and select IP and Domain Restrictions, as shown in Figure 9.
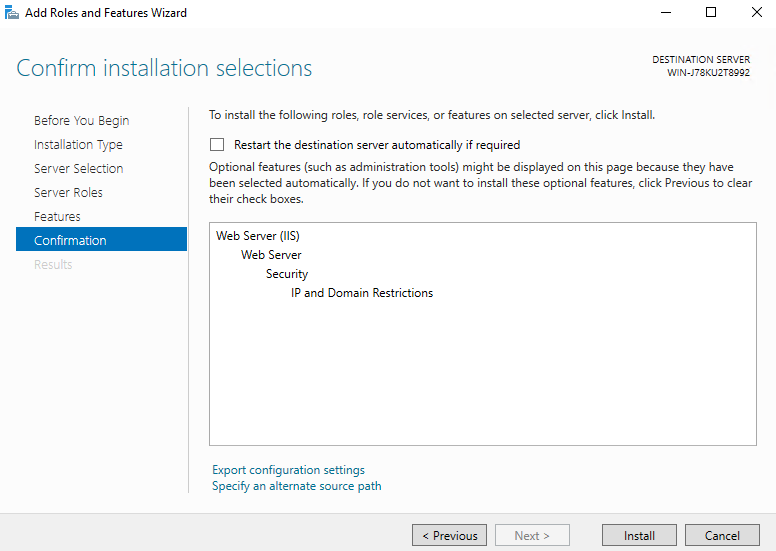
- Click Next as prompted. On the confirmation page, ensure that IP and Domain Restrictions is selected under Web Server (IIS), as shown in Figure 10.
- Click Install.
- Click
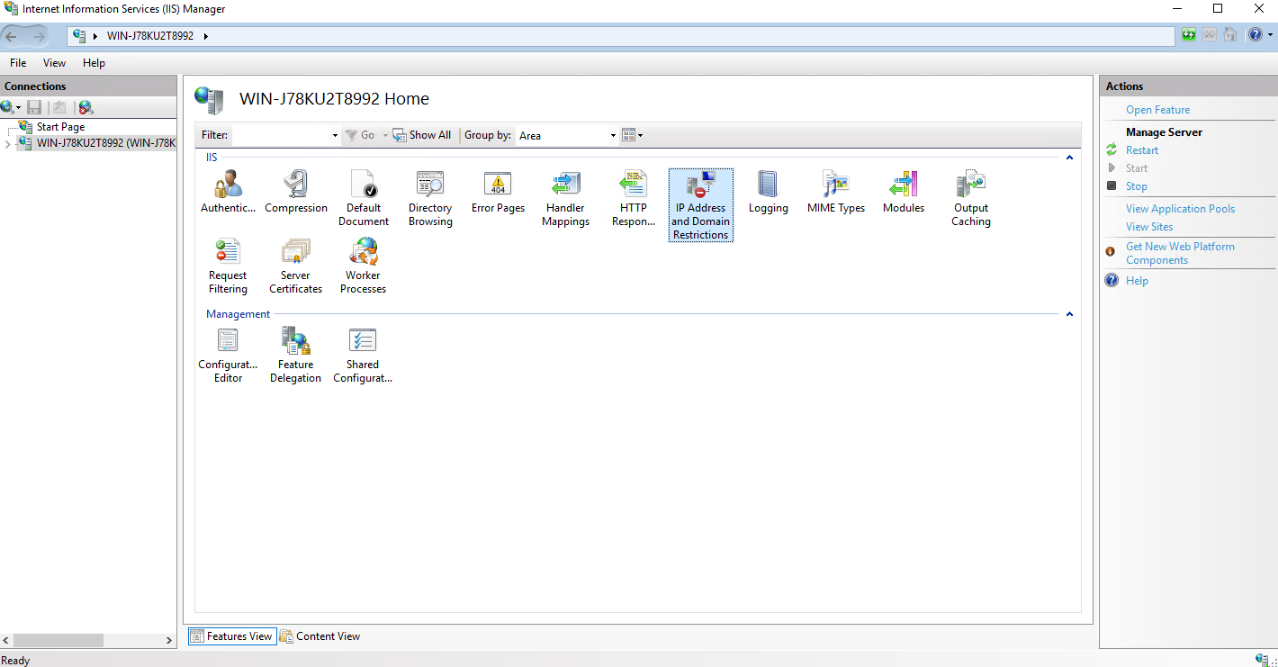
 in the lower left corner of the ECS and choose Administrative Tools > Internet Information Service (IIS) Manager. The Internet Information Service (IIS) Manager page is displayed. Click the host name, as shown in Figure 11.
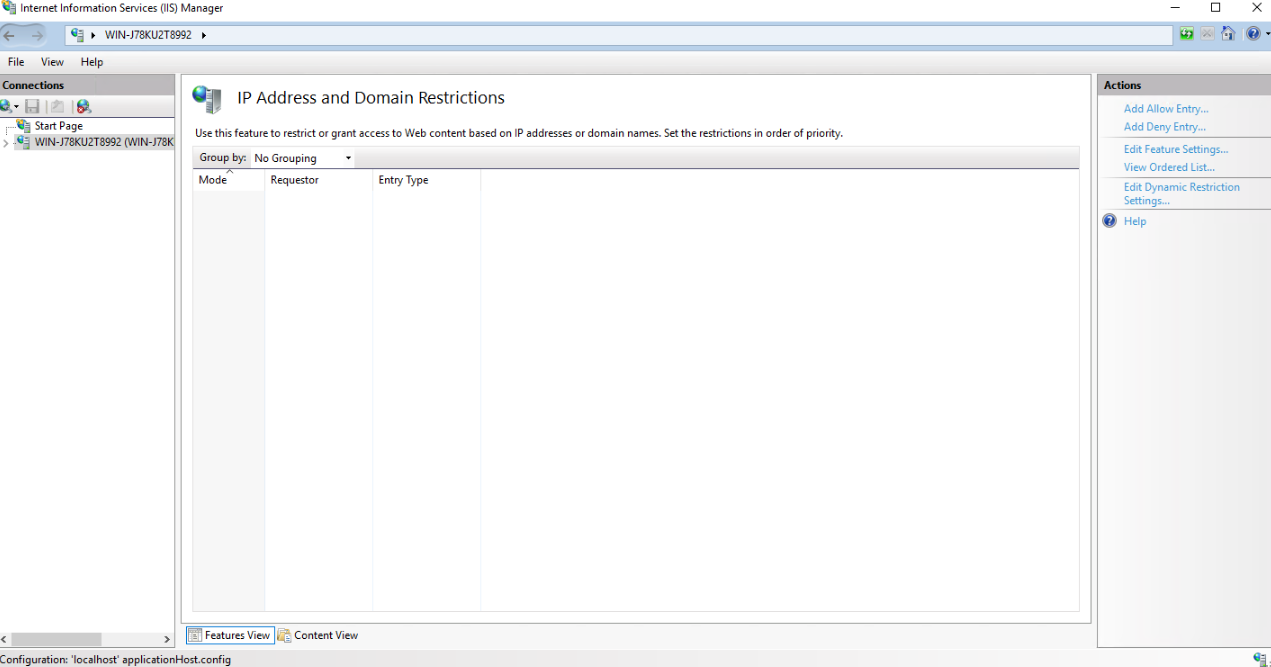
- Double-click IP Address and Domain Restrictions on the host name page. The IP Address and Domain Restrictions page is displayed, as shown in Figure 12.
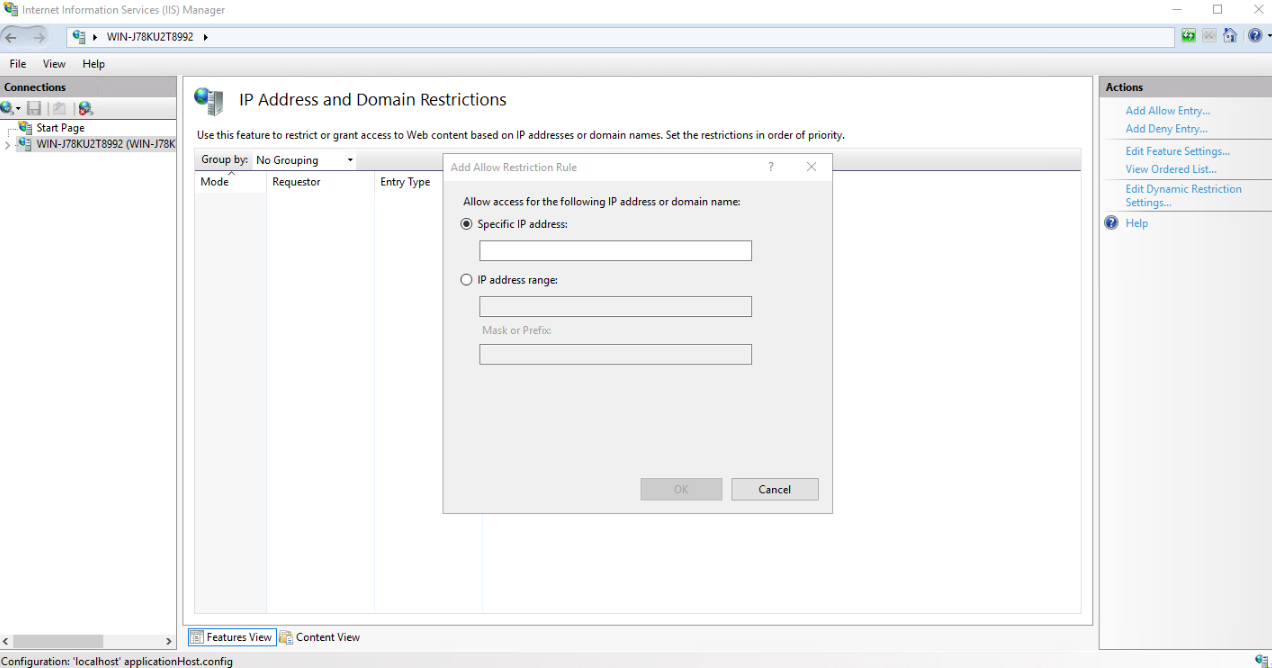
- In the upper right corner of the IP Address and Domain Restrictions page, click Add Allow Restriction Rule in the Operation column. The Add Allow Restriction Rule dialog box is displayed, as shown in Figure 13.
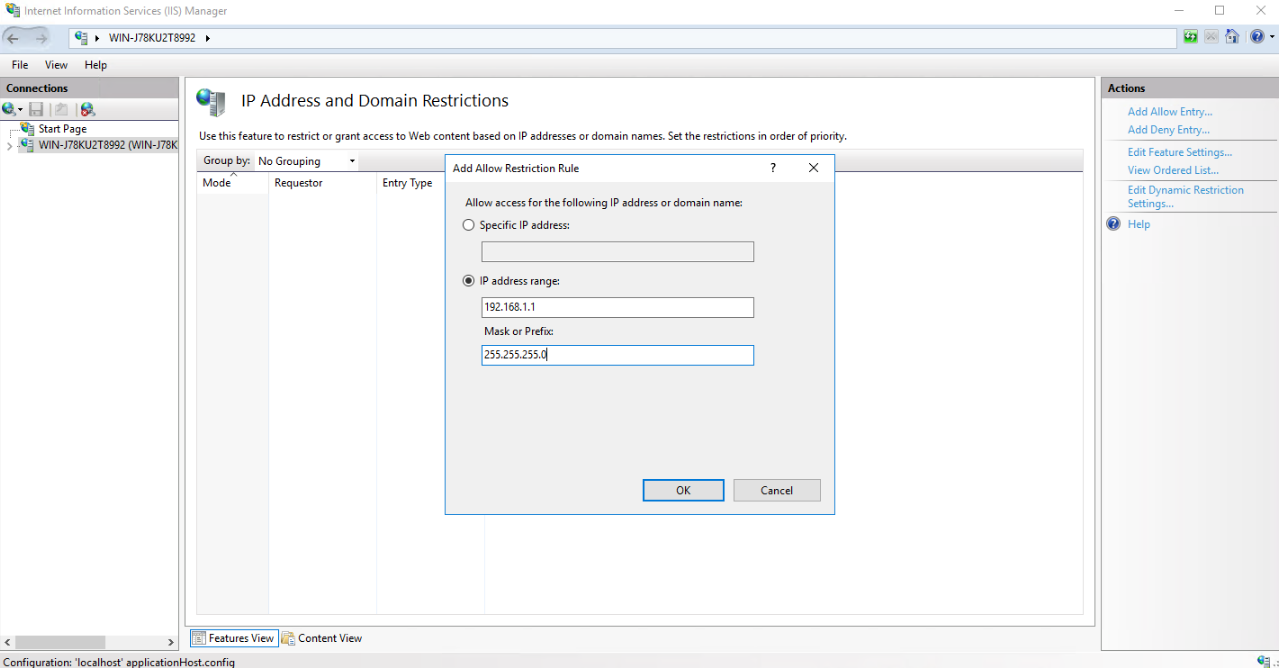
- In the Add Allow Restriction Rule dialog box, select and configure IP address range, as shown in Figure 14.
- IP address range: IP address segment, for example, 192.168.1.1.
- Mask or Prefix: Set this parameter to the subnet mask, for example, 255.255.255.0.

It is recommended that the IP address range be the same as the network segment of the subnet in Workspace > Tenant Configuration. If not, the cloud desktop may fail to access the file server.
- Click OK.
Feedback
Was this page helpful?
Provide feedbackThank you very much for your feedback. We will continue working to improve the documentation.See the reply and handling status in My Cloud VOC.
For any further questions, feel free to contact us through the chatbot.
Chatbot

