Instance Management
Selecting an Instance
After an instance is created, select the instance before creating products and devices and setting other functions in the instance.
- Access the IoTDA service page and click Access Console.
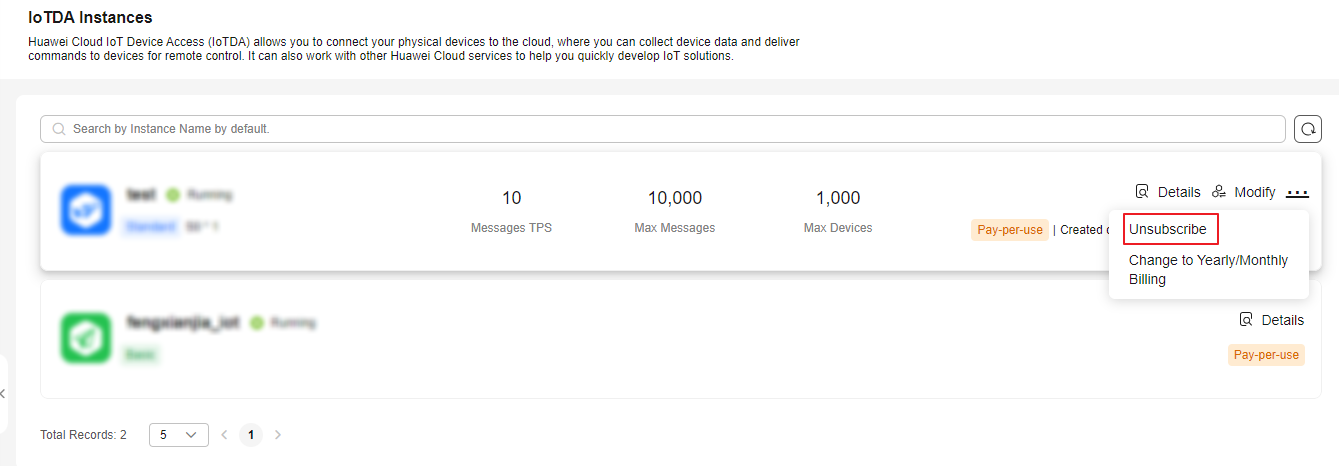
- In the navigation pane, choose IoTDA Instances, and click the target instance card.
Figure 1 Instance management - Changing instance

Viewing Instance Details
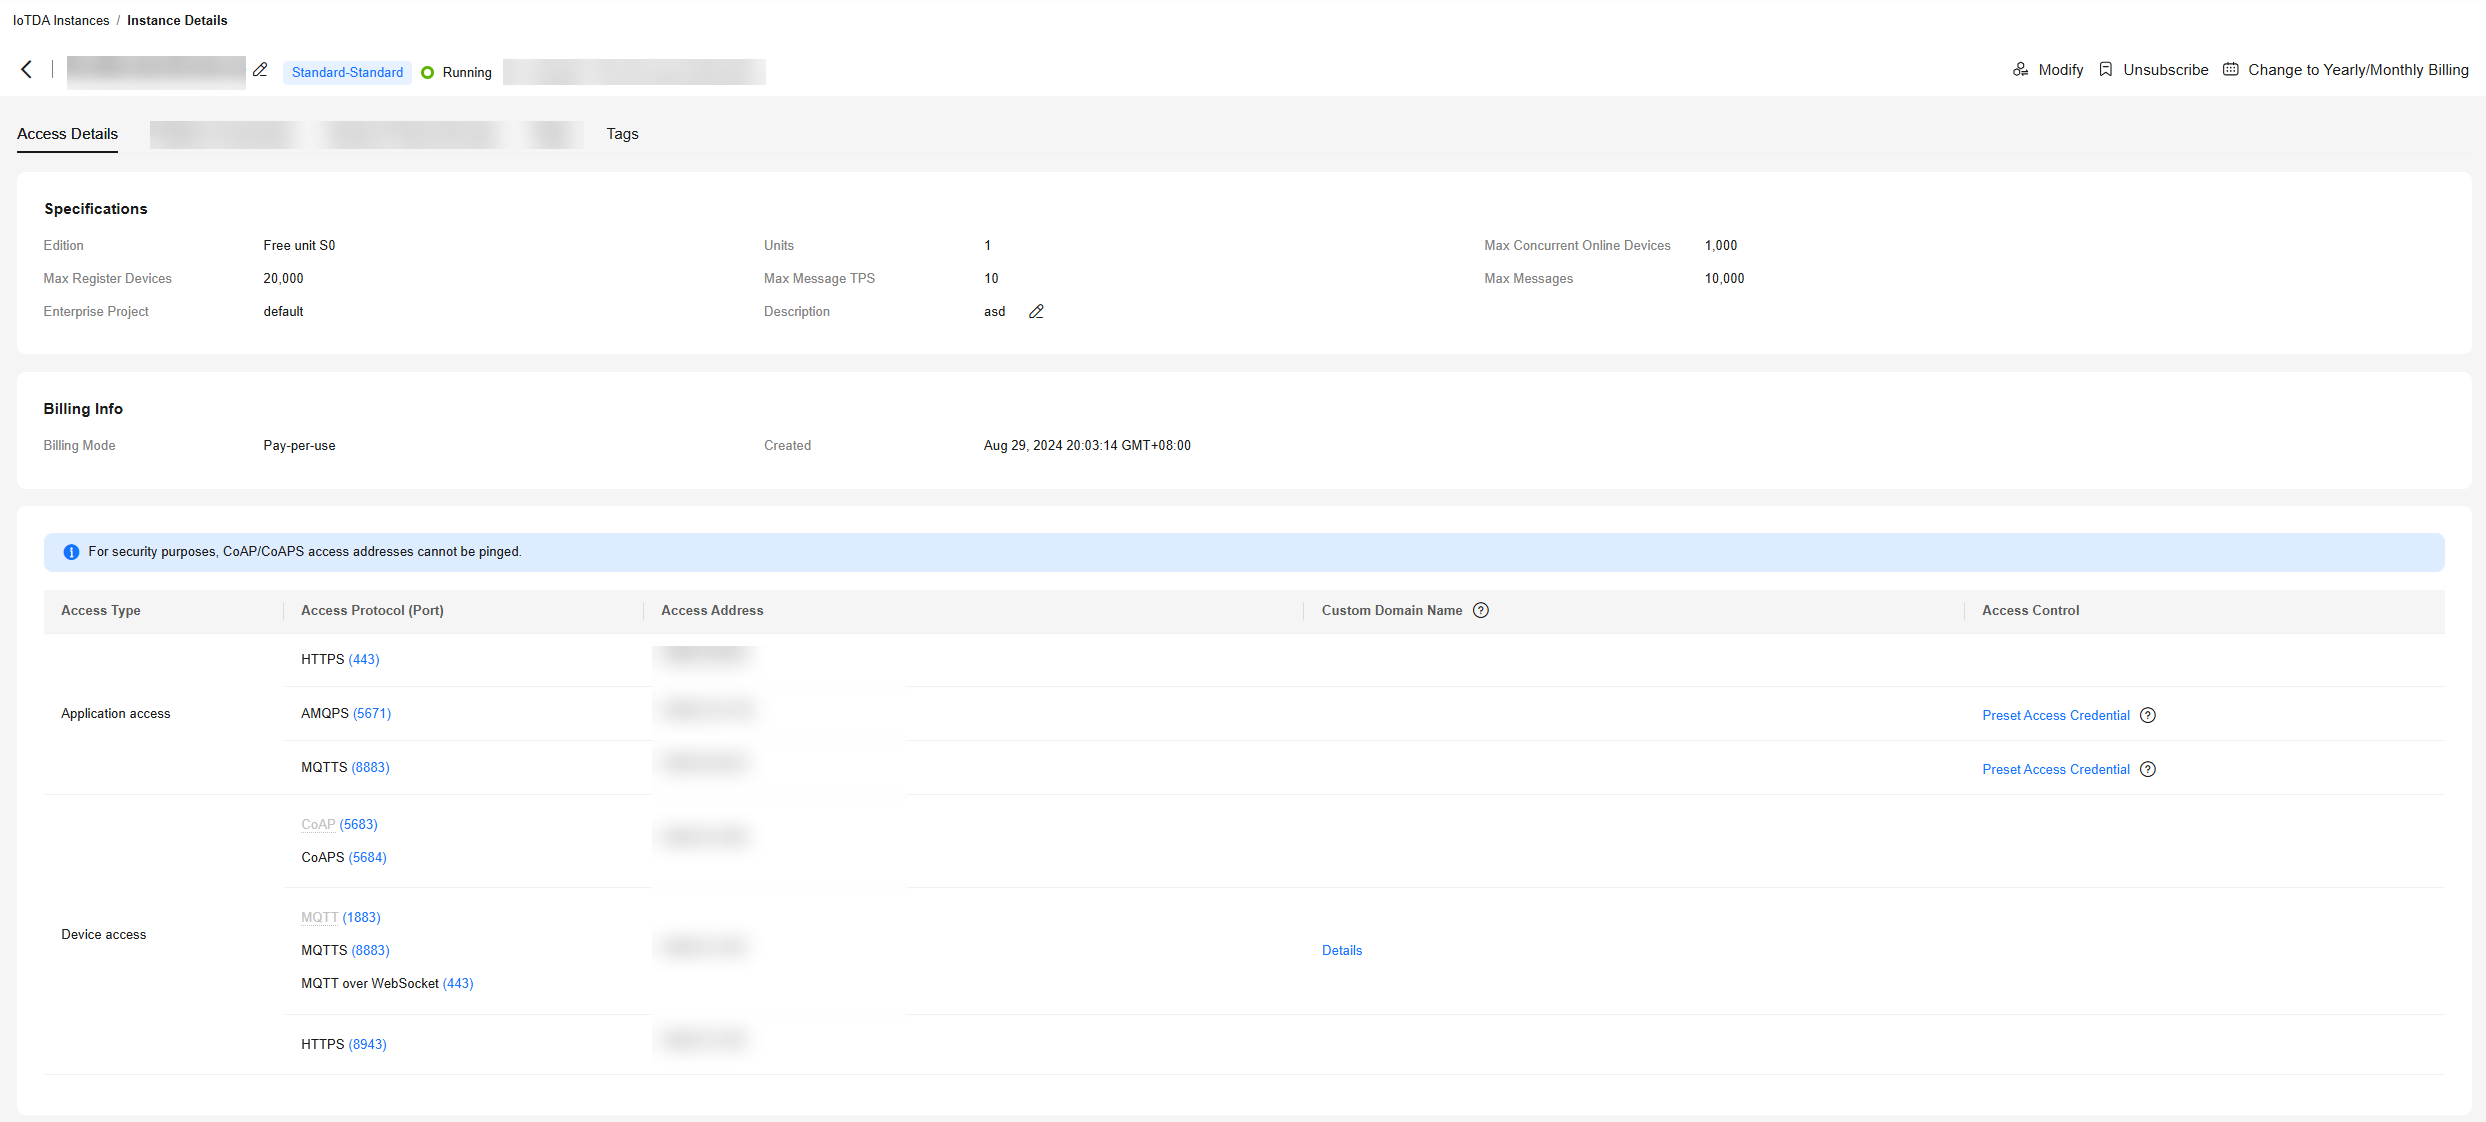
After purchasing an IoTDA instance, you can view the instance details in the instance details page, including the instance ID, name, and specifications.
- Access the IoTDA service page and click Access Console.
- In the navigation pane, choose IoTDA Instances and click Details corresponding to an instance.
Figure 2 Instance management - Instance details

Modifying Instance Specifications
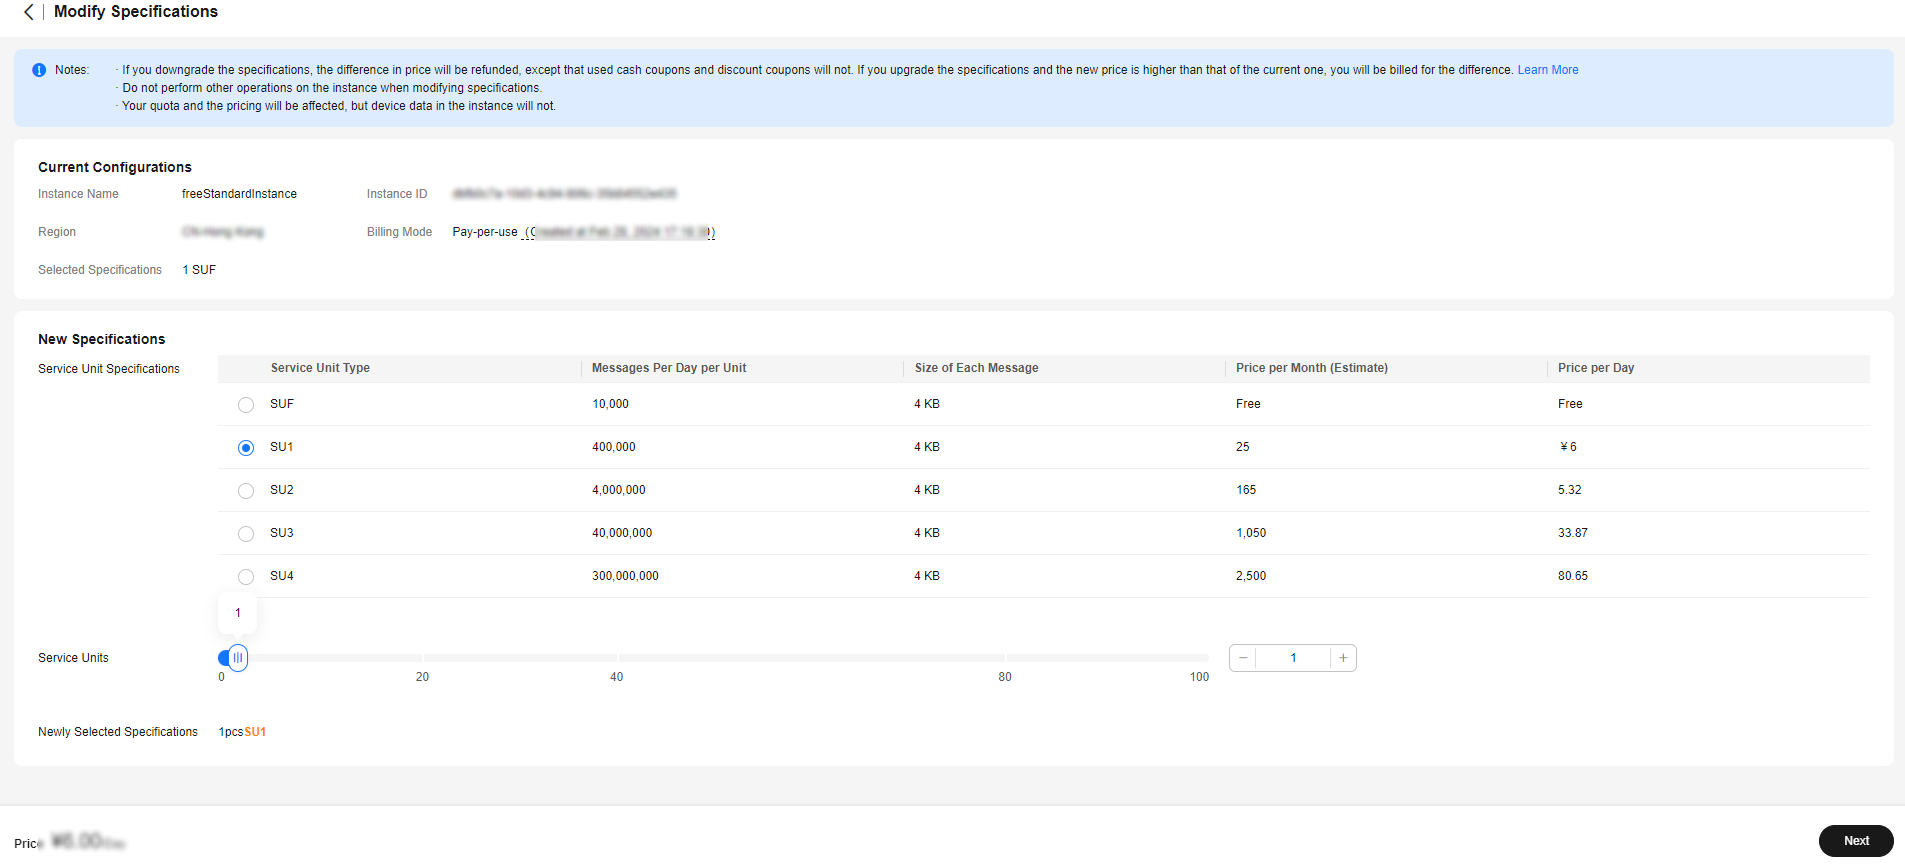
You can upgrade the specifications of an IoTDA instance based on service requirements. Modifying instance specifications does not affect services.
- Access the IoTDA service page and click Access Console.
- In the navigation pane, choose IoTDA Instances. Locate the target instance, click Modify, and select the new instance specifications.
- Set a delay for the change to take effect. After you set a maintenance window, the change will be performed in the scheduled time.
Figure 3 Instance management - Modifying specifications

Unsubscribing from an Instance
If an instance is no longer required, you can choose in the Operation column to release your cloud service resources. For details, see Unsubscriptions.

After an instance is unsubscribed from, all resources and data of the instance will be deleted and cannot be restored. Back up data before the unsubscription.

Feedback
Was this page helpful?
Provide feedbackThank you very much for your feedback. We will continue working to improve the documentation.See the reply and handling status in My Cloud VOC.
For any further questions, feel free to contact us through the chatbot.
Chatbot


