Using a Snapshot to Roll Back a Disk
After a snapshot is created, you can use the snapshot to roll back the disk data. When a snapshot is used to roll back data, the data on the source disk can be quickly restored to the data at a certain point in time, reducing the lost data of the source disk.
Prerequisites
- You have created a snapshot. For details, see Creating a Snapshot.
- The snapshot is in the Available state, and the disk is in the Available, or Rollback failed.
Procedure
- Log in to the management console. For details, see Logging In to the Management Console.
- Click
 and select the wanted region.
- Use any of the following methods to display the snapshot list:
- Method 1: Via the snapshot-residing DESS device
- Click
 and choose Dedicated Cloud > Dedicated Enterprise Storage to go to the DeC management console.
 - In the row of the desired DESS device, click the number in the Number of Snapshots column to go to the Snapshots tab page.
The snapshot tab page lists the snapshots of the DESS device.
- Click
- Method 2: Via the snapshot-residing HyperMetro resource
- Click
 and choose Dedicated Cloud > Dedicated Enterprise Storage to go to the DeC management console.
 - On the navigation pane on the left, choose Dedicated Enterprise Storage > HyperMetro to go to the HyperMetro resource list page.
By default, HyperMetro resources in all statuses are listed.
- Use any of the following methods to display the snapshot list:
- Method 1
- Click
 next to the resource name to view the HyperMetro resource details.
 - In the row of the desired DESS device, click the number in the Number of Snapshots column to go to the Snapshots tab page.
The snapshot tab page lists the snapshots of the HyperMetro resource.
- Click
- Method 2
- In the row of the wanted HyperMetro resource, click the DESS device name in the Associated DESS Devices column to go to the device details page.
- In the row of the desired DESS device, click the number in the Number of Snapshots column to go to the Snapshots tab page.
The snapshot tab page lists the snapshots of the DESS device.
- Method 1
- Click
- Method 3: Via the snapshot list of all DESS devices
- Click
 and choose Storage > Dedicated Enterprise Storage Service to go to DESS Console.
 - On the navigation pane on the left, choose Snapshots.
- Click
- Method 1: Via the snapshot-residing DESS device
- Search for a snapshot using either of the following methods:
- Method 1: On the Snapshots page, set search parameters to query the desired snapshot.

- Method 2: On the Disks tab page, click the desired disk name to go to the disk details page. Click the Snapshots tab and then search for the wanted snapshot.

- Method 1: On the Snapshots page, set search parameters to query the desired snapshot.
- In the row of the snapshot you want to use, click Roll Back.
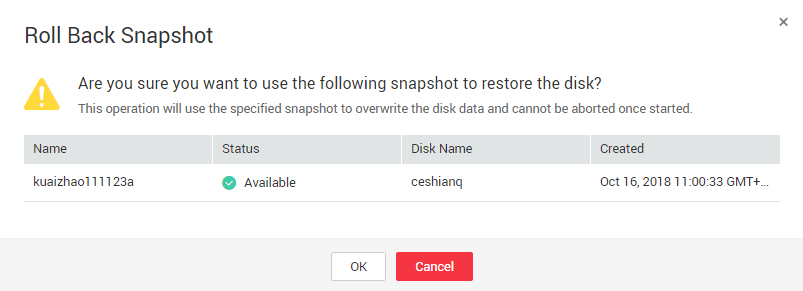
The Roll Back Using a Snapshot dialog box is displayed.


This operation will use the specified snapshot to overwrite the disk data. Once started, the rollback process cannot be stopped.
- Confirm the information and click OK.
Feedback
Was this page helpful?
Provide feedbackThank you very much for your feedback. We will continue working to improve the documentation.See the reply and handling status in My Cloud VOC.
For any further questions, feel free to contact us through the chatbot.
Chatbot


