
(Optional) Step 10: Configure a Log Parser
This topic describes how to configure a log parser to convert the log format in a codeless manner.
SecMaster provides log parser (rule) templates. You can use them directly. If the log parser (rule) templates cannot meet your log conversion requirements, you can create custom log parsers (rules).
Method 1: Using a Template
The following example shows how to parse DBAPPSecurity WAF logs.
- Log in to the SecMaster console.
- In the navigation pane on the left, choose Workspaces > Management. In the workspace list, click the name of the target workspace. Figure 1 Workspace management page

- In the navigation pane on the left, choose . Then, select the Parsers tab. Figure 2 Accessing the Parsers tab page
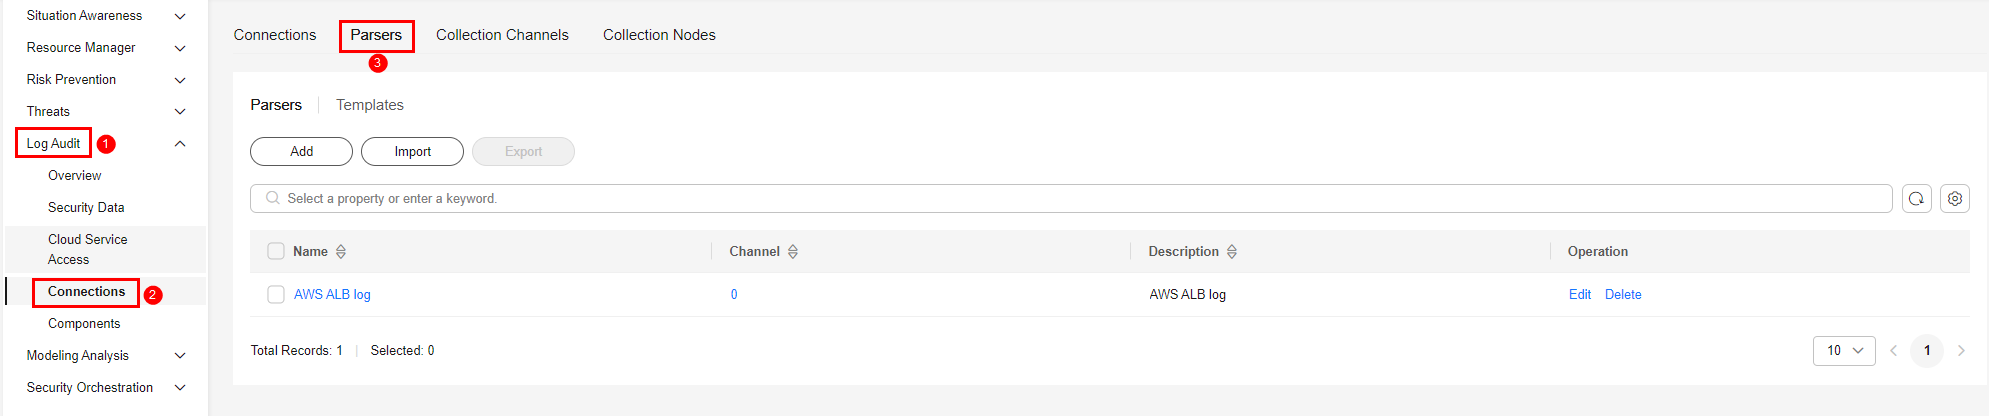
- On the Parsers tab, click the Templates tab.
- On the template list page, locate the row that contains Analysis of Anheng WAF log and click Create by Template in the Operation column.
- On the Create Parser page, set parameters.
Table 1 Parameters for adding a parser Parameter
Description
Basic Information
Name
Parser name, which is automatically generated by the system based on the template and can be changed.
Description
Parser description, which is automatically generated by the system based on the template and can be modified.
Rules
Parsing rules, which are automatically generated by the system based on the template. You can edit them as needed.
To add a rule, click Add, select a rule type, and set parameters based on the selected rule.
- Parsing rule: Select parsing rules for the parser. For details about the parameters, see Parser Rules.
- Conditional control: Select the conditions for the parser. You can select If, Else, or Else if.
- Click OK in the lower right corner of the page.
Method 2: Creating a Custom Parser
If the log parser (rule) templates cannot meet your log conversion requirements, you can create custom log parsers (rules).
- Log in to the SecMaster console.
- In the navigation pane on the left, choose Workspaces > Management. In the workspace list, click the name of the target workspace. Figure 3 Workspace management page
- In the navigation pane on the left, choose . Then, select the Parsers tab. Figure 4 Accessing the Parsers tab page
- On the Parsers tab, click Add.
- On the Create Parser page, set parameters.
Table 2 Parameters for adding a parser Parameter
Description
Basic Information
Name
Set the parser name.
Description
Enter the parser description.
Rules
Set the parsing rule of the parser. The procedure is as follows:
- Click Add and select a rule type.
- Parsing rule: Select parsing rules for the parser. For details about the parameters, see Parser Rules.
- Conditional control: Select the conditions for the parser. You can select If, Else, or Else if.
- Set parameters based on the selected rule.
- Click Add and select a rule type.
- Click OK in the lower right corner of the page.
Feedback
Was this page helpful?
Provide feedbackThank you very much for your feedback. We will continue working to improve the documentation.See the reply and handling status in My Cloud VOC.
For any further questions, feel free to contact us through the chatbot.
Chatbot


