Step 11: Configure a Log Collection Channel
This topic describes how to configure a log collection channel and connect functional components to let SecMaster and the log collector work properly.
Configuring a Log Collection Channel
- Log in to the SecMaster console.
- In the navigation pane on the left, choose Workspaces > Management. In the workspace list, click the name of the target workspace.
Figure 1 Workspace management page

- In the navigation pane on the left, choose . Then, select the Collection Channels tab.
Figure 2 Accessing the Collection Channels tab

- Add a log collection channel group.
- On the Collection Channels tab, click
 on the right of Groups.
 - Enter a group name and click
 .
.
- On the Collection Channels tab, click
- Create a log collection channel.
- On the right of the group list, click Add.
- In the Configure Basic Configuration step, configure basic information.
Table 1 Basic configuration parameters Parameter
Description
Basic Information
Title
The collection channel name you customize.
Channel grouping
Select the group created in 4.
(Optional) Description
Enter the description of the collection channel.
Configure Source
Source Name
Select the name of the log source added in Step 9: Configure a Connector.
After you select a source, the system automatically generates the information about the selected source.
Destination Configuration
Destination Name
Select the name of the log destination added in Step 9: Configure a Connector.
After you select a destination, the system automatically generates the information about the selected destination.
- Click Next in the lower right corner of the page.
- On the displayed Configure Parser page, select the parser configured in (Optional) Step 10: Configure a Log Parser and click Next in the lower right corner of the page.
If no parsers are configured, you can select Quick access Parser to add raw logs to the collection channel list.
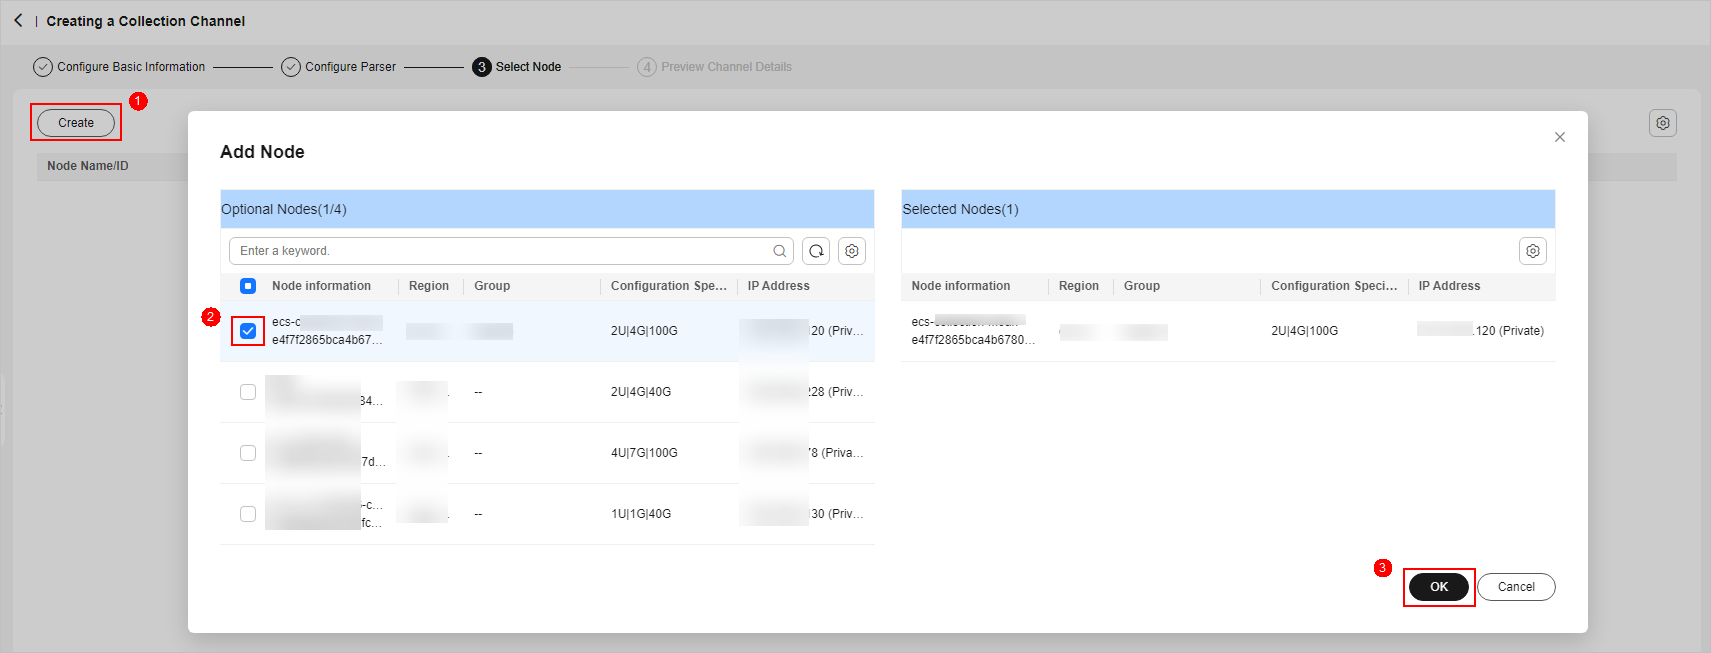
- On the Select Node page, click Create. In the Add Node dialog box displayed, select the ECS node created in (Optional) Step 1: Buy an ECS and click OK.
Figure 3 Selecting a node

- Click Next in the lower right corner of the page.
- On the Preview Channel Details page, confirm the configuration and click Save and Execute.
On the Collection Channels tab, if the health status of a collection channel is Normal, the collection channel is successfully delivered.
Figure 4 Collection channels configured
Feedback
Was this page helpful?
Provide feedbackThank you very much for your feedback. We will continue working to improve the documentation.See the reply and handling status in My Cloud VOC.
For any further questions, feel free to contact us through the chatbot.
Chatbot


