Manually Deploying RabbitMQ (Ubuntu 20.04)
Overview
This best practice guides you through the manual deployment of RabbitMQ on a Linux ECS. RabbitMQ is a message middleware that uses the Erlang programming language for the Advanced Message Queuing Protocol (AMQP). It originates from the financial system and is used to store and forward messages in the distributed system. RabbitMQ is popular for its high reliability, scalability, availability, and extensive functions.
Prerequisites
The rule listed in the following table has been added to the security group that the target ECS belongs to. For details, see Adding a Security Group Rule.
|
Direction |
Priority |
Action |
Type |
Protocol & Port |
Source |
|---|---|---|---|---|---|
|
Inbound |
1 |
Allow |
IPv4 |
TCP: 80 |
0.0.0.0/0 |
|
Inbound |
1 |
Allow |
IPv4 |
TCP: 15672 |
0.0.0.0/0 |
Procedure

This section uses RabbitMQ 3.8.3 as an example. For more versions and installation methods, see Installing RabbitMQ.
- Log in to the ECS.
- Install RabbitMQ.
- Run the following command to install the dependency packages:
sudo apt-get install curl gnupg apt-transport-https -y
- Download the GPG public keys for RabbitMQ and Erlang and add the public keys to the trusted keyring of the system.
curl -1sLf "https://keys.openpgp.org/vks/v1/by-fingerprint/0A9AF2115F4687BD29803A206B73A36E6026DFCA" | sudo gpg --dearmor | sudo tee /usr/share/keyrings/com.rabbitmq.team.gpg > /dev/null
curl -1sLf https://github.com/rabbitmq/signing-keys/releases/download/3.0/cloudsmith.rabbitmq-erlang.E495BB49CC4BBE5B.key | sudo gpg --dearmor | sudo tee /usr/share/keyrings/rabbitmq.E495BB49CC4BBE5B.gpg > /dev/null
curl -1sLf https://github.com/rabbitmq/signing-keys/releases/download/3.0/cloudsmith.rabbitmq-server.9F4587F226208342.key | sudo gpg --dearmor | sudo tee /usr/share/keyrings/rabbitmq.9F4587F226208342.gpg > /dev/null
- Add the official APT repositories of RabbitMQ and Erlang to the /etc/apt/sources.list.d/rabbitmq.list file.
sudo tee /etc/apt/sources.list.d/rabbitmq.list <<EOF
deb [signed-by=/usr/share/keyrings/rabbitmq.E495BB49CC4BBE5B.gpg] https://ppa1.novemberain.com/rabbitmq/rabbitmq-erlang/deb/ubuntu jammy main
deb-src [signed-by=/usr/share/keyrings/rabbitmq.E495BB49CC4BBE5B.gpg] https://ppa1.novemberain.com/rabbitmq/rabbitmq-erlang/deb/ubuntu jammy main
deb [signed-by=/usr/share/keyrings/rabbitmq.E495BB49CC4BBE5B.gpg] https://ppa2.novemberain.com/rabbitmq/rabbitmq-erlang/deb/ubuntu jammy main
deb-src [signed-by=/usr/share/keyrings/rabbitmq.E495BB49CC4BBE5B.gpg] https://ppa2.novemberain.com/rabbitmq/rabbitmq-erlang/deb/ubuntu jammy main
deb [signed-by=/usr/share/keyrings/rabbitmq.9F4587F226208342.gpg] https://ppa1.novemberain.com/rabbitmq/rabbitmq-server/deb/ubuntu jammy main
deb-src [signed-by=/usr/share/keyrings/rabbitmq.9F4587F226208342.gpg] https://ppa1.novemberain.com/rabbitmq/rabbitmq-server/deb/ubuntu jammy main
deb [signed-by=/usr/share/keyrings/rabbitmq.9F4587F226208342.gpg] https://ppa2.novemberain.com/rabbitmq/rabbitmq-server/deb/ubuntu jammy main
deb-src [signed-by=/usr/share/keyrings/rabbitmq.9F4587F226208342.gpg] https://ppa2.novemberain.com/rabbitmq/rabbitmq-server/deb/ubuntu jammy main
EOF
- Update the local package index.
sudo apt-get update -y
- Install the Erlang-related packages.
sudo apt-get install -y erlang-base erlang-asn1 erlang-crypto erlang-eldap erlang-ftp erlang-inets erlang-mnesia erlang-os-mon erlang-parsetools erlang-public-key erlang-runtime-tools erlang-snmp erlang-ssl erlang-syntax-tools erlang-tftp erlang-tools erlang-xmerl
- Install RabbitMQ.
sudo apt-get install rabbitmq-server -y --fix-missing
- Run the following command to install the dependency packages:
- Configure RabbitMQ.
- Configure RabbitMQ to automatically start upon system startup and start RabbitMQ.
sudo systemctl enable rabbitmq-server
sudo systemctl start rabbitmq-server
- Run the following command to delete the default user:
sudo rabbitmqctl delete_user guest

The default username and password of RabbitMQ are both guest.
- Run the following command to create a user:
sudo rabbitmqctl add_user username password
The username and password are user-defined.
For example, run the following command:
sudo rabbitmqctl add_user root 123456
- Run the following command to set the user as the administrator:
sudo rabbitmqctl set_user_tags username administrator
For example, run the following command:
sudo rabbitmqctl set_user_tags root administrator
- Run the following command to assign all permissions to the user:
sudo rabbitmqctl set_permissions -p / username ".*" ".*" ".*"
For example, run the following command:
sudo rabbitmqctl set_permissions -p / root '.*' '.*' '.*'
- Configure RabbitMQ to automatically start upon system startup and start RabbitMQ.
- Run the following command to enable the RabbitMQ web-based management page:
sudo rabbitmq-plugins enable rabbitmq_management
Information similar to the following is displayed:
[root@ecs-rabbitmq ~]# sudo rabbitmq-plugins enable rabbitmq_management
Enabling plugins on node rabbit@ecs-rabbitmq:
rabbitmq_management
The following plugins have been configured:
  rabbitmq_management
  rabbitmq_management_agent
  rabbitmq_web_dispatch
Applying plugin configuration to rabbit@ecs-rabbitmq...
The following plugins have been enabled:
  rabbitmq_management
  rabbitmq_management_agent
  rabbitmq_web_dispatch

started 3 plugins.
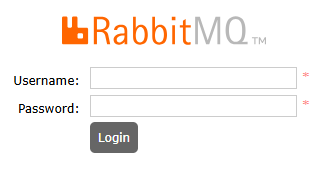
- Enter http://EIP:15672 in the address bar to access RabbitMQ. If the following page is displayed, RabbitMQ has been installed.

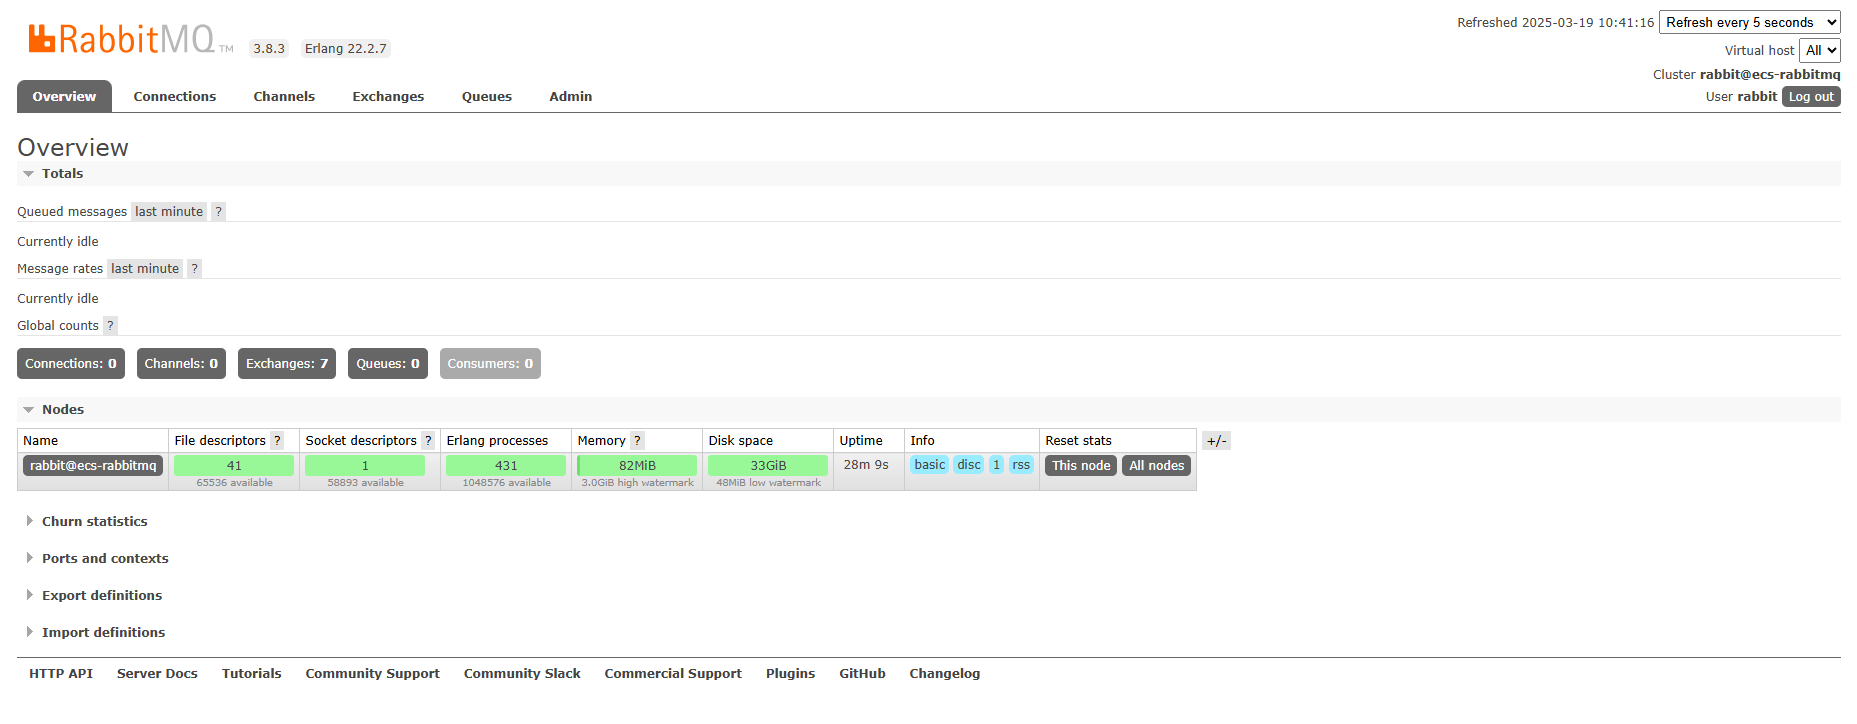
- Enter the created username and password to go to the RabbitMQ management page.

Feedback
Was this page helpful?
Provide feedbackThank you very much for your feedback. We will continue working to improve the documentation.See the reply and handling status in My Cloud VOC.
For any further questions, feel free to contact us through the chatbot.
Chatbot


