
Using Nginx for Gray Release
Application Scenario
When you upgrade to a new system, services may be stopped or gray verification may fail. In this practice, you can use the Nginx load balancing mechanism for smooth system upgrade without affecting service running.
Solution Architecture
When upgrading the system using blue-green deployment, perform the following operations:
- Bring server A (blue environment, carrying the current workloads) offline and distribute all access traffic to server B. Upgrade server A.
- After server A is upgraded, set it as the gray test environment and let testers perform gray verification on it.
- After the gray verification is complete and the functions become normal, release server A (green environment) and move all traffic from B to it. Now, the blue-green deployment is complete.
- If an emergency occurs on server A during service running, perform a blue-green switchover to quickly restore services.

If you use canary release (grayscale release), upgrade server B by referring to operations described in blue-green deployment. Complete the gray test on it and release it to complete the gray release.

Prerequisites
- A project is available. If there is no project, Creating a Scrum Project and a Work Item first.
- You have the permissions to create applications. For details, see Configuring Permissions for Different Roles.
- Target service servers A_test and B_test are available and application services are running on the servers. This practice uses Linux as an example.
- A reverse proxy server Gray_release is available. This practice uses Linux as an example.
- A gray verification host is available. This host represents a gray tester.
- Ensure that servers can communicate with each other. To ensure it, you can add all servers to the same virtual private cloud (VPC).
Process
Based on the Nginx load balancing mechanism, this practice implements blue-green release and gray release in host deployment scenarios. For more information about Nginx, visit Nginx official website.

Step 1: (Optional) Install and Start the Nginx Node on the Reverse Proxy Server
If the Nginx node has been installed and started on your reverse proxy server, skip this step.
- Create basic resources.
- Go to the CodeArts homepage and click the target project name to access the project.
- Choose Settings > General > Basic Resources to access the Host Clusters page.
Alternatively, choose CICD > Deploy > Basic Resources to access the Host Clusters page.
- Click Create Host Cluster, enter basic information such as the Cluster Name, OS, Proxy, Execution Resource Pool, and Description, and click Save.
- Create three hosts (A_test, B_test, and Gray_release) and verify their connectivity. Specifically, click Add Host, select Adding IP, enter the host name, IP, Username, Password or Key, and SSH Port, and click OK. For details about connectivity verification, see Host Management.

- Create an application.
- Choose CICD > Deploy.
- Click Create Application. On the Basic Information page, specify the Name, Description, and Execution Resource Pool as required.
- After editing the basic application information, click Next. The deployment template selection page is displayed.
- Select Blank Template and click OK. The Deployment Actions tab page is displayed.
- Edit the application.
- Switch to the Environment Management tab page. Create an environment and edit it.
- Click Create Environment, enter the environment name, for example, Reverse_proxy_server_group, select the OS corresponding to each server, and enter the description information.
- Click Save. The environment is created.
- Click Import Host. The system automatically filters all clusters that meet the requirements of the current environment. In the displayed dialog box, select the target host cluster and click
 in the Operation column of the target host to import the host to the environment.
- Switch to the Deployment Actions tab page. Add the following actions and edit them.
- Add the Install Nginx action and modify the parameters in the following table (Linux is used as an example).
Table 1 Parameter description Parameter
Mandatory
Description
Action Name
Yes
Enter a custom action name. You can retain the default value.
Enter 1 to 128 characters. Do not start or end with a space. Use letters, digits, spaces, and these special characters: -_,;:./()
Environment
Yes
Select Reverse_proxy_server_group.
Nginx Version
Yes
Select a target version. Example: nginx-1.14.2.
Installation Path
Yes
Enter the installation path of the Nginx service in the target environment. Example: /usr/local/nginx.
- Add the Start/Stop Nginx action and modify the parameters in the following table (Linux is used as an example).
Table 2 Parameter description Parameter
Mandatory
Description
Action Name
Yes
Enter a custom action name. You can retain the default value.
Enter 1 to 128 characters. Do not start or end with a space. Use letters, digits, spaces, and these special characters: -_,;:./()
Environment
Yes
Select Reverse_proxy_server_group.
Operation
Yes
Select Start Nginx.
Nginx Installation Path
Yes
Enter the installation path of the Nginx service in the target environment.
Example: /usr/local/nginx.
- Add the Install Nginx action and modify the parameters in the following table (Linux is used as an example).
- Click Save & Deploy to deploy the application.
- Switch to the Environment Management tab page. Create an environment and edit it.
- Deploy the application.
If the application status bar turns green and displays Successful, the application is deployed successfully.
If the application status bar turns red and displays Failed, the application fails to be deployed. In this case, click View Solution.
For more deployment FAQs, see Application Deployment.
Step 2: Create and Edit Application 1 (Gray Release of A-Side Node)
- Create an application.
- Choose CICD > Deploy.
- Click Create Application. On the Basic Information page, specify the Name, Description, and Execution Resource Pool as required.
- After editing the basic application information, click Next. The deployment template selection page is displayed.
- Select the Deploy a General Application template and click OK.
- Edit the application.
- Switch to the Environment Management tab page. Create an environment and edit it.
- Click Create Environment, enter the environment name, for example, Reverse_proxy_server_group, select the OS corresponding to each server, and enter the description information.
- Click Save. The environment is created.
- Click Import Host. The system automatically filters all clusters that meet the requirements of the current environment. In the displayed dialog box, select the target host cluster and click
 in the Operation column of the target host to import the host to the environment.
 - Repeat the preceding steps to create Target service server group_A-side node and add the A_test server.
- Switch to the Parameters tab page. Add the following parameters.

Table 3 Parameter description Parameter
Mandatory
Description
Name
Yes
Parameter name. You can customize it.
The name of a custom parameter cannot be the same as that of a predefined parameter.
Enter 1 to 128 characters, including letters, digits, and underscores (_).
Examples: app_name and service_port.
Type
Yes
Parameter types, including String, Enumeration, and Environment.
Select String in this example.
Default Value
No
Enter or select a parameter value.
Examples: test and 3000.
Private Parameter
No
If a parameter is private, the system encrypts the input for storage and only decrypts the parameter when you use it. If you enable Private Parameter, Runtime Settings cannot be enabled.
It is disabled by default.
Runtime Settings
No
If it is enabled, the parameter value can be changed during application deployment and the value will be reported to the application.
It is disabled by default.
Description
No
Parameter description.
- Switch to the Deployment Actions tab page. Add the following actions and edit them.
- Add the Start/Stop Nginx action and modify the parameters in the following table (Linux is used as an example).
Table 4 Parameter description Parameter
Mandatory
Description
Action Name
Yes
Enter a customized action name displayed in the deployment actions.
Enter 1 to 128 characters. Do not start or end with a space. Use letters, digits, spaces, and these special characters: -_,;:./()
Enter a name such as Bring_A-side_node_offline.
Environment
Yes
Select a target environment.
Example: Reverse_proxy_server_group.
Operation
Yes
Specify an operation type.
Example: Reload configuration file.
Nginx Installation Path
Yes
Enter the installation path of the Nginx service in the target environment. Example: /usr/local/nginx.
Modify configuration file before execution
No
Select this option for this example.
Nginx Configuration File Path
Yes
Enter the path of the Nginx configuration file on the target host.
Example: /usr/local/nginx/conf/nginx.conf.
Configuration File Backup Path
No
Enter the target path for backing up the original Nginx configuration file on the target host.
Example: /usr/local/nginx/conf/nginx_bak.conf.
Configuration File Content
Yes
Enter content of the new configuration file.
See Example code to bring A-side node offline in the appendix.
- Edit the Download Software Package action and modify the parameters in the following table (Linux is used as an example).
Table 5 Parameter description Parameter
Mandatory
Description
Action Name
Yes
Enter a customized action name displayed in the deployment actions.
Enter 1 to 128 characters. Do not start or end with a space. Use letters, digits, spaces, and these special characters: -_,;:./()
Example: Download_software_package_on_A-side_node.
Source
Yes
Select a source.
Example: Artifact.
Environment
Yes
Select a target environment.
Example: Target service server group_A-side node.
Software Package
Yes
Select a software package to be deployed in CodeArts Artifact.
Download Path
Yes
Enter the path for downloading the software package to the target host.
Example: /usr/local/.
- Edit the Run Shell Commands action and modify the parameters in the following table (Linux is used as an example).
Table 6 Parameter description Parameter
Mandatory
Description
Action Name
Yes
Enter a customized action name displayed in the deployment actions.
Enter 1 to 128 characters. Do not start or end with a space. Use letters, digits, spaces, and these special characters: -_,;:./()
Example: Deploy A-side node.
Environment
Yes
Select a target environment.
Example: Target service server group_A-side node.
Shell Commands
Yes
Enter the commands to be executed.
Example: See Deployment node in the appendix.
- Add the Start/Stop Nginx action and modify the parameters in the following table (Linux is used as an example).
Table 7 Parameter description Parameter
Mandatory
Description
Action Name
Yes
Enter a customized action name displayed in the deployment actions.
Enter 1 to 128 characters. Do not start or end with a space. Use letters, digits, spaces, and these special characters: -_,;:./()
Example: Bring A-side node online to gray environment.
Environment
Yes
Select a target environment.
Example: Reverse_proxy_server_group.
Operation
Yes
Specify an operation type.
Example: Reload configuration file.
Nginx Installation Path
Yes
Enter the installation path of the Nginx service in the target environment.
Example: /usr/local/nginx.
Modify configuration file before execution
No
Select this option for this example.
Nginx Configuration File Path
Yes
Enter the path of the Nginx configuration file on the target host.
Example: /usr/local/nginx/conf/nginx.conf.
Configuration File Backup Path
No
Enter the target path for backing up the original Nginx configuration file on the target host.
Example: /usr/local/nginx/conf/nginx_bak.conf.
Configuration File Content
Yes
Enter content of the new configuration file.
See Example code to bring A-side node online to the gray environment in the appendix.
- Edit the Health Test via URLs action and modify the parameters in the following figure (Linux is used as an example).
Table 8 Parameter description Parameter
Mandatory
Description
Action Name
Yes
Enter a customized action name displayed in the deployment actions.
Enter 1 to 128 characters. Do not start or end with a space. Use letters, digits, spaces, and these special characters: -_,;:./()
Enter a name such as Test_A-side_health.
Environment
Yes
Select a target environment. Example: Target service server group_A-side node.
Retries
Yes
If a service does not start up when the health test reaches the maximum retries, the service fails this test.
Example: 1
Interval (s)
Yes
Interval between two retries, in seconds.
Example: 60
Test Path
Yes
Used for the health test via URLs. You can add multiple URLs.
Example: http://127.0.0.1:3000 (IP address and port number of the application service)
- Add the Start/Stop Nginx action and modify the parameters in the following table (Linux is used as an example).
- Switch to the Environment Management tab page. Create an environment and edit it.
- Click Save. The application is created.

Step 3: Create and Edit Application 2 (Bring_A-side_node_online)
- Create an application.
- Click Create Application. On the Basic Information page, specify the Name, Description, and Execution Resource Pool as required.
- After editing the basic application information, click Next. The deployment template selection page is displayed.
- Select Blank Template and click OK.
- Edit the application.
- Switch to the Environment Management tab page. Create an environment and edit it.
- Click Create Environment, enter the environment name, for example, Reverse_proxy_server_group, select the OS corresponding to each server, and enter the description information.
- Click Save. The environment is created.
- Click Import Host. The system automatically filters all clusters that meet the requirements of the current environment. In the displayed dialog box, select the target host cluster and click
 in the Operation column of the target host to import the host to the environment.
- Switch to the Deployment Actions tab page. Add the following actions and edit them. Add the Start/Stop Nginx action and modify the parameters in the following table (Linux is used as an example).
Table 9 Parameter description Parameter
Mandatory
Description
Action Name
Yes
Enter a customized action name displayed in the deployment actions.
Enter 1 to 128 characters. Do not start or end with a space. Use letters, digits, spaces, and these special characters: -_,;:./()
Example: Bring_A-side_node_online.
Environment
Yes
Select a target environment.
Example: Reverse_proxy_server_group.
Operation
Yes
Specify an operation type.
Example: Reload configuration file.
Nginx Installation Path
Yes
Enter the installation path of the Nginx service in the target environment.
Example: /usr/local/nginx.
Modify configuration file before execution
No
Select this option for this example.
Nginx Configuration File Path
Yes
Enter the path of the Nginx configuration file on the target host.
Example: /usr/local/nginx/conf/nginx.conf.
Configuration File Backup Path
No
Enter the target path for backing up the original Nginx configuration file on the target host.
Example: /usr/local/nginx/conf/nginx_bak.conf.
Configuration File Content
Yes
Enter content of the new configuration file.
See Example code to bring a node online in the appendix.
- Switch to the Environment Management tab page. Create an environment and edit it.
- Click Save. The application is created.

Step 4: Create and Edit Application 3 (Gray_release_of_B-side_node)
- Clone an application.
Click
 and choose Clone.
- Edit the application.
- Switch to the Environment Management tab page. Create an environment and edit it.
- Click Create Environment, enter the environment name, for example, Reverse_proxy_server_group, select the OS corresponding to each server, and enter the description information.
- Click Save. The environment is created.
- Click Import Host. The system automatically filters all clusters that meet the requirements of the current environment. In the displayed dialog box, select the target host cluster and click
 in the Operation column of the target host to import the host to the environment.
 - Repeat the preceding steps to create Target service server group_B-side node and add the B_test server.
- Switch to the Deployment Actions tab page. Add the following actions and edit them.
- Edit the Bring A-side node offline action and modify the parameters as follows (Linux is used as an example).
Table 10 Parameter description Parameter
Mandatory
Description
Action Name
Yes
Enter a customized action name displayed in the deployment actions.
Enter 1 to 128 characters. Do not start or end with a space. Use letters, digits, spaces, and these special characters: -_,;:./()
Example: Bring_B-side_node_offline.
Environment
Yes
Select a target environment.
Example: Reverse_proxy_server_group.
Operation
Yes
Specify an operation type.
Example: Reload configuration file.
Nginx Installation Path
Yes
Enter the installation path of the Nginx service in the target environment.
Example: /usr/local/nginx.
Modify configuration file before execution
No
Select this option for this example.
Nginx Configuration File Path
Yes
Enter the path of the Nginx configuration file on the target host.
Example: /usr/local/nginx/conf/nginx.conf.
Configuration File Backup Path
No
Enter the target path for backing up the original Nginx configuration file on the target host.
Example: /usr/local/nginx/conf/nginx_bak.conf.
Configuration File Content
Yes
Enter content of the new configuration file.
See Example code to bring B-side node offline in the appendix.
- Edit the Download software package on A-side node action and change the parameter values to those listed in the following table (Linux is used as an example).
Table 11 Parameter description Parameter
Mandatory
Description
Action Name
Yes
Enter a customized action name displayed in the deployment actions.
Enter 1 to 128 characters. Do not start or end with a space. Use letters, digits, spaces, and these special characters: -_,;:./()
Example: Download_software_package_on_B-side_node.
Source
Yes
Select a source.
Example: Artifact.
Environment
Yes
Select a target environment.
Example: B_group.
Software Package
Yes
Select a software package to be deployed in CodeArts Artifact.
Download Path
Yes
Enter the path for downloading the software package to the target host.
Example: /usr/local/.
- Edit the Deploy A-side node action and modify the parameters as follows (Linux is used as an example).
Table 12 Parameter description Parameter
Mandatory
Description
Action Name
Yes
Enter a customized action name displayed in the deployment actions.
Enter 1 to 128 characters. Do not start or end with a space. Use letters, digits, spaces, and these special characters: -_,;:./()
Example: Deploy_B-side_node.
Environment
Yes
Select a target environment.
Example: B_group.
Shell Commands
Yes
Enter the commands to be executed.
Example: See Deployment node in the appendix.
- Edit the Bring A-side node online to gray environment action and modify the parameters as follows (Linux is used as an example).
Table 13 Parameter description Parameter
Mandatory
Description
Action Name
Yes
Enter a customized action name displayed in the deployment actions.
Enter 1 to 128 characters. Do not start or end with a space. Use letters, digits, spaces, and these special characters: -_,;:./()
Example: Bring_B-side_node_online_to_gray_environment.
Environment
Yes
Select a target environment. Example: Reverse_proxy_server_group.
Operation
Yes
Specify an operation type. Example: Reload configuration file.
Nginx Installation Path
Yes
Enter the installation path of the Nginx service in the target environment. Example: /usr/local/nginx.
Modify configuration file before execution
No
Select this option for this example.
Nginx Configuration File Path
Yes
Enter the path of the Nginx configuration file on the target host.
Example: /usr/local/nginx/conf/nginx.conf.
Configuration File Backup Path
No
Enter the target path for backing up the original Nginx configuration file on the target host.
Example: /usr/local/nginx/conf/nginx_bak.conf.
Configuration File Content
Yes
Enter content of the new configuration file.
See Example code to bring B-side node online to the gray environment in the appendix.
- Edit the Test A-side health action and modify the parameters as follows (Linux is used as an example).
Table 14 Parameter description Parameter
Mandatory
Description
Action Name
Yes
Enter a customized action name displayed in the deployment actions.
Enter 1 to 128 characters. Do not start or end with a space. Use letters, digits, spaces, and these special characters: -_,;:./()
Enter a name such as Test_B-side_health.
Environment
Yes
Select a target environment. Example: B_group.
Retries
Yes
If a service does not start up when the health test reaches the maximum retries, the service fails this test.
Example: 1
Interval (s)
Yes
Interval between two retries, in seconds.
Example: 60
Test Path
Yes
Used for the health test via URLs. You can add multiple URLs.
Example: http://127.0.0.1:3000 (IP address and port number of the application service)
- Edit the Bring A-side node offline action and modify the parameters as follows (Linux is used as an example).
- Switch to the Environment Management tab page. Create an environment and edit it.
- Click Save. The application is created.

Step 5: Create and Editing Application 4 (Bring_B-side_node_online)
- Clone an application.
Click
 and choose Clone.
 - Edit the application.
- Switch to the Environment Management tab page. Create an environment and edit it.
- Click Create Environment, enter the environment name, for example, Reverse_proxy_server_group, select the OS corresponding to each server, and enter the description information.
- Click Save. The environment is created.
- Click Import Host. The system automatically filters all clusters that meet the requirements of the current environment. In the displayed dialog box, select the target host cluster and click
 in the Operation column of the target host to import the host to the environment.
- Switch to the Deployment Actions tab page. Add the following actions and edit them. Edit the Bring A-side node online action and modify the parameters as follows (Linux is used as an example):
Table 15 Parameter description Parameter
Mandatory
Description
Action Name
Yes
Enter a customized action name displayed in the deployment actions.
Enter 1 to 128 characters. Do not start or end with a space. Use letters, digits, spaces, and these special characters: -_,;:./()
Example: Bring_B-side_node_online.
Environment
Yes
Select a target environment. Example: Reverse_proxy_server_group.
Operation
Yes
Specify an operation type. Example: Reload configuration file.
Nginx Installation Path
Yes
Enter the installation path of the Nginx service in the target environment. Example: /usr/local/nginx.
Modify configuration file before execution
No
Select this option for this example.
Nginx Configuration File Path
Yes
Enter the path of the Nginx configuration file on the target host. Example: /usr/local/nginx/conf/nginx.conf.
Configuration File Backup Path
No
Enter the target path for backing up the original Nginx configuration file on the target host. Example: /usr/local/nginx/conf/nginx_bak.conf.
Configuration File Content
Yes
Enter content of the new configuration file. See Example code to bring a node online in the appendix.
- Switch to the Environment Management tab page. Create an environment and edit it.
- Click Save. The application is created.

Step 6: Create and Edit a Pipeline
- Create a pipeline.
- Choose CICD > Pipeline.
- Click Create Pipeline, select a Project, enter a Name, set Pipeline Source to None, and click Next.
- Select Blank Template and click OK.

- Edit job 1 (Gray release of A-side node) in the pipeline stage.
- Click
 . In the displayed dialog box, set the parameters as follows and click Confirm.
 Table 16 Parameter description Parameter
Mandatory
Description
Stage Name
Yes
Example: Gray_release_of A-side_node.
Always Run
Yes
Select No.
- Click
 . In the displayed dialog box, set Entry Type to Automatic and click OK.
 - Click New Job, click the Deploy tab, select Deploy, and click Add. In the displayed dialog box, set the parameters as follows and click OK.
Table 17 Parameter description Parameter
Mandatory
Description
Name
Yes
Example: Gray_release_of A-side_node.
Select Task
Yes
Select Gray_release_of A-side_node.
Build Task
No
Leave it blank for this example.
- Click
- Create and edit job 2 (Bring_A-side_node_online) in the pipeline stage.
- Click
 and
and  . In the displayed dialog box, set the parameters as follows and click Confirm.
 Table 18 Parameter description Parameter
Mandatory
Description
Name
Yes
Example: Bring_A-side_node_online.
Always Run
Yes
Select No.
- Click
 . In the displayed dialog box, set Entry Type to Automatic and click OK.
 - Click New Job. In the window that is displayed, click the Normal tab, select Manual Review and click Add, set the parameters as follows, and click OK.
Table 19 Parameter description Parameter
Mandatory
Description
Name
Yes
Example: Gray_release_of A-side_node.
Reviewer
Yes
Select the service verification personnel.
Review Mode
Yes
Select Review by all.
Timeout Processing
Yes
Select Review failed and pipeline terminated.
Review Duration
Yes
Example: 4 hours.
Description
No
Enter the review description.
- Click
 , click the Deploy tab, select Deploy, and click Add. In the displayed dialog box, set the parameters as follows and click OK.
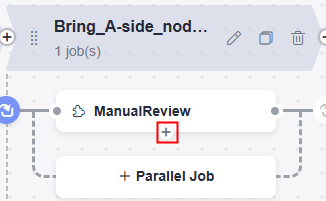
Table 20 Parameter description Parameter
Mandatory
Description
Name
Yes
Example: Bring_A-side_node_online.
Select Task
Yes
Select Bring_A-side_node_online.
Build Task
No
Leave it blank for this example.
- Click
- Edit job 3 (Gray_release_of_B-side_node) in the pipeline stage.
- Click
 and
and  . In the displayed dialog box, set the parameters as follows and click Confirm.
 Table 21 Parameter description Parameter
Mandatory
Description
Name
Yes
Example: Gray_release_of_B-side_node.
Always Run
Yes
Select No.
- Click
 . In the displayed dialog box, set Entry Type to Automatic and click OK.
 - Click New Job, click the Deploy tab, select Deploy, and click Add. In the displayed dialog box, set the parameters as follows and click OK.
Table 22 Parameter description Parameter
Mandatory
Description
Name
Yes
Example: Gray_release_of_B-side_node.
Select Task
Yes
Select Gray_release_of_B-side_node.
Build Task
No
Leave it blank for this example.
- Click
- Create and edit job 4 (Bring_B-side_node_online) in the pipeline stage.
- Click
 and
and  . In the displayed dialog box, set the parameters as follows and click Confirm.
 Table 23 Parameter description Parameter
Mandatory
Description
Name
Yes
Example: Bring_B-side_node_online.
Always Run
Yes
Select No.
- Click
 . In the displayed dialog box, set Entry Type to Automatic and click OK.
 - Click New Job. In the window that is displayed, click the Normal tab, select Manual Review and click Add, set the parameters as follows, and click OK.
Table 24 Parameter description Parameter
Mandatory
Description
Name
Yes
Example: Gray_verification_of_B-side_node.
Reviewer
Yes
Select the service verification personnel.
Review Mode
Yes
Select Review by all.
Timeout Processing
Yes
Select Review failed and pipeline terminated.
Review Duration
Yes
Example: 4 hours.
Description
No
Enter the review description.
- Click
 , click the Deploy tab, select Deploy, and click Add. In the displayed dialog box, set the parameters as follows and click OK.
 Table 25 Parameter description Parameter
Mandatory
Description
Name
Yes
Example: Bring_B-side_node_online.
Select Task
Yes
Select Bring_B-side_node_online.
Build Task
No
Leave it blank for this example.
- Click
- After the preceding operations are complete, click Save and Run to run pipeline jobs.

Step 7: Run Pipeline and Manually Perform Gray Verification to Check Whether A-Side and B-Side Nodes Are Normal
When CodeArts Pipeline is executed to bring node A or B online, pipeline execution is suspended. Gray users need to manually verify whether the servers on node A or B in the gray environment are working. Continue to run the pipeline if the servers are working.
Gray users can run the curl command to check whether the gray environment is normal.
curl http://IP address of the reverse proxy server:Nginx port
To check whether the gray users have accessed the target gray environment server, log in to the reverse proxy server and go to the path logs/access.log to check logs. If the following command output is displayed, the status is normal.

Appendixes
- Example code to bring A-side node offline
worker_processes 1; events { worker_connections 1024; } http { include mime.types; default_type application/octet-stream; log_format main '$time_local|$remote_addr[$remote_port]|$request|$request_method|$content_length|' '$content_type|$http_referer|$host|$http_x_forwarded_for|' '$http_true_client_ip|$server_name|$request_uri|$server_addr|$server_port|' '$status|$request_time|$upstream_addr|$upstream_response_time|$cookie_domain_tag'; access_log logs/access.log main; #Access log: storage path and log level error_log logs/error.log; #Error log: storage path sendfile on; keepalive_timeout 65; upstream portal { #Enter the IP address and application service port number of host A. #server X.X.X.X:X; #Bring node A offline. #Enter the IP address and application service port number of host B. server X.X.X.X:X; } upstream portal_test { #Enter the IP address and application service port number of host A. server X.X.X.X:X; #Enter the IP address and application service port number of host B. server X.X.X.X:X; } server { listen XXX;#Enter the Nginx port number. server_name localhost; location / { set $backend portal; set $test portal_test; #Enter the IP address of the gray verification host. #if ( $remote_addr ~* "X.X.X.X") { # set $backend $test; #} proxy_pass https://$backend; } error_page 500 502 503 504 /50x.html; location = /50x.html { root html; } } } - Deployment node
#Obtain the application process ID. pid=`ps -ef | grep app_name | grep -v grep | awk '{print $2}'` if [ -z "$pid" ]; then echo "[app_name pid is not exist.]" else echo "app_name pid: $pid " #End the process. kill -15 $pid fi #Restart the application. You can run the deployment script or command to start the application. #Method 1: Run the deployment script to start the application. # sh startup.sh #Method 2: Run the command to start the application. nohup is recommended for backend startup. # nohup java -jar /usr/local/app/SpringbootDemo.jar & - Example code to bring A-side node online to the gray environment
worker_processes 1; events { worker_connections 1024; } http { include mime.types; default_type application/octet-stream; log_format main '$time_local|$remote_addr[$remote_port]|$request|$request_method|$content_length|' '$content_type|$http_referer|$host|$http_x_forwarded_for|' '$http_true_client_ip|$server_name|$request_uri|$server_addr|$server_port|' '$status|$request_time|$upstream_addr|$upstream_response_time|$cookie_domain_tag'; access_log logs/access.log main; #Access log: storage path and log level error_log logs/error.log; #Error log: storage path sendfile on; keepalive_timeout 65; upstream portal { #Enter the IP address and application service port number of host A. #server X.X.X.X:X; #Bring node A offline. #Enter the IP address and application service port number of host B. server X.X.X.X:X; } upstream portal_test { #Enter the IP address and application service port number of host A. server X.X.X.X:X; #Gray release of node A #Enter the IP address and application service port number of host B. #server X.X.X.X:X; } server { listen XXX;#Enter the Nginx port number. server_name localhost; location / { set $backend portal; set $test portal_test; #Enter the IP address of the gray verification host. if ( $remote_addr ~* "X.X.X.X") { set $backend $test; } proxy_pass https://$backend; } error_page 500 502 503 504 /50x.html; location = /50x.html { root html; } } } - Example code to bring B-side node offline
worker_processes 1; events { worker_connections 1024; } http { include mime.types; default_type application/octet-stream; log_format main '$time_local|$remote_addr[$remote_port]|$request|$request_method|$content_length|' '$content_type|$http_referer|$host|$http_x_forwarded_for|' '$http_true_client_ip|$server_name|$request_uri|$server_addr|$server_port|' '$status|$request_time|$upstream_addr|$upstream_response_time|$cookie_domain_tag'; access_log logs/access.log main; #Access log: storage path and log level error_log logs/error.log; #Error log: storage path sendfile on; keepalive_timeout 65; upstream portal { #Enter the IP address and application service port number of host A. server X.X.X.X:X; #Enter the IP address and application service port number of host B. #server X.X.X.X:X; #Bring node B offline. } upstream portal_test { #Enter the IP address and application service port number of host A. server X.X.X.X:X; #Enter the IP address and application service port number of host B. server X.X.X.X:X; } server { listen XXX;#Enter the Nginx port number. server_name localhost; location / { set $backend portal; set $test portal_test; #Enter the IP address of the gray verification host. #if ( $remote_addr ~* "X.X.X.X") { # set $backend $test; #} proxy_pass https://$backend; } error_page 500 502 503 504 /50x.html; location = /50x.html { root html; } } } - Example code to bring B-side node online to the gray environment
worker_processes 1; events { worker_connections 1024; } http { include mime.types; default_type application/octet-stream; log_format main '$time_local|$remote_addr[$remote_port]|$request|$request_method|$content_length|' '$content_type|$http_referer|$host|$http_x_forwarded_for|' '$http_true_client_ip|$server_name|$request_uri|$server_addr|$server_port|' '$status|$request_time|$upstream_addr|$upstream_response_time|$cookie_domain_tag'; access_log logs/access.log main; #Access log: storage path and log level error_log logs/error.log; #Error log: storage path sendfile on; keepalive_timeout 65; upstream portal { #Enter the IP address and application service port number of host A. server X.X.X.X:X; #Enter the IP address and application service port number of host B. #server X.X.X.X:X; #Bring node B offline. } upstream portal_test { #Enter the IP address and application service port number of host A. #server X.X.X.X:X; #Enter the IP address and application service port number of host B. server X.X.X.X:X; #Gray release of node B } server { listen XXX;#Enter the Nginx port number. server_name localhost; location / { set $backend portal; set $test portal_test; #Enter the IP address of the gray verification host. if ( $remote_addr ~* "X.X.X.X") { set $backend $test; } proxy_pass https://$backend; } error_page 500 502 503 504 /50x.html; location = /50x.html { root html; } } } - Example code to bring a node online
worker_processes  1;
events {
    worker_connections  1024;
}
http {
    include       mime.types;
    default_type  application/octet-stream;
    log_format main  '$time_local|$remote_addr[$remote_port]|$request|$request_method|$content_length|'
        '$content_type|$http_referer|$host|$http_x_forwarded_for|'
        '$http_true_client_ip|$server_name|$request_uri|$server_addr|$server_port|'
        '$status|$request_time|$upstream_addr|$upstream_response_time|$cookie_domain_tag';
    access_log logs/access.log main; #Access log: storage path and log level
    error_log logs/error.log; #Error log: storage path
    sendfile        on;
    keepalive_timeout  65;
    upstream portal {
        #Enter the IP address and application service port number of host A.
        server X.X.X.X:X;
        #Enter the IP address and application service port number of host B.
        server X.X.X.X:X;
    }
    upstream portal_test {
        #Enter the IP address and application service port number of host A.
        server X.X.X.X:X;
        #Enter the IP address and application service port number of host B.
        server X.X.X.X:X;
    }

    server {
        listen       XXX;#Enter the Nginx port number.
        server_name  localhost;

        location / {
            set $backend portal;
            set $test portal_test;
            #Enter the IP address of the gray verification host.
            #if ( $remote_addr ~* "X.X.X.X") {
            #    set $backend $test;
            #}
            proxy_pass https://$backend;
        }
        error_page   500 502 503 504  /50x.html;
        location = /50x.html {
            root   html;
        }
   }
}
Feedback
Was this page helpful?
Provide feedbackThank you very much for your feedback. We will continue working to improve the documentation.See the reply and handling status in My Cloud VOC.
For any further questions, feel free to contact us through the chatbot.
Chatbot


