
Running a Build Task on a Custom Environment (Built-in Executors, GUI)
Scenario
You may need to extend CodeArts Build with custom environments in the following scenarios:
- CodeArts Build uses Java 1.8 by default, but you may require Java 21.
- Your build may require your enterprise's dedicated tools that are not supported by CodeArts Build.
In this practice, you customize a build environment to run a build task.
Requirements
- You have created an organization named hwstaff_codeci_gray in SWR.
- You have permissions for CodeArts Artifact.
- You have permissions for CodeArts Repo.
Procedure
| Step | Description |
|---|---|
| Create a project. | |
| Create the code file used for your build. | |
| Create an image as the custom environment. | |
| Create, configure, and run a build task. | |
| Check the build logs and result files to verify the build results. |
Creating a Project
- Log in to the Huawei Cloud console with your Huawei Cloud account.
- Click
 in the upper left corner and choose from the service list.
 - Click Access Service. The homepage of CodeArts is displayed.
- Click Create Project, and select the Scrum template.
- Set the project name to build-bestpractice, and leave the other parameters as default.
- Click OK to access the project.
Creating a CodeArts Repo Repository
- In the navigation pane, choose .
- On the displayed page, click New Repository. Select Template, and click Next.
- On the template selection page, select the Java Maven Demo template and click Next.
- On the displayed page, set Repository Name to custom_env_repo, and leave the other parameters as default. Click OK. The details page of the new code repository is displayed.
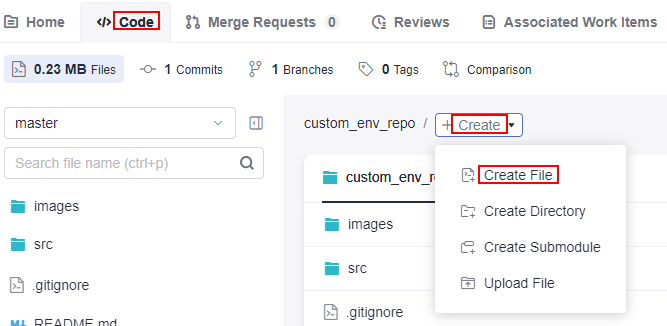
- In the root directory of the code repository, choose Create and select Create File from the drop-down list. Figure 1 Creating a file
- Name the file Dockerfile, copy the following code to the file, and click Submit.
# Use the official Ubuntu image as the base image.
FROM ubuntu:latest
# Install wget.
RUN apt-get update && apt-get install -y wget
# 1. Create a directory for JDK installation.
# 2. Download the JDK installation package of the specified version to the temporary directory.
# 3. Decompress the JDK package into the designated directory using the tar command.
# 4. Delete the JDK package after extraction.
RUN mkdir /usr/local/jdk \
  && wget "https://download.oracle.com/java/17/archive/jdk-17.0.12_linux-x64_bin.tar.gz" -P /tmp/jdk \
  && tar -zxf /tmp/jdk/jdk-17.0.12_linux-x64_bin.tar.gz -C /usr/local/jdk --strip-components 1 \
  && rm -rf /tmp/jdk/jdk-17.0.12_linux-x64_bin.tar.gz
# 1. Create a directory for Maven installation.
# 2. Download the Maven installation package of the specified version to the temporary directory.
# 3. Decompress the Maven package into the designated directory using tar command.
# 4. Delete the Maven package after extraction.
RUN mkdir /usr/local/maven \
  && wget "https://dlcdn.apache.org/maven/maven-3/3.9.8/binaries/apache-maven-3.9.8-bin.tar.gz" -P /tmp/maven \
  && tar -zxf /tmp/maven/apache-maven-3.9.8-bin.tar.gz -C /usr/local/maven --strip-components 1 \
  && rm -rf /tmp/maven/apache-maven-3.9.8-bin.tar.gz
# Configure the environment variables for running Java and Maven.
ENV JAVA_HOME /usr/local/jdk
ENV MAVEN_HOME /usr/local/maven
ENV PATH $PATH:$JAVA_HOME/bin:$MAVEN_HOME/bin
# Verify the installations by checking the version information.
RUN java -version && mvn -v
Dockerfile contains the following instructions for building a container image as your custom environment.
Table 2 Dockerfile instructions Instruction
Description
FROM
It specifies the base image (the latest official Ubuntu image is used in this practice) and must be the first instruction.
RUN
They are run when docker build creates an image. In this practice, RUN instructions install three tools: wget, Java Development Kit (JDK) 17, and Maven 3.9.8. After environment variables are set, these instructions run commands to verify the installation of proper JDK and Maven versions.
ENV
They set environment variables. In this practice, ENV instructions set environment variables for JDK and Maven and add their directory to the PATH environment variable so that users can conveniently run JDK and Maven by invoking shortcut commands.
Creating an Image as the Custom Build Environment
- In the navigation pane, choose .
- Click Create Task. On the displayed Basic Information page, set parameters according to Table 3. Then, click Next.
Table 3 Basic information Parameter
Description
Name
Assign a custom name to the build task, for example, custom_env_task.
Code Source
Select the code source from which code will be pulled for your build. In this practice, select Repo.
Repository
Select custom_env_repo, the code repository created in Creating a CodeArts Repo Repository.
Default Branch
Keep the default value master.
- Select Blank Template and click OK to create the build task. The Build Actions page is displayed.
- On the Build Actions page, click the GUI tab and click Add Build Actions. Figure 2 Adding a build action

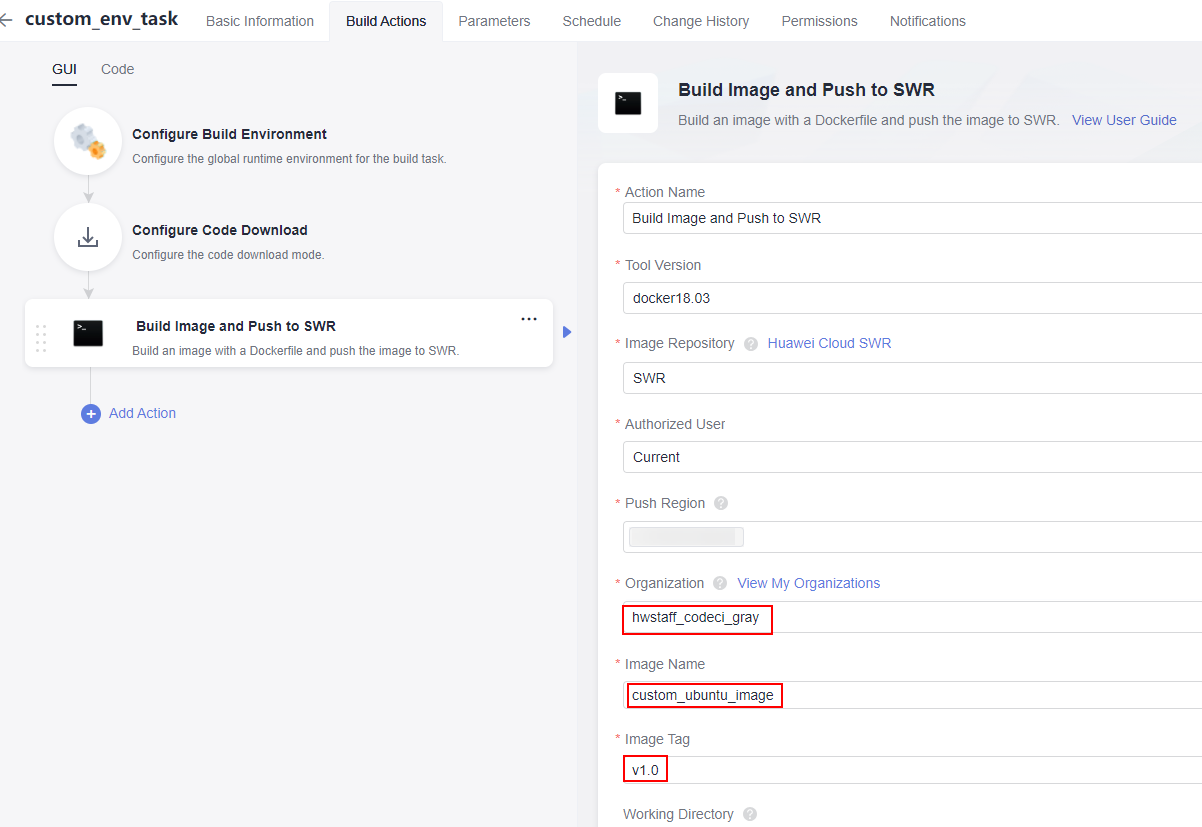
- In the right pane, click the Container related tab. Hover over action Build Image and Push to SWR and click Add on the card. Set the parameters according to Figure 3. Expand the Organization drop-down list and select hwstaff_codeci_gray created to meet the requirements. Type custom_ubuntu_image in the Image Name text box, and v1.0 in Image Tag. Leave the other parameters as default.
- Click Save and Execute in the upper right corner. In the displayed dialog box, click OK. The build task execution page is displayed.
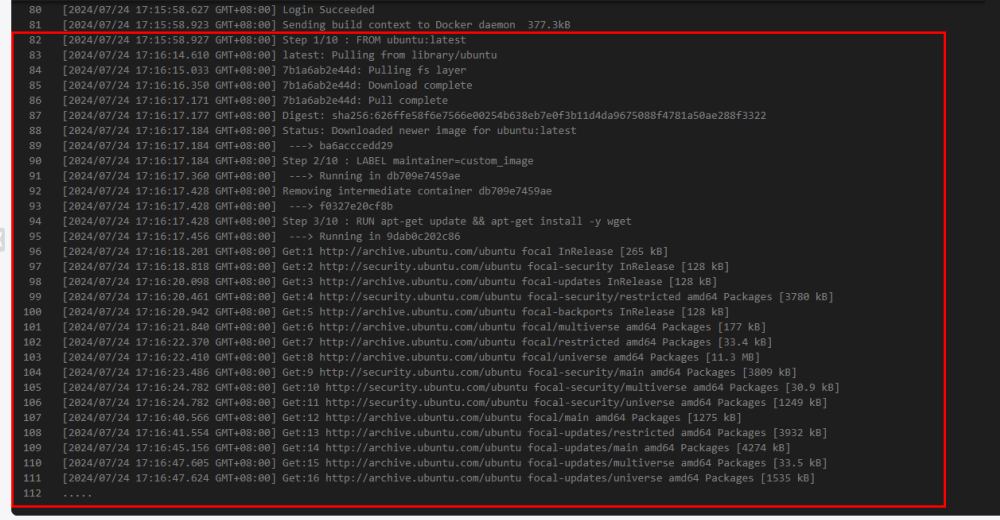
- On the Actions tab, check that the console displays the logs of the build task as it runs. The Build Logs window automatically scrolls down to show new entries. As shown in Figure 4, the console prints logs of creating an image from the Dockerfile stored in the code repository.
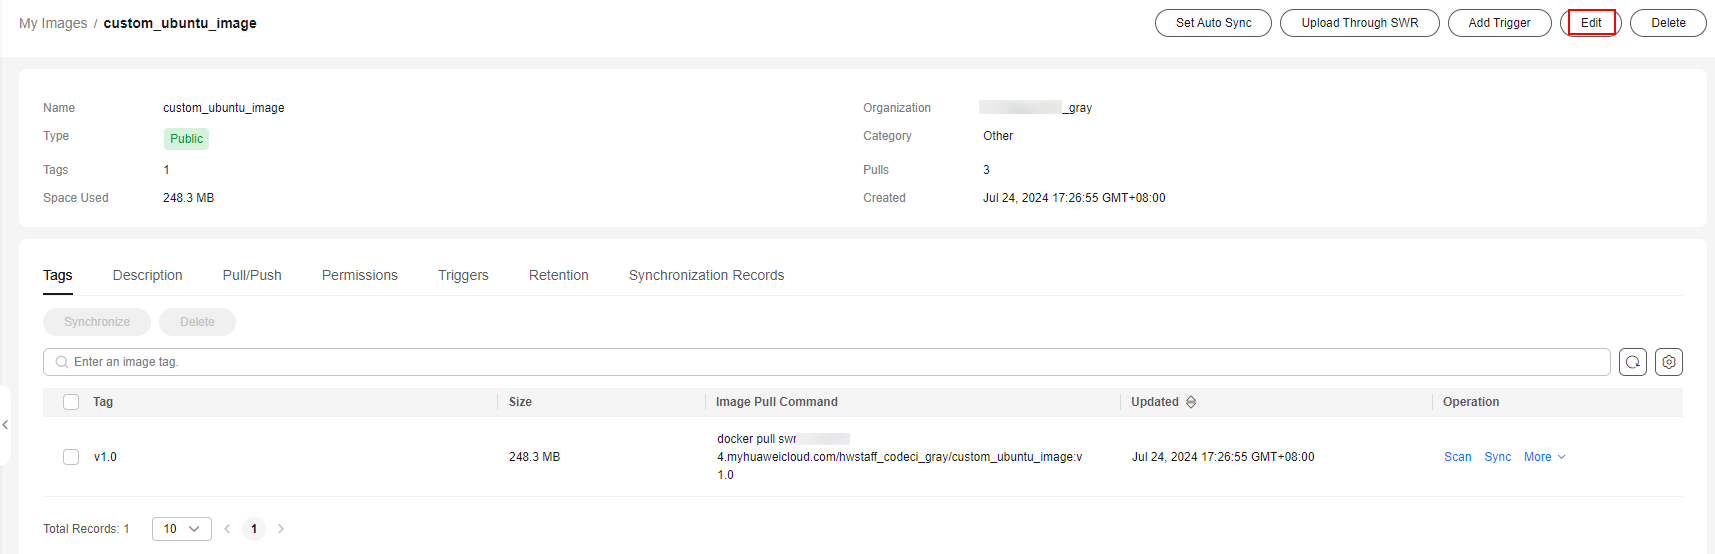
- After the build task is successfully run, go to the SWR console. Choose My Images and click the Private Images tab (which is displayed by default). From there, click the name of the image (custom_ubuntu_image) created in 5 to access its details page.
- On the image details page, click Edit. In the displayed dialog box, set Type to Public and click OK. Figure 5 Image details
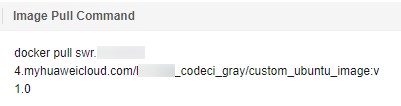
- In the Image Pull Command column, copy and save the complete image name following docker pull (swr.{regionID}.myhuaweicloud.com/hwstaff_codeci_gray/custom_ubuntu_image:v1.0 is copied in this practice) for future use. {regionID} indicates the ID of the current region. Figure 6 Complete image name
Creating and Running a Build Task
- Access CodeArts Build. Click Create Task. On the displayed Basic Information page, set the following parameters. Leave the other parameters as default.
- Name: Assign a custom name to the build task, for example, custom_env_build_task.
- Code Source: Select the code source from which code will be pulled for this build. In this practice, select Repo.
- Repository: Select custom_env_repo, the code repository created in Creating a CodeArts Repo Repository.
- Click Next. On the displayed page, select Blank Template. Click OK. The Build Actions page is displayed.
- On the Build Actions page, click the GUI tab and click Add Build Actions.
- In the right pane, click the Container related tab. Hover over action Use SWR Public Image and click Add on the card. Set the parameters according to Figure 3. In the Image Address text box, enter the complete image name swr.{regionID}.myhuaweicloud.com/hwstaff_codeci_gray/custom_ubuntu_image:v1.0 saved in 10. Copy the following sample code to the Commands window. Leave the other parameters as default.
java -version  # Show the JDK version contained in the current image.
mvn -v    # Show the Maven version contained in the current image.
mvn package -Dmaven.test.skip=true -U -e -X -B  # Run the maven build command.
Figure 7 Configuring the action of using the SWR public image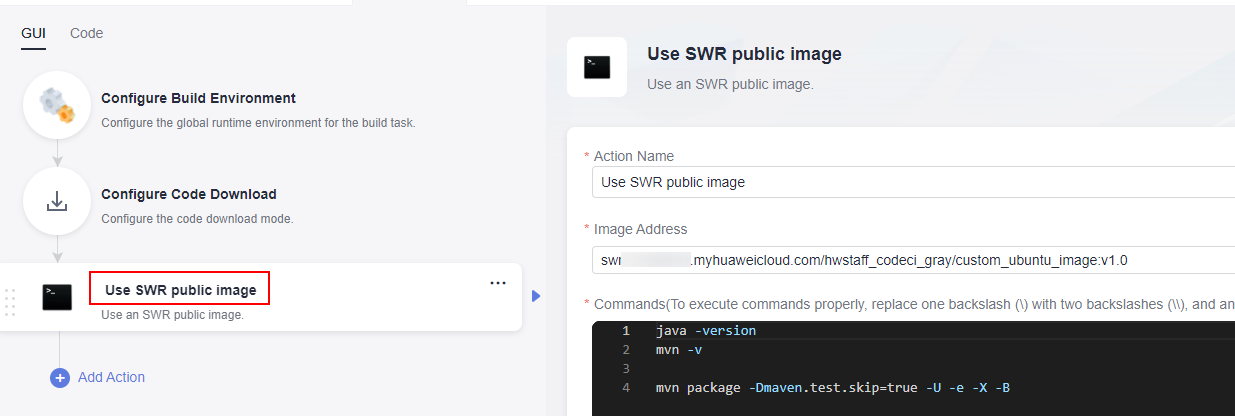
- Click Add Action and add the Upload to Release Repo action. In the Package Location text box, enter **/target/*.?ar. Leave the other parameters as default.
- Click Save and Execute in the upper right corner. In the displayed dialog box, click OK. The build task execution page is displayed.
Viewing the Build Results
- After the build task is successfully run, go to the Actions tab page. On the top of the Build Logs window, click View More to scroll the window up and reveal the preceding logs. If you see Status: Downloaded newer image for swr.{regionID}.myhuaweicloud.com/hwstaff_codeci_gray/custom_ubuntu_image:v1.0 in the logs, the current build environment is created using the custom image.
- Click the Upload to Release Repo action on the left. The right-hand log window will display information about the upload of the build product to the release repo.
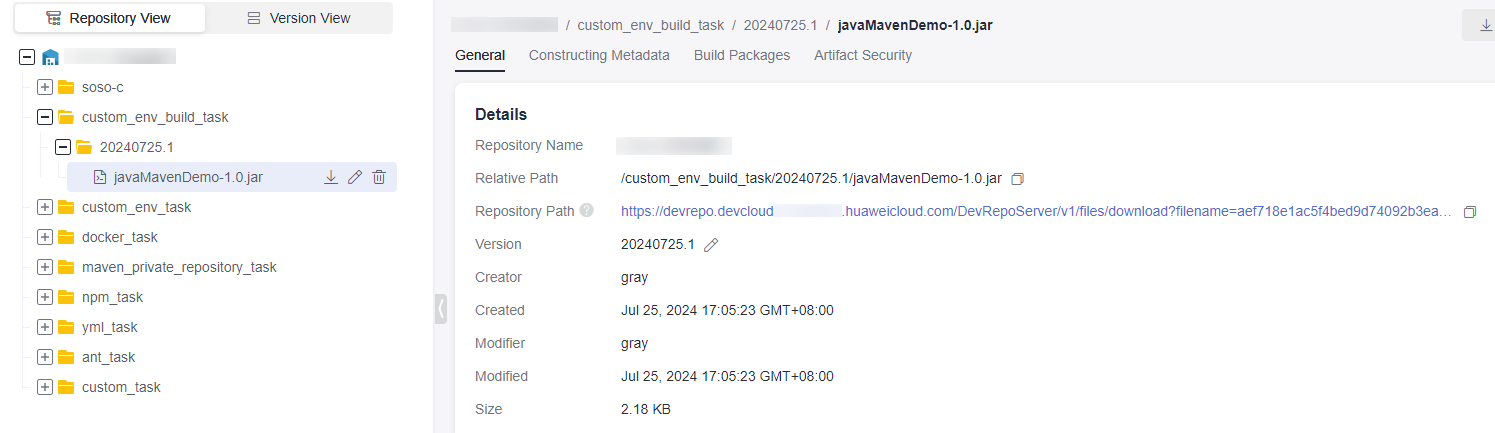
- In the navigation pane, choose . On the displayed page, find the folder that shares the same name as the build task, as shown in Figure 8. The software package can be found within this folder.
Related Operations
- For more details about image creation, see Building an Image and Pushing It to SWR.
- For Maven build questions, see Maven Build FAQs.
- For image questions, see Image FAQs.
Feedback
Was this page helpful?
Provide feedbackThank you very much for your feedback. We will continue working to improve the documentation.See the reply and handling status in My Cloud VOC.
For any further questions, feel free to contact us through the chatbot.
Chatbot


