
Submitting an MRS Flink Job on DataArts Studio
Flink jobs are distributed data processing tasks developed based on the Flink framework. They are mainly used for stream data processing and stateful computations. Flink is a unified framework for computations over unbounded (streaming) and bounded (batch) data. Flink, designed with stream processing as its core, handles batch processing (finite data streams) as a special case of stream processing. Flink features real-time data processing with high throughput, low latency, and exactly-once semantics. It is widely used in real-time monitoring, log analysis, and financial transactions.
DataArts Studio is a one-stop data processing platform with convenient and efficient Flink job submission capabilities. It helps enterprises quickly build real-time data applications to monetize data in real time.
Figure 1 shows the process of submitting an MRS Flink job on DataArts Studio.

|
Phase |
Description |
|---|---|
|
Preparing an MRS cluster |
DataArts Studio can interconnect with big data components such as MRS Hive, HDFS, Flink, and ClickHouse. Select these components based on service requirements when creating an MRS cluster. |
|
Configuring DataArts Studio |
The VPC, subnet, and security group of the DataArts Studio instance must be the same as those of the MRS cluster. |
|
Developing jobs or applications |
DataArts Factory is a one-stop collaborative big data development platform that provides fully managed big data scheduling capabilities. You can develop SQL script jobs or Jar jobs based on service requirements. |
|
Running a job and checking the result |
You can check the job running result. |
This section illustrates how to develop an MRS Flink SQL job.
Step 1: Preparing an MRS Cluster
- Go to the Buy Cluster page.
- Click the Quick Config tab and set parameters.
Table 2 shows the key parameters for creating an MRS cluster with Kerberos authentication enabled and the Flink and Kafka components.
For details about how to create an MRS cluster, see Quickly Buying an MRS Cluster.
Table 2 Creating an MRS cluster Parameter
Description
Example Value
Billing Mode
Billing mode of the cluster
Pay-per-use
Cluster Name
Name of the MRS cluster
MRS_demo
Cluster Type
Type of the cluster
Custom
Version Type
Version type of the MRS cluster
LTS
Cluster Version
Version of the MRS cluster
MRS 3.2.0-LTS.1
Component
Components in the MRS cluster
Hadoop Analysis Cluster
AZ
AZ. Select the AZ associated with the cluster's region.
AZ1
VPC
VPC of the cluster. You can click View VPC to view the name and ID. If no VPC is available, create one.
vpc-01
Subnet
Subnet of the cluster. You can access the VPC management console to view the names and IDs of existing subnets in the VPC. If no subnet is available under the VPC, click Create Subnet to create one.
subnet-01
Kerberos Authentication
Whether to enable Kerberos authentication for accessing the MRS cluster
Enabled
Password
Password of the admin user of the Manager and the root user of the ECS node in the cluster.
Test!@12345.
Enterprise Project
Enterprise project to which the cluster belongs.
default
- Click Buy Now and wait until the MRS cluster is created.
- After the cluster status changes to Running, click the cluster name to go to the cluster details page.
- On the Dashboard page, click Synchronize on the right side of IAM User Sync to synchronize IAM users.
Perform this step only when Kerberos authentication is enabled for the cluster.
After IAM user synchronization, wait for five minutes before submitting a job. For details about IAM user synchronization, see Synchronizing IAM Users to MRS.
- After the cluster status changes to Running, click the cluster name. On the cluster details page, click Access Manager. Then, select an EIP, and the Manager login page is displayed.
For details about how to access MRS Manager, see Accessing MRS Manager.
- Log in to Manager as user admin using the password set in Step 2.
- Choose Cluster > Services > Kafka and check the IP address and port number of the Kafka broker instance.
- On the Instances page, check the IP address of the node where the Kafka broker instance is located.
- On the Configurations page, search for the parameter sasl.port to check the port number.
- You can also search for bootstrap.servers on the Configurations page to check the broker IP address, for example, 192.168.42.95:21007,192.168.67.136:21007,192.168.67.142:21007.
- Choose System > Permission > Domain and Mutual Trust. Check and record the value of Local Domain, which is the system domain name of the current MRS cluster.
Step 2: Configuring DataArts Studio
- Log in to the DataArts Studio console and buy a DataArts Studio instance.
The VPC, subnet, and security group of the DataArts Studio instance must be the same as those of the MRS cluster.
For details about how to purchase a DataArts Studio instance, see Buying a DataArts Studio Instance.
- On the DataArts Studio instance overview page, click the Workspaces tab and then Create Workspace to create a workspace.
By default, a workspace named default is available in the DataArts Studio instance and you are assigned the administrator role. Alternatively, you can create a workspace on the Workspaces page.
For details about how to create a workspace, see Creating a Workspace in Simple Mode.
Step 3: Developing a Flink SQL Job
- On the DataArts Studio instance overview page, click DataArts Factory.
- On the Develop Job page, right-click the Jobs directory and select Create Job from the shortcut menu.
Table 3 DataArts Studio job parameters Parameter
Description
Example Value
Job Name
The job name. Enter 1 to 128 characters. Only letters, digits, hyphens (-), underscores (_), and periods (.) are supported.
job_test
Job Type
- Batch processing: Data is processed periodically in batches based on the scheduling plan, which is used in scenarios with low real-time requirements. This type of job is a pipeline that consists of one or more nodes and is scheduled as a whole. It can only run for a period of time.
- Real-time processing: Data is processed in real time, which is used in scenarios with high real-time requirements. This type of job covers services of one or more nodes. You can configure scheduling policies for each node, and jobs started on a node can keep running. In this type of job, lines with arrows represent only service relationships, rather than task execution processes or data flows.
Real-time processing
Mode
- Pipeline: You drag and drop one or more nodes to the canvas to create a job. The nodes are executed in sequence like a pipeline.
- Single task: The job contains only one node.
Select Single task > Flink SQL
Select Directory
The directory where the job resides. The root directory is selected by default.
/Jobs/
Owner
Owner of the job
-
Priority
Priority of the job. The value can be High, Medium, or Low.
Job priority is a label attribute of the job and does not affect the scheduling and execution sequence of the job.
High
Agency
An agency that is used to interact jobs with other services.
If an agency has been configured for the workspace, the jobs in the workspace use the agency by default.
-
Log Path
Path of the OBS bucket for storing job logs
obs://test/dataarts-log/
Job Description
Job description
-
Figure 2 Creating a Flink SQL job
- Enter SQL statements in the editor to meet requirements.
The following Flink SQL statement creates a real-time data pipeline to transfer data from a Kafka topic test_source to another Kafka topic test_sink.
You can modify the Kafka Broker connection information and MRS cluster domain name based on the site requirements.
--Define the source table.
CREATE TABLE KafkaSource (
  `user_id` VARCHAR,
  `user_name` VARCHAR,
  `age` INT
) WITH (
  'connector' = 'kafka',--The target Kafka connector
  'topic' = 'test_source',--Name of the Kafka topic to be consumed
  'properties.bootstrap.servers' = 'IP address and port number of the Kafka broker instance',--IP address of the Kafka cluster
  'properties.group.id' = 'testGroup',-- Kafka consumer group ID, which is used to record the consumption offset.
  'scan.startup.mode' = 'latest-offset',--Consume data from the latest offset upon startup.
  'format' = 'csv',--Data format
  'properties.sasl.kerberos.service.name' = 'kafka',--Kerberos service name. This parameter is not required for clusters with Kerberos authentication disabled.
  'properties.security.protocol' = 'SASL_PLAINTEXT',-- Network security protocol type. This parameter is not required for clusters with Kerberos authentication disabled.
  'properties.kerberos.domain.name' = 'hadoop.MRS cluster domain name'--Kerberos domain name. This parameter is not required for clusters with Kerberos authentication disabled.
);
--Define the target table.
CREATE TABLE KafkaSink(
  `user_id` VARCHAR,
  `user_name` VARCHAR,
  `age` INT
) WITH (
  'connector' = 'kafka',
  'topic' = 'test_sink',
  'properties.bootstrap.servers' = 'IP address and port number of the Kafka broker instance',
  'scan.startup.mode' = 'latest-offset',
  'value.format' = 'csv',
  'properties.sasl.kerberos.service.name' = 'kafka',--Kerberos service name. This parameter is not required for clusters with Kerberos authentication disabled.
  'properties.security.protocol' = 'SASL_PLAINTEXT',-- Network security protocol type. This parameter is not required for clusters with Kerberos authentication disabled.
  'properties.kerberos.domain.name' = 'hadoop.MRS cluster domain name'--Kerberos domain name. This parameter is not required for clusters with Kerberos authentication disabled.
);
--Transfer data from the source table to the target table.
Insert into
  KafkaSink
select * from KafkaSource;
- Click Basic Info in the upper right corner of the development area and configure job running parameters.
Table 4 Flink SQL job running parameters Parameter
Description
Example Value
Flink Job Name
User-defined Flink job name.
Enter 1 to 64 characters. Only letters, digits, hyphens (-), underscores (_), and periods (.) are supported.
job_test
Cluster or Data Connection
Name of the MRS cluster for running the Flink job.
Currently, MRS 3.2.0-LTS.1 or later supports single-task Flink SQL.
Cluster > MRS_demo
Program Parameter
Parameters used to optimize resource usage (threads, memory, and vCPUs) and improve job performance
Flink job running parameters can be configured based on the execution program and cluster resources. If no parameter is configured, the default value of the cluster is used.
Common Flink job running parameters are as follows:
- -ytm: specifies the memory size of each TaskManager, in MB or GB (g for short), for example, -ytm 2g.
TaskManager is a process of executing specific computing jobs. Its memory must be adjusted based on job complexity (such as the state size and parallelism). Insufficient memory will cause out of memory (OOM) errors.
- -yjm: specifies the memory size of JobManager, in MB or GB (g for short).
JobManager is responsible for task scheduling and checkpoint management. The memory required by JobManager is usually less than that required by TaskManager, but the memory must be sufficient (at least 1 GB).
- -yn: specifies the maximum number of TaskManagers that can be started in the YARN cluster.
The number of TaskManagers determines the job concurrency capability. Configure the number of TaskManagers based on cluster resources and job concurrency to avoid resource waste or insufficiency.
- -ys: specifies the number of slots of each TaskManager.
A slot is the unit of resource allocation in Flink. One slot corresponds to one concurrent job.
- -ynm: specifies the application name (customized identifier) of a job in the YARN cluster.
This parameter is used to distinguish multiple jobs on ResourceManager UI. Use a clear name (with specific service scenarios and time).
- -c: specifies the entry class of a Flink job, that is, the fully qualified name of the class that contains the main method.
The class name is related to the running program. You must specify a correct class name. Otherwise, the job cannot be started.
- -s: specifies the savepoint from where a job is restored.
A savepoint is a manually triggered global status snapshot. It is used to restore the status during job upgrade or restart. You need to run the flink savepoint command to generate a savepoint in advance.
When querying the checkpoint list, enter parameter -s and click the parameter value text box. The parameter value will be automatically displayed.
- -yD: dynamically sets Flink configuration parameters (which will overwrite the default configurations in flink-conf.yaml).
Flink configuration items (such as the checkpoint interval and status backend) can be adjusted temporarily. You do not need to modify the global configuration file.
Example:
To make a Flink checkpoint take effect, configure the following two parameters:
- Interval for triggering checkpoints
- Number of reserved checkpoints
For more information about Flink job parameters, see https://nightlies.apache.org/flink/flink-docs-release-1.17/.
-
Flink Job Parameter
Key parameter for program execution. The parameter is specified by the function in the user program. Multiple parameters are separated by spaces.
-
Rerun Policy
Rerun policy of a Flink job.
- Rerun from the previous checkpoint: When a job fails and is automatically or manually restarted, Flink automatically restores the job status from the latest checkpoint.
- Rerun the job: A failed job will be restarted.
Rerun the job
Input Data Path
Data input path. You can select an HDFS or OBS path.
-
Output Data Path
Data output path. You can select an HDFS or OBS path.
-
Job Status Polling Interval (s)
Interval for querying job running status. The system checks the job status at the configured interval.
30
Maximum Wait Time
Timeout interval for running a job. If the job is not complete within the timeout interval and retry is enabled, the job will be executed again.
6 hours
Retry upon Failure
If retry is configured for a job node and the timeout interval is configured, the job will be retried after it times out on the node.
Retry upon Timeout is displayed only when Retry upon Failure is set to Yes.
No
- -ytm: specifies the memory size of each TaskManager, in MB or GB (g for short), for example, -ytm 2g.
Step 4: Running a Job
- Click Submit above the canvas to submit the current job.
- Click Start above the canvas and wait until the Flink job is started successfully.
Choose Monitoring > Job Monitoring to check the running status of the current job.
Figure 3 Executing a Flink SQL job
If the job fails to be started, click View Log to check the job running details.
- If Kerberos authentication has been enabled for the current cluster, log in to the MRS Manager and create a user with the Kafka operation permissions. For details, see Creating an MRS Cluster User.
In this example, create a human-machine user testuser, and associate the user with user group supergroup and role System_administrator.
- Install an MRS cluster client.
For details, see Installing an MRS Cluster Client.
The MRS cluster comes with a client installed for job submission by default, which can also be used directly. In MRS 3.x or later, the default client installation path is /opt/Bigdata/client on the Master node. In versions earlier than MRS 3.x, the default client installation path is /opt/client on the Master node.
- Run the following command to go to the client installation directory:
cd /opt/Bigdata/client
Run the following command to load the environment variables:
source bigdata_env
If Kerberos authentication is enabled for the current cluster, run the following command to authenticate the user. If Kerberos authentication is disabled for the current cluster, you do not need to run the kinit command.
kinit testuser
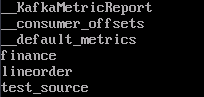
- Run the following command to check whether a Kafka topic has been generated:
cd /opt/client/Kafka/kafka/bin
./kafka-topics.sh --list --bootstrap-server IP address and port number of the Kafka broker instance --command-config /opt/client/Kafka/kafka/config/client.propertiesThe test_source topic has been created.
- Write data to the test_source topic.
sh kafka-console-producer.sh --broker-list IP address and port number of the Kafka broker instance --topic test_source --producer.config /opt/client/Kafka/kafka/config/producer.properties - Open a new client connection window and run the following command to check whether the sink table receives data:
sh kafka-console-consumer.sh --topic test_sink --bootstrap-server IP address and port number of the Kafka Broker instance --consumer.config /opt/client/Kafka/kafka/config/consumer.properties - In the window opened in Step 7, send a message.
1,clw,33
The consumer window opened in Step 8 shows that the message has been written.

Helpful Links
- For more data development practices on DataArts Studio, see DataArts Studio Advanced Data Development Practices.
- For more information about how to develop jobs on DataArts Studio, see Job Development Process.
- For more MRS application development sample programs, see MRS Developer Guide.
Feedback
Was this page helpful?
Provide feedbackThank you very much for your feedback. We will continue working to improve the documentation.See the reply and handling status in My Cloud VOC.
For any further questions, feel free to contact us through the chatbot.
Chatbot


