
Help Center/
Huawei Cloud Astro Canvas/
User Guide/
Data Center/
Connector Management/
Creating a Connector
Updated on 2025-03-24 GMT+08:00
Creating a Connector
Scenario
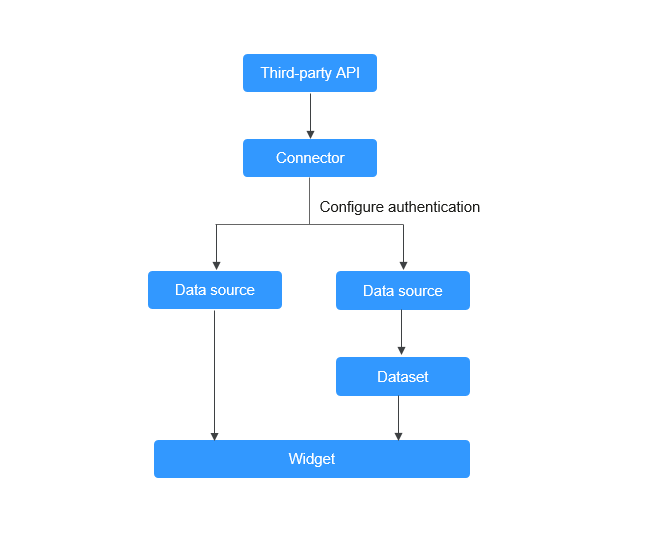
You can create an HTTP connector to introduce third-party APIs as the data source of a widget.
Figure 1 Introducing connectors to widgets
Creating a Connector
- Log in to Huawei Cloud Astro Canvas by referring to Logging In to Huawei Cloud Astro Canvas.
- Choose Data Center from the main menu.
- In the navigation pane, choose Connectors.
- On the Connectors page, click Create.
- Configure basic information.
Figure 2 Basic information (no identity authentication)
 Figure 3 Basic information (AK/SK)
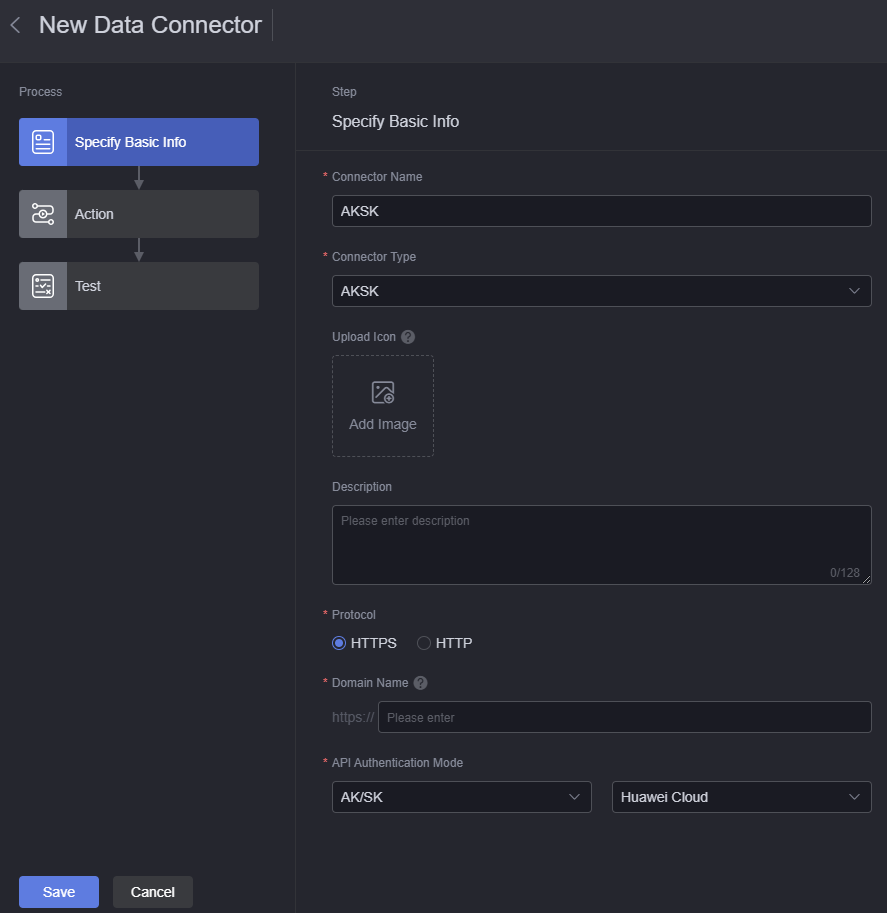 Figure 4 Basic information (API key)
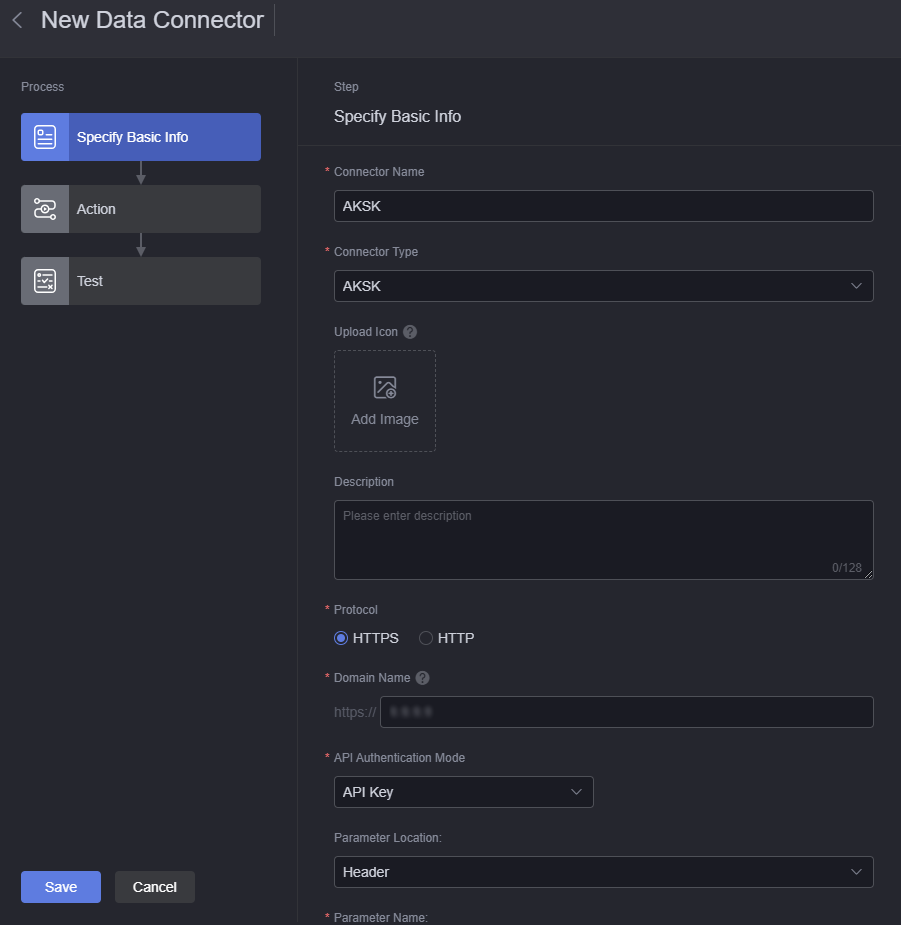 Figure 5 API authentication
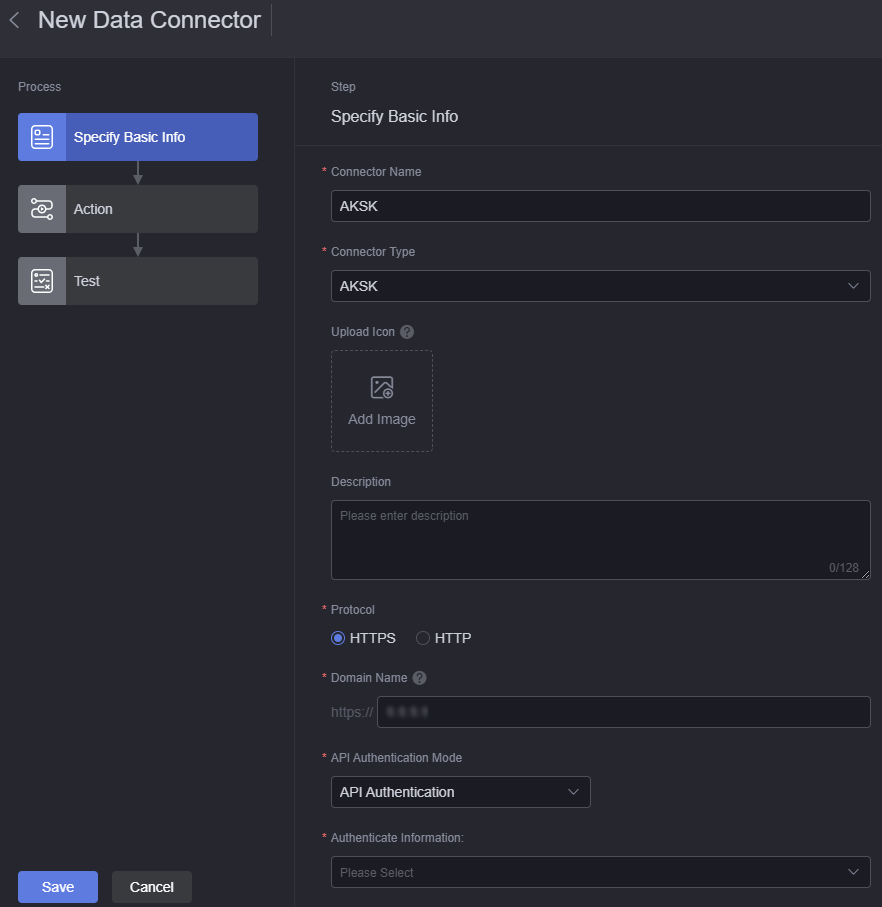
- Connector Name: The name can contain 1 to 32 characters, including letters, digits, and underscores (_).
- Connector Type: Select a connector type to facilitate connector management. Click Add Connector Type to customize the connector type.
- Upload Icon: Click + to set the icon displayed for the connector.
- Description: Description of the connector to be created. You can set this parameter as required.
- Protocol: Set the connector protocol.
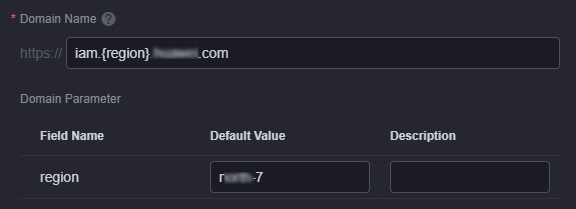
- Domain Name: The requested host address. Do not include the http:// or https:// protocol header, and omit the trailing slash (/).
- Domain Parameter: Configure host parameters, including the Name, Default Value, and Description. These parameters are displayed only when the {Name} parameter is configured in the host during connector configuration.
Figure 6 Configuring host parameters
- API Authentication Mode: Set the API authentication mode, which can be API authentication, AK/SK, API key, or none.
- API authentication: After entering the API authentication information, choose a response parameter from the connector to use as the value for the connector's request parameter.
- No authentication refers to an API that is directly called without any authentication information. It is usually used to access some public APIs.
- AK/SK: Access keys are used for API authentication. Access keys are identity credentials for accessing the system. An AK is a unique identifier used in conjunction with an SK to sign requests cryptographically, ensuring that the requests are secret, complete, and correct.
- An API key is used for authorization. The authentication information can be attached to a Query or Header.
- Authenticate Information: This parameter is displayed only when API Authentication Mode is set to API authentication. Click Add Authenticate Information and set authentication information.
Figure 7 Adding authentication information
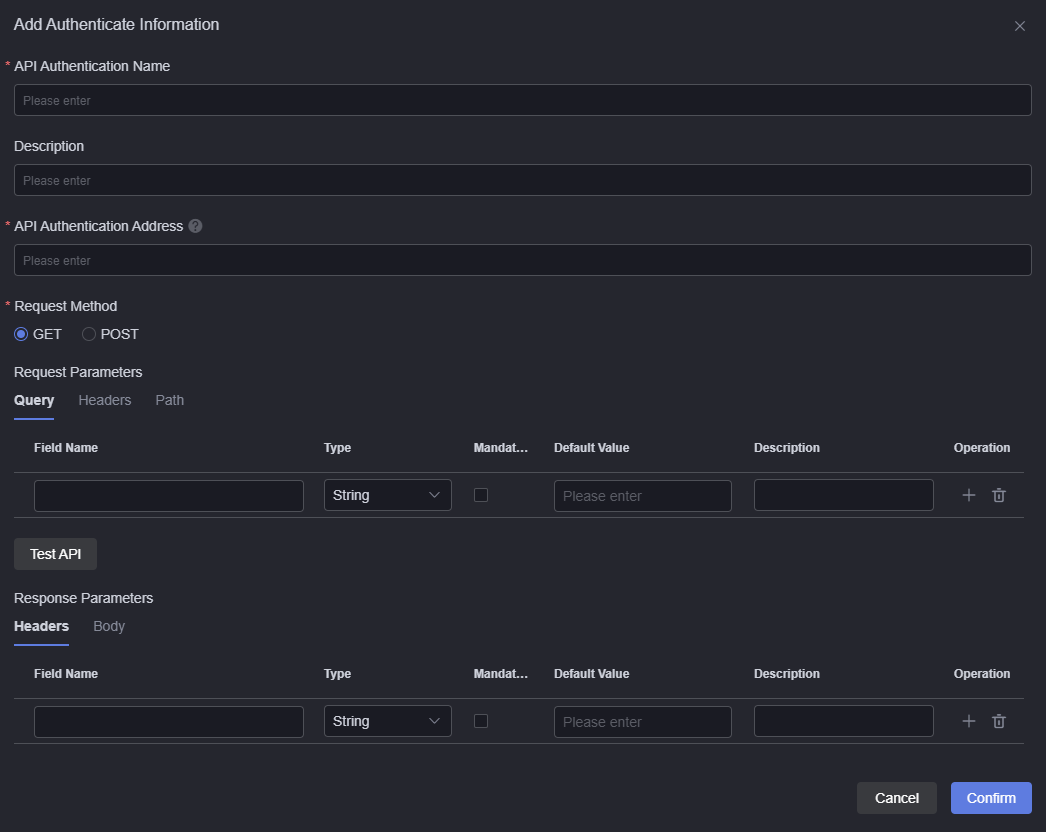
- API Authentication Name: The name can contain 1 to 32 characters, including letters, digits, and underscores (_).
- Description: API authentication description.
- API Authentication Address: You can use {xx} to insert variable xx into the request path parameters.
- Request Method: GET and POST are supported.
- Request Parameters: API request parameters. After the setting is successful, click Test API to debug the API.
- Response Parameters: Define the output parameters of the API. These parameters can be used as values for connector request parameters.
- Parameter Location: Add the authentication information to Query or Headers. Set this parameter as required. This parameter is displayed only when API Authentication Mode is set to API Key.
- Parameter Name: Name of the API key. Set this parameter as required. This parameter is displayed only when API Authentication Mode is set to API Key.
- Add actions.
Figure 8 Adding actions
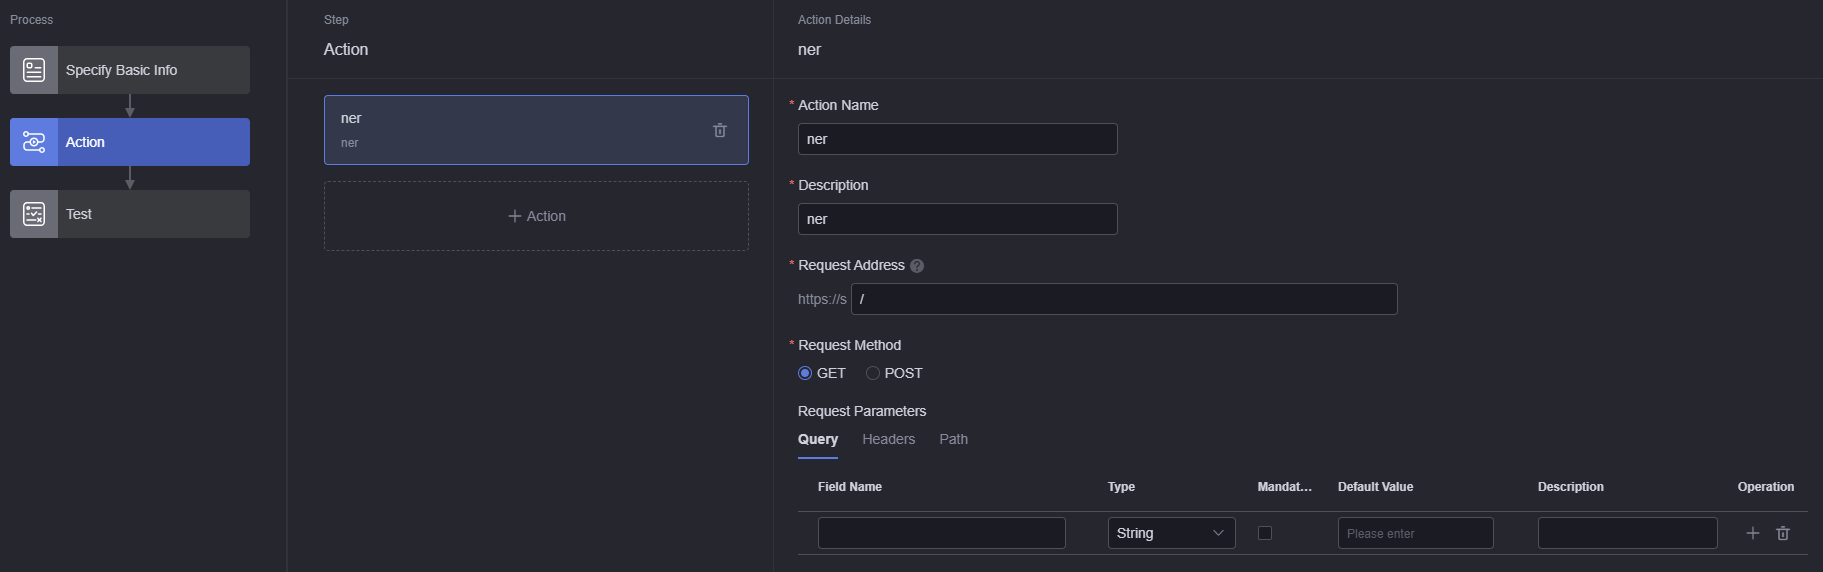 Figure 9 Assigning the returned parameter in the authentication information to the Header parameter in the connector
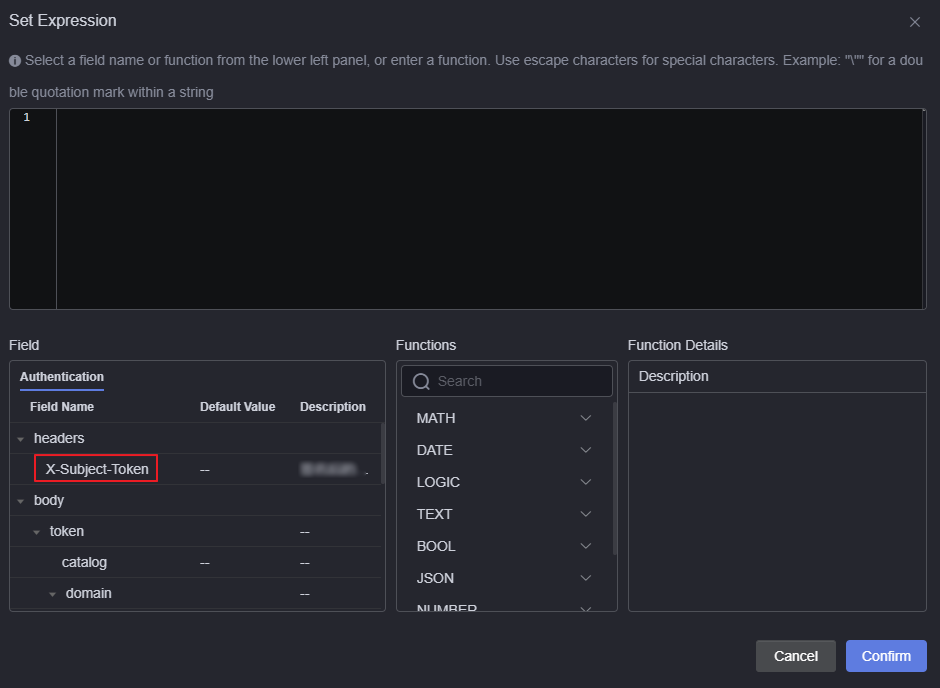
- Action Name: The name can contain 1 to 32 characters, including letters, digits, and underscores (_).
- Description: Description of the new action.
- Request Address: Enter {xx} to use the variable xx in the request path parameters.
- Request Method: Select a request method based on the API type.
- Request Parameters
- Query: Request parameters that appear after the ? in a URL.
- Headers: Parameter required by the header, which supports the string or expression type. If the field type is an expression type, click the default value to assign the parameter returned in the authentication information of 5 to the request parameter of the connector.
- Body: If the request type is POST, you can set the parameter with the default value or based on requirements.
- Path: Indicates variables with braces configured in the URL. For example, {pathParam}, where pathParam is used as a variable name.
- Response Parameters: Set returned parameters. In Body, you can paste a JSON segment of the expected result. The field format can be parsed when the JSON segment is used.
- After the authentication information is set, click Test to test whether the API is valid.
- After testing the API, click Save.
Parent topic: Connector Management
Feedback
Was this page helpful?
Provide feedbackThank you very much for your feedback. We will continue working to improve the documentation.See the reply and handling status in My Cloud VOC.
The system is busy. Please try again later.
For any further questions, feel free to contact us through the chatbot.
Chatbot


