Manually Deploying Hadoop (Linux)
Overview
This section guides you through the manual deployment of Hadoop on a Linux ECS. Apache Hadoop is a Java-based, distributed open source software framework. It allows users to develop distributed applications using high-speed computation and storage provided by clusters without knowing the underlying details of the distributed system. The core components of Hadoop include Hadoop Distributed File System (HDFS) and MapReduce.
- HDFS: a distributed file system that can store and read application data in a distributed way.
- MapReduce: a distributed computing framework. It allocates computing tasks to servers in a cluster, splits the computing tasks (in Map and Reduce) and performs distributed computing based on JobTracker.
For more information, visit the Apache Hadoop official website.
Prerequisites
- You have purchased an ECS and bound an EIP to it.
- The rule listed in the following table has been added to the security group which the target ECS belongs to. For details, see Adding a Security Group Rule.
Table 1 Security group rules Direction
Priority
Action
Type
Protocol & Port
Source
Inbound
1
Allow
IPv4
TCP: 8088
0.0.0.0/0
Inbound
1
Allow
IPv4
TCP: 9870
0.0.0.0/0
Process
The process of deploying Hadoop on a Linux ECS is as follows:
Procedure
- Log in to the ECS.
- Install JDK.
- Run the following command to download the JDK 1.8 installation package:
wget https://download.java.net/openjdk/jdk8u41/ri/openjdk-8u41-b04-linux-x64-14_jan_2020.tar.gz
- Run the following command to decompress the downloaded JDK 1.8 installation package:
tar -zxvf openjdk-8u41-b04-linux-x64-14_jan_2020.tar.gz
- Run the following command to move and rename the JDK installation package.
In this example, the JDK installation package is renamed java8. You can use other names as required.
sudo mv java-se-8u41-ri/ /usr/java8
- Run the following commands to configure Java environment variables.
If you rename the JDK installation package, replace java8 in the following commands with the actual name.
sudo sh -c "echo 'export JAVA_HOME=/usr/java8' >> /etc/profile"
sudo sh -c 'echo "export PATH=\$PATH:\$JAVA_HOME/bin" >> /etc/profile'
source /etc/profile
- Run the following command to verify the installation:
java -version
The JDK package has been installed if the following information is displayed.

- Run the following command to download the JDK 1.8 installation package:
- Configure SSH password-free login.
- Run the following command to create a public key and a private key:
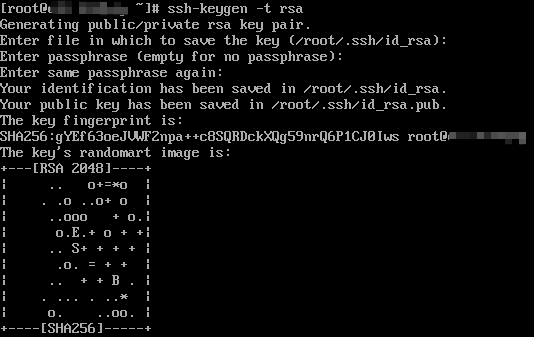
ssh-keygen -t rsa
Press Enter for three times. If the following information is displayed, the public and private keys have been created.

- Run the following commands to add the public key to the authorized_keys file:
cd .ssh
cat id_rsa.pub >> authorized_keys
- Run the following command to create a public key and a private key:
- Install Hadoop.
- Run the following commands to download the Hadoop installation package.
Version 3.2.4 is used as an example.
cd
wget https://archive.apache.org/dist/hadoop/common/hadoop-3.2.4/hadoop-3.2.4.tar.gz
- Run the following commands to decompress the Hadoop installation package to the /opt directory:
sudo tar -zxvf hadoop-3.2.4.tar.gz -C /opt/
sudo mv /opt/hadoop-3.2.4 /opt/hadoop
- Run the following commands to configure environment variables:
sudo sh -c "echo 'export HADOOP_HOME=/opt/hadoop' >> /etc/profile"
sudo sh -c "echo 'export PATH=\$PATH:/opt/hadoop/bin' >> /etc/profile"
sudo sh -c "echo 'export PATH=\$PATH:/opt/hadoop/sbin' >> /etc/profile"
source /etc/profile
- Run the following commands to change the paths of JAVA_HOME in the yarn-env.sh and hadoop-env.sh configuration files:
sudo sh -c 'echo "export JAVA_HOME=/usr/java8" >> /opt/hadoop/etc/hadoop/yarn-env.sh'
sudo sh -c 'echo "export JAVA_HOME=/usr/java8" >> /opt/hadoop/etc/hadoop/hadoop-env.sh'
- Run the following command to verify the installation:
hadoop version
Hadoop has been installed if the following information is displayed.

- Run the following commands to download the Hadoop installation package.
- Configure Hadoop.
- Modify the Hadoop configuration file core-site.xml.
- Run the following command to go to the editing page:
vim /opt/hadoop/etc/hadoop/core-site.xml
- Press i to enter insert mode.
- Add the following content between <configuration> and </configuration> in the configuration file:
<property> <name>hadoop.tmp.dir</name> <value>file:/opt/hadoop/tmp</value> <description>location to store temporary files</description> </property> <property> <name>fs.defaultFS</name> <value>hdfs://localhost:9000</value> </property> - Press Esc to exit insert mode.
- Run the following command to save the settings and exit:
:wq
- Run the following command to go to the editing page:
- Modify the Hadoop configuration file hdfs-site.xml.
- Run the following command to go to the editing page:
vim /opt/hadoop/etc/hadoop/hdfs-site.xml
- Press i to enter insert mode.
- Add the following content between <configuration> and </configuration> in the configuration file:
<property> <name>dfs.replication</name> <value>1</value> </property> <property> <name>dfs.namenode.name.dir</name> <value>file:/opt/hadoop/tmp/dfs/name</value> </property> <property> <name>dfs.datanode.data.dir</name> <value>file:/opt/hadoop/tmp/dfs/data</value> </property> - Press Esc to exit insert mode.
- Run the following command to save the settings and exit:
:wq
- Run the following command to go to the editing page:
- Modify the Hadoop configuration file core-site.xml.
- Start Hadoop.
- Run the following command to initialize NameNode:
hadoop namenode -format
- Run the following commands in sequence to start Hadoop:

- For system security and stability, do not start Hadoop as user root. Otherwise, Hadoop cannot be started due to permission issues. You can start the Hadoop service as a non-root user, for example, ecs-user.
- If you need to start Hadoop as user root, you must understand the Hadoop permission control and related risks first and modify the configuration file. For details, see Related Operations.
- Starting Hadoop as user root poses serious security risks, such as data breach, malware gaining system-wide privileges more easily, and unexpected permission issues.
start-dfs.sh
Information similar to the following is displayed.

start-yarn.sh
Information similar to the following is displayed.

- Run the following command to check the processes that are started:
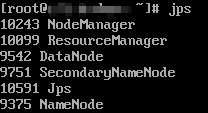
jps
The processes that have been started are as follows:

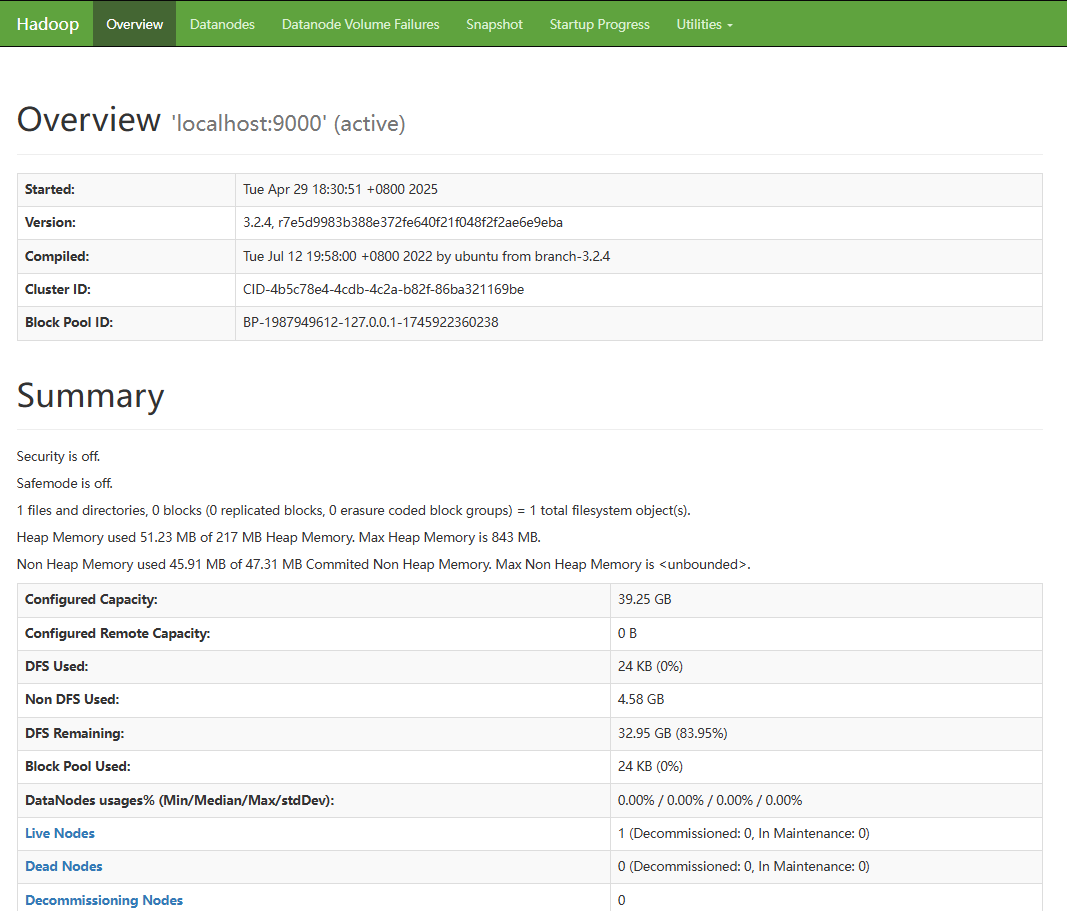
- Open a browser and access http://EIP of the server:8088 and http://EIP of the server:9870, respectively.
If information similar to the following is displayed, the Hadoop environment has been deployed.


- Run the following command to initialize NameNode:
Related Operations
If you need to start Hadoop as user root, do as follows to modify the configuration file:
- Run the following commands to edit the start-dfs.sh and stop-dfs.sh files:
vim /opt/hadoop/sbin/start-dfs.sh
vim /opt/hadoop/sbin/stop-dfs.sh
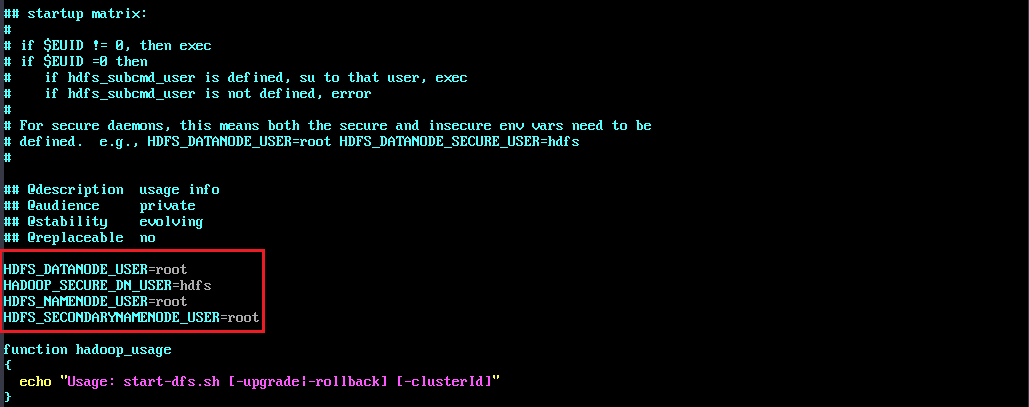
- Add the following parameter configuration to the file:
HDFS_DATANODE_USER=root
HADOOP_SECURE_DN_USER=hdfs
HDFS_NAMENODE_USER=root
HDFS_SECONDARYNAMENODE_USER=root

- Run the following commands to edit the start-yarn.sh and stop-yarn.sh files respectively to add the required parameter configuration:
vim /opt/hadoop/sbin/start-yarn.sh
vim /opt/hadoop/sbin/stop-yarn.sh
- Add the following parameter configuration to the file:
YARN_RESOURCEMANAGER_USER=root
HADOOP_SECURE_DN_USER=yarn
YARN_NODEMANAGER_USER=root
Feedback
Was this page helpful?
Provide feedbackThank you very much for your feedback. We will continue working to improve the documentation.See the reply and handling status in My Cloud VOC.
For any further questions, feel free to contact us through the chatbot.
Chatbot


