Procedure
Restrictions
The official Nginx image is executed by the Nginx user. You need to set the file mask (umask) of the mounted file to 0022 to ensure that the Nginx user has the permission to read the mounted file. For details, see Configuring a Cloud Storage Mount Path.
Creating and Deploying a Nginx Component
- Log in to CAE.
- Choose Components.
- Select the created application and environment from the drop-down lists in the upper part of the page, and click Create Component.
- Configure the component by referring to Table 1.
Table 1 Basic component information Parameter
Description
Component
Enter a component name. In this practice, enter nginx.
Version
Enter a component version.
In this practice, enter 1.0.0.
Specifications
Select instance specifications, for example, 0.5 Core and 1 GiB.
Instances
Set it to 1.
Code Source
Choose Images > Open Source Images > nginx. In this practice, select Nginx alpine-perl.
Figure 1 Creating a component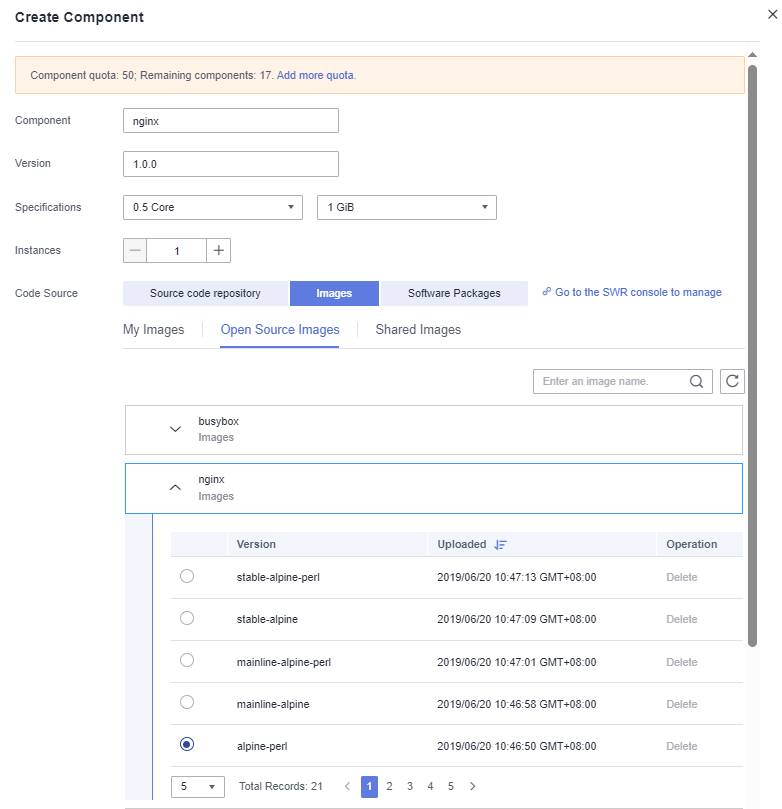
- Click Configure Component.
- On the Component Configurations page, click Edit in the Access Mode module to configure the Nginx component.
- On the Load Balancing tab, click Add Load Balancer and set parameters.
- Load Balancer: Select Built-in load balancer.
- Health Check: Use the default value Start.
- Access Control: Select Allow all IP addresses.
- Protocol: Select TCP.
- Listening Port: Enter 80.
- Access Port: Enter an access port. In this practice, enter 14632.
Figure 2 Adding external network access for load balancing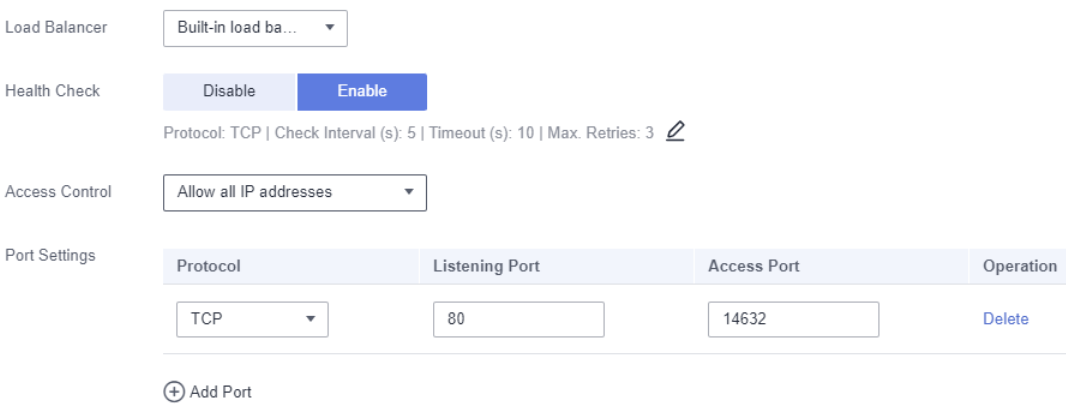
- Click OK.
- On the Component Configurations page, click Set and Deploy Component for the Nginx component access mode to take effect.
- After deployment, choose Components.
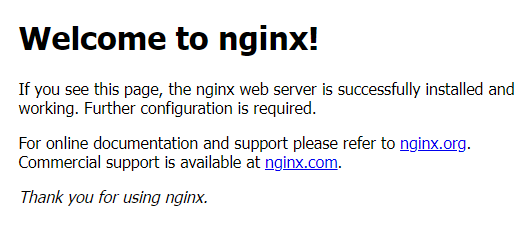
Click the IP address in the Access Address column of the component to view the Nginx static web page.Figure 3 Accessing a static page
Cloud Storage Authorizations
- Choose System Settings > Cloud Storage Authorizations and click Edit. The Authorized Cloud Storage dialog box is displayed.
- Click Authorize Parallel File System.
Figure 4 Authorize Parallel File System

- Click Create Parallel File System and enter a name, for example, test-nginx.
- Click OK.
- Select the created parallel file system. You can also enter a keyword in the search box above the list to filter data.
- Click Authorize.
In the displayed Access Key Authorization dialog box, enter the AK and SK, and click Confirm.
You can click Obtain Access Key to obtain the AK/SK. For details, see Access Keys.
If your environment was created before April 20, 2024, skip this step.
- If the message "Authorization successful" is displayed, you can view the authorized parallel file system on the Authorized Cloud Storage page.
Uploading a File
- Log in to OBS.
- Choose Parallel File Systems and click file system test-nginx to go to the parallel system page.
Figure 5 Parallel file systems

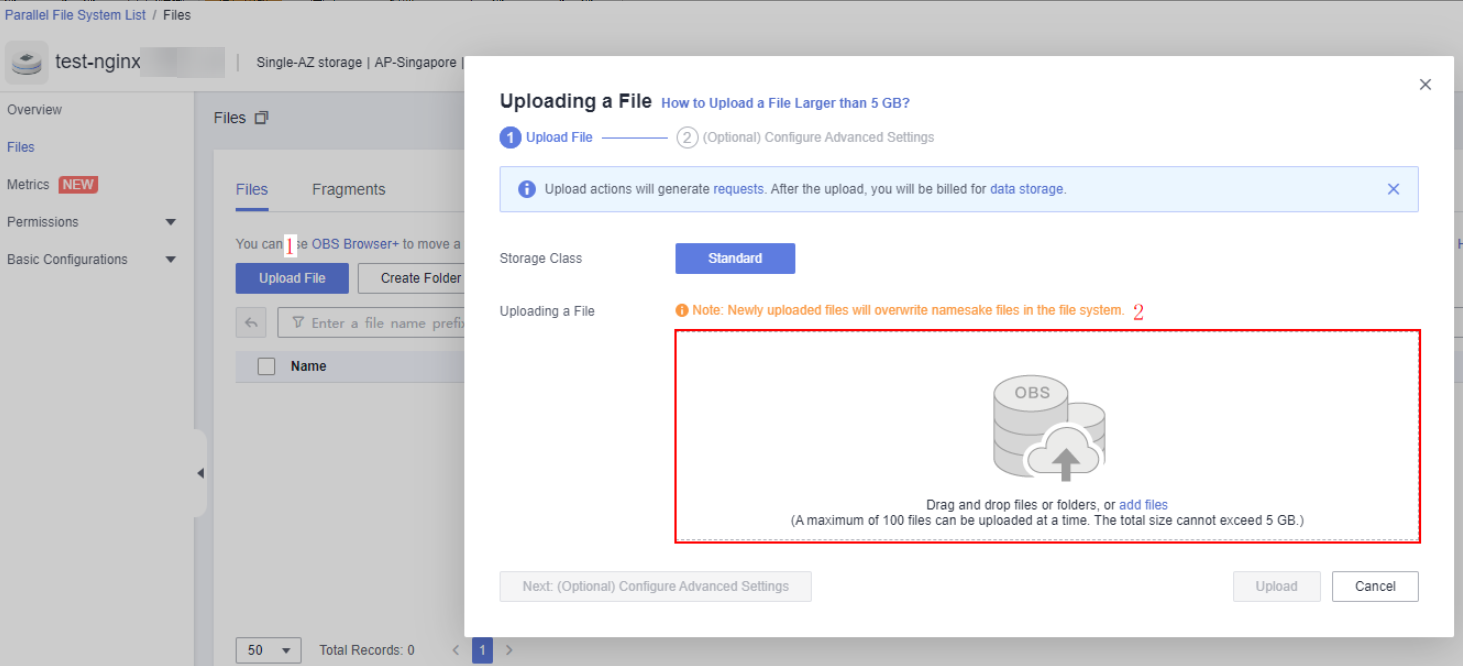
- Choose Files and click Upload File.
- Drag the obtained static files index.html and test.html to the file upload area. You can also click add files to upload the files. The default storage class is Standard.
Figure 6 Uploading a file
- Click Upload.
Configuring a Cloud Storage Mount Path
- Return to CAE and choose Component Configurations.
- Select the Nginx component from the drop-down list in the upper part of the page.
- Click Edit in the Cloud Storage module.
Figure 7 Configuring cloud storage

- Click Set Parallel File System, enter the mount path, and set permissions.
- Parallel File System: Select test-nginx authorized in Cloud Storage Authorizations.
- File Mask (umask): Enter 0022.
- Mount Path: path to which the data store is mounted. In this practice, use the default path /usr/share/nginx/html of nginx.
- Required Permissions: permissions on the mount path and files in the mount path. The value can be Read/Write or Read only. In this example, select Read/Write.
Note:
- Do not mount a static file path to a directory that contains system files, such as / and /var/run. Otherwise, the components may be abnormal.
- The Read/Write permission indicates that the component has the read and write permissions on the mount path and all files in the path. The Read only permission indicates that the component has only the read permission.
Figure 8 Configuring a cloud storage mount path
- Click OK. On the Cloud Storage page, click OK again.
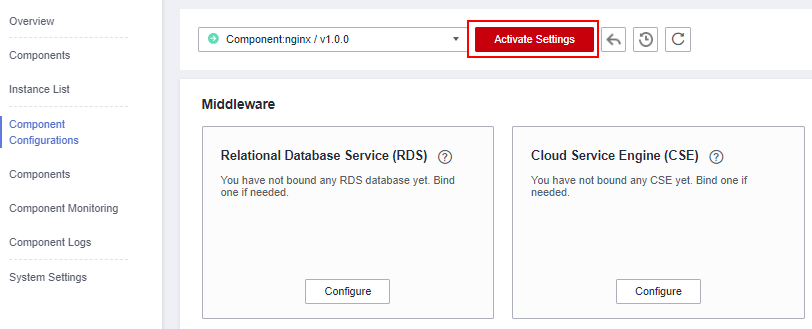
- On the Component Configurations page, click Activate Settings.
Figure 9 Activate Settings
Viewing an Updated Page
- Choose Components.
- Click the IP address in the Access Address column of the Nginx component to access the Nginx again. The page can be updated in real time (Press F5).

The new index.html file can be customized and uploaded as required.
Figure 10 Updated static page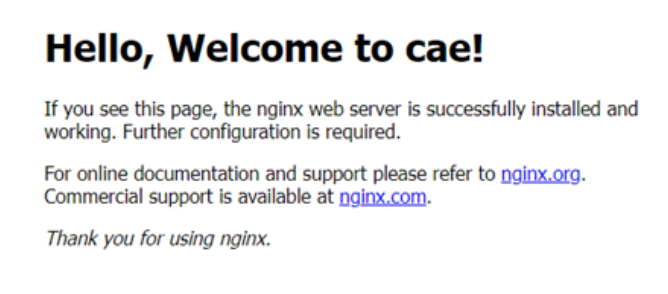
You can also access the new static page file using /test.html.
Figure 11 Accessing the test page
Feedback
Was this page helpful?
Provide feedbackThank you very much for your feedback. We will continue working to improve the documentation.See the reply and handling status in My Cloud VOC.
For any further questions, feel free to contact us through the chatbot.
Chatbot


