
Livestream Settings
Livestream settings are tenant-level and apply to all live rooms of the tenant.
Procedure
- Log in to the MetaStudio console and go to the Overview page.
- Click Go to MetaStudio Console to go to the MetaStudio console.
- Click the Livestreaming card to go to the virtual avatar livestreaming page.
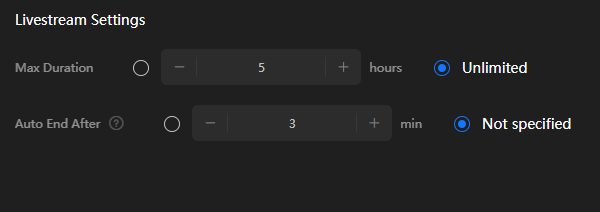
- Click Livestream Settings to go to the page shown in Figure 1.
See Table 1.
Table 1 Playback settings Parameter
Description
Max Duration
Select Unlimited or specify the duration.
Unit: hour
A livestream ends when reaching the specified Max Duration. However, if Playback Times is also specified and differs from Max Duration, the livestream will end whichever comes soonest.
Auto End After
If a livestream is interrupted unexpectedly with quota remaining, attempts for resuming the livestream will be made. If you select Not specified, the value defaults to 3 min. That is, if the attempts for resuming the livestream fail within three minutes, the livestream automatically ends. You can specify the value. 0 means continuously making attempts till the livestream is resumed.
Unit: minute
Notify on Livestream Interruption
After enabling this function, you need to go to the Notification Settings page to add a recipient and set the notification receiving mode (see Setting the Notification on Livestream Interruptions).
Then you will receive notifications on livestream interruptions via the channel you set, such as email, SMS, or system notification.
- Click Save.
Setting the Notification on Livestream Interruptions
Enabling Notify on Livestream Interruption requires you to then specify your notification receiving mode on the Notification Settings page.
- Click
 in the upper right corner of the page to go to the Message Center page.
 - In the navigation pane on the left, choose Message Receiving Management > SMS & Email Settings.
- Locate the O&M row and select a desired notification mode (Email, SMS, or System Notification) for O&M reminder.
- Click Modify Recipient in the Operation column of the O&M reminder row to go to the Modify Recipient dialog box.
Add recipient information, including the name, email address, and phone number.
- Click OK to save the recipient information.
Feedback
Was this page helpful?
Provide feedbackThank you very much for your feedback. We will continue working to improve the documentation.See the reply and handling status in My Cloud VOC.
For any further questions, feel free to contact us through the chatbot.
Chatbot


