Building with Android
The Android build system compiles application resources and source code, and then packages them into APKs that can be deployed, signed, and distributed.
Build on GUI
- Add Build with Android, when configuring build actions. Set the parameters according to Table 1.
Table 1 Parameters for building with Android Parameter
Description
Action Name
Assign a custom name to the build action. The name can contain:
- Letters, digits, hyphens (-), underscores (_), commas (,), semicolons (;), colons (:), periods (.), slashes (/), and parentheses.
- 1 to 128 characters.
Gradle
Select a tool version that matches your current development environment.
For tool versions supported by CodeArts Build, see build tools and versions. If the current tools and versions do not meet your requirements, you can customize a build environment.
JDK
Select a tool version that matches your current development environment.
For tool versions supported by CodeArts Build, see build tools and versions. If the current tools and versions do not meet your requirements, you can customize a build environment.
NDK
Select a tool version that matches your current development environment.
For tool versions supported by CodeArts Build, see build tools and versions. If the current tools and versions do not meet your requirements, you can customize a build environment.
Commands
Configure the Gradle commands, or use the default ones. For more commands, see the Gradle official website.
Continue After Failure
Specify whether to proceed after the current action fails by setting the parameter to either Yes or No.
- If you need to use apksigner to sign Android APKs, add the Sign Android APK action and configure the parameters according to the following table.
Parameter
Description
Action Name
Assign a custom name to the build action. The name can contain:
- Letters, digits, hyphens (-), underscores (_), commas (,), semicolons (;), colons (:), periods (.), slashes (/), and parentheses.
- 1 to 128 characters.
APK Location
Location of the .apk file to be signed after the Android build.
You can use regular expressions, such as build/bin/*.apk, to match the built APK package.
Keystore File
Select the keystore file used for signature from the drop-down list. For details about how to create and upload the file, see Generating the Keystore Signature File and Uploading It for Management.
Keystore Password
Optional.
Enter the custom password of the keystore file.
Alias
Assign a custom alias to the key.
- The value must start with a letter and can contain letters, digits, underscores (_), hyphens (-), and periods (.).
- The value contains 1 to 128 characters.
Key Password
Optional.
Enter a custom key password.
apksigner CLI
Enter a custom signature parameter. By default, --verbose is added to display the signature details.
Continue After Failure
Specify whether to proceed after the current action fails by setting the parameter to either Yes or No.
Once you have finished configuration, run the build task. If the task is executed successfully, check the build logs. If the logs of the Sign Android APK action display Signed, it means that the signing process was successful.
Build with Code
Modify the code in the BUILD block in Creating a YAML File for Your Code-based Build by referring to the following sample code:
- The following sample code is for the Android build:
 1
 2
 3
 4
 5
 6
 7
 8
 9
10
11
12
13
14
15
16
17
18
19
version: 2.0 # The value must be 2.0.
steps:
  BUILD:
    - android:
        inputs:
          gradle: 4.8
          jdk: 1.8
          ndk: 17
          command: |
            cat ~/.gradle/init.gradle
            cat ~/.gradle/gradle.properties
            cat ~/.gradle/init_template.gradle
            rm -rf ~/.gradle/init.gradle
            rm -rf /home/build/.gradle/init.gradle
            # Gradle Wrapper provided by CodeArts Build is used for cache acceleration.
            cp /cache/android/wrapper/gradle-wrapper.jar ./gradle/wrapper/gradle-wrapper.jar
            # Build an unsigned APK.
            /bin/bash ./gradlew assembleDebug -Dorg.gradle.daemon=false -d --stacktrace
         ignore_fail: true
Table 2 Parameters in the sample code for the Android build Parameter
Type
Description
command
String
Enter the Gradle command. For more commands, see the Gradle official website.
gradle
String
Select a tool version that matches your current development environment.
For tool versions supported by CodeArts Build, see build tools and versions. If the current tools and versions do not meet your requirements, you can customize a build environment.
jdk
String
Select a tool version that matches your current development environment.
For tool versions supported by CodeArts Build, see build tools and versions. If the current tools and versions do not meet your requirements, you can customize a build environment.
ndk
String
Select a tool version that matches your current development environment.
For tool versions supported by CodeArts Build, see build tools and versions. If the current tools and versions do not meet your requirements, you can customize a build environment.
ignore_fail
String
Whether to proceed after the current action fails.- true: Yes
- Empty: No
- The following sample code is to sign the Android APK.
 1
 2
 3
 4
 5
 6
 7
 8
 9
10
11
12
version: 2.0 # The value must be 2.0.
steps:
  BUILD:
    - android_sign:
            inputs:
               file_path: build/bin/*.apk
                   keystore_file: androidapk.jks
                   keystore_password: xxxxxx
                   alias: keyalias
                   key_password: xxxxxx
                   apksigner_commond: --verbose
                   ignore_fail: true
Table 3 Parameters in the sample code for signing the Android APK Parameter
Type
Description
file_path
String
Location of the .apk file to be signed after the Android build.
You can use regular expressions, such as build/bin/*.apk, to match the built APK package.
keystore_file
String
Name of the keystore file. For details about how to create and upload the file, see Generating the Keystore Signature File and Uploading It for Management.
keystore_password
String
Optional.
Enter the custom password of the keystore file.
alias
String
Alias of the keystore file.
- The value must start with a letter and can contain letters, digits, underscores (_), hyphens (-), and periods (.).
- The value contains 1 to 128 characters.
key_password
String
Optional.
Enter a custom key password.
apksigner_commond
String
Enter a custom signature parameter. By default, --verbose is added to display the signature details.
ignore_fail
String
Whether to proceed after the current action fails.- true: Yes
- Empty: No
Android Version Description
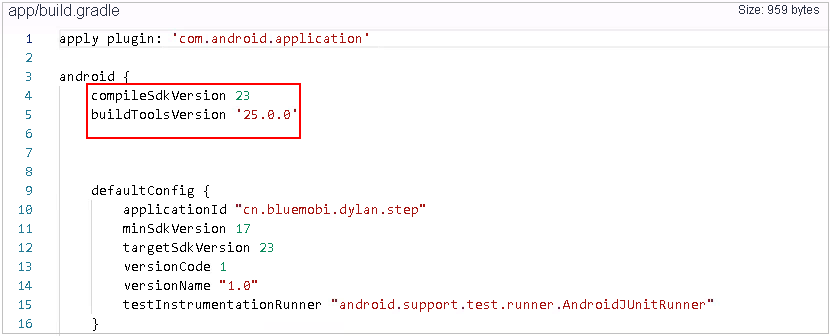
- SDK: used to specify compileSdkVersion.
- Build Tools: used to specify buildToolsVersion.
You can find the two versions in the build.gradle file or the global configuration file (user-defined) of the project.

- Select compileSdkVersion or buildToolsVersion based on project requirements.
- The Gradle wrapper build mode is also supported. If the provided Gradle version does not meet your requirements, you can run the gradlew command for build using the wrapper. The required Gradle version will be automatically downloaded. Example of the build command: ./gradlew clean build.
Generating the Keystore Signature File and Uploading It for Management
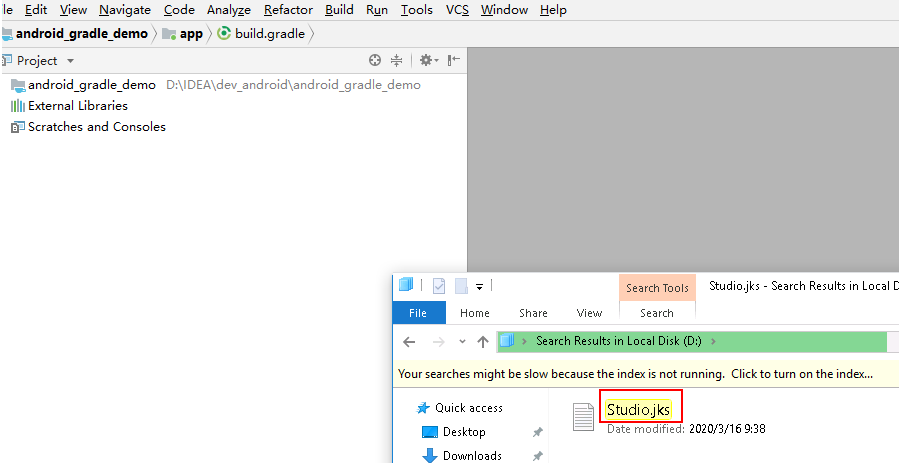
- The keystore signature file can be generated in either of the following ways:
- Using Keytool in JDK to Generate Signature Files
- Find the JDK installation path and run keytool.exe.
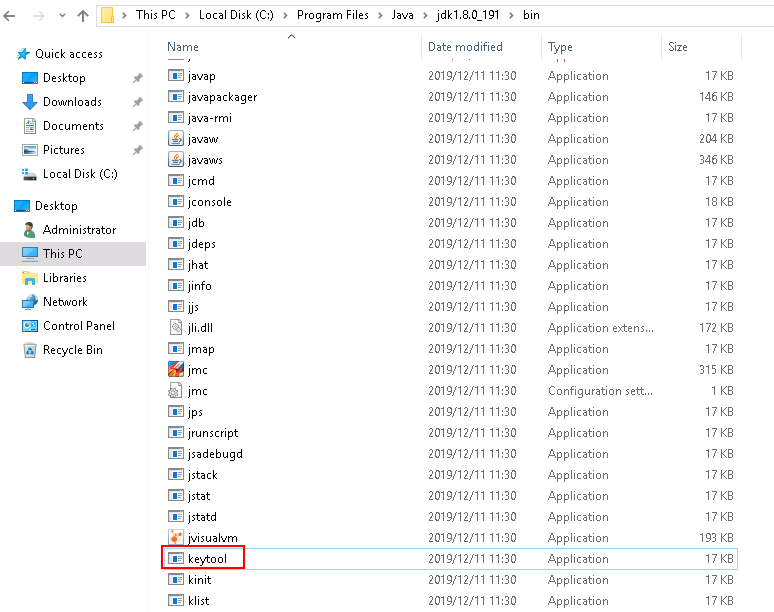
- Run the following command to generate a .jks file:
keytool -genkeypair -storepass 123456 -alias apksign -keypass 123456 -keyalg RSA -validity 20000 -keystore D:/android.jks
- Find the JDK installation path and run keytool.exe.
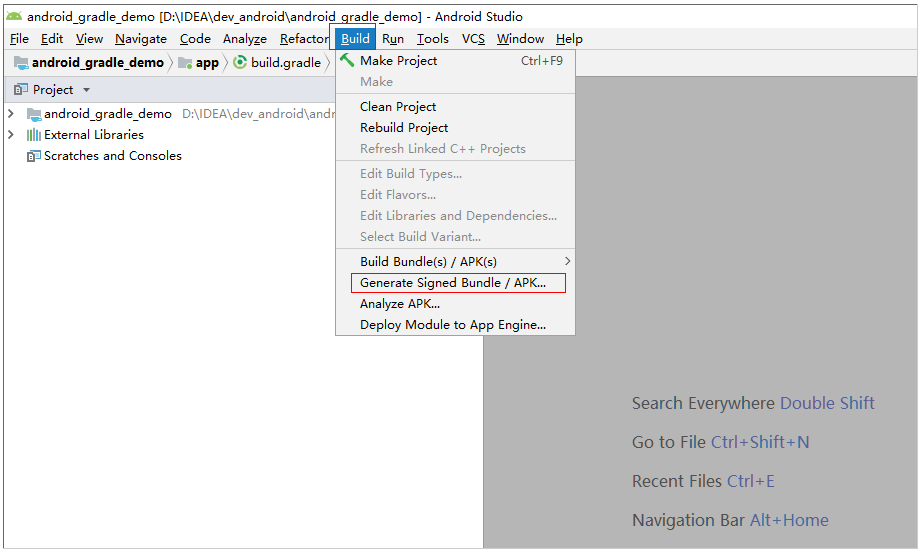
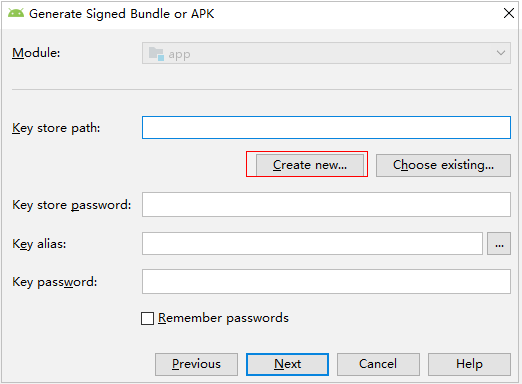
- Using Android Studio to Generate Signature Files
- Using Keytool in JDK to Generate Signature Files
- You can upload the keystore signature file to the Files page in either of the following ways:
- In the Build with Android action, click Upload next to Keystore File. In the displayed dialog box, select a file, add a description, select the related agreements, and click Save.
- On the CodeArts Build homepage, choose . On the displayed page, click Upload File. In the displayed dialog box, select a file, add a description, select the related agreements, and click Save.
Helpful Links
Hit snags in Android builds? See Android Build FAQs.
Feedback
Was this page helpful?
Provide feedbackThank you very much for your feedback. We will continue working to improve the documentation.See the reply and handling status in My Cloud VOC.
For any further questions, feel free to contact us through the chatbot.
Chatbot

