Backing Up a FlexusX Instance
Scenarios
CBR can be used upon application and can enhance data integrity and service continuity. You can back up FlexusX instances manually or configure a policy to back them up automatically. This section describes how to back up a FlexusX instance manually.
For more information, see CBR Architecture, Backup Mechanism, and Backup Options.
Constraints
To ensure the integrity of backup data, do not delete disk data or restart or stop the FlexusX instance during the backup.
Prerequisites
The FlexusX instance has been associated with a backup vault. For details, see Associating a FlexusX Instance with a Backup Vault.
Procedure
- Log in to the FlexusX console. In the upper left corner, click
 and select a region.
 - Locate the FlexusX instance, choose More > Manage Disk/Backup and click Create Server Backup or Create Disk Backup in the Operation column.

If the page for purchasing a backup vault is displayed after you click Create Server Backup or Create Disk Backup, the FlexusX instance has not been associated with a vault. In this case, associate the FlexusX instance with a vault first. Then, create a backup by referring to the steps described in this section.
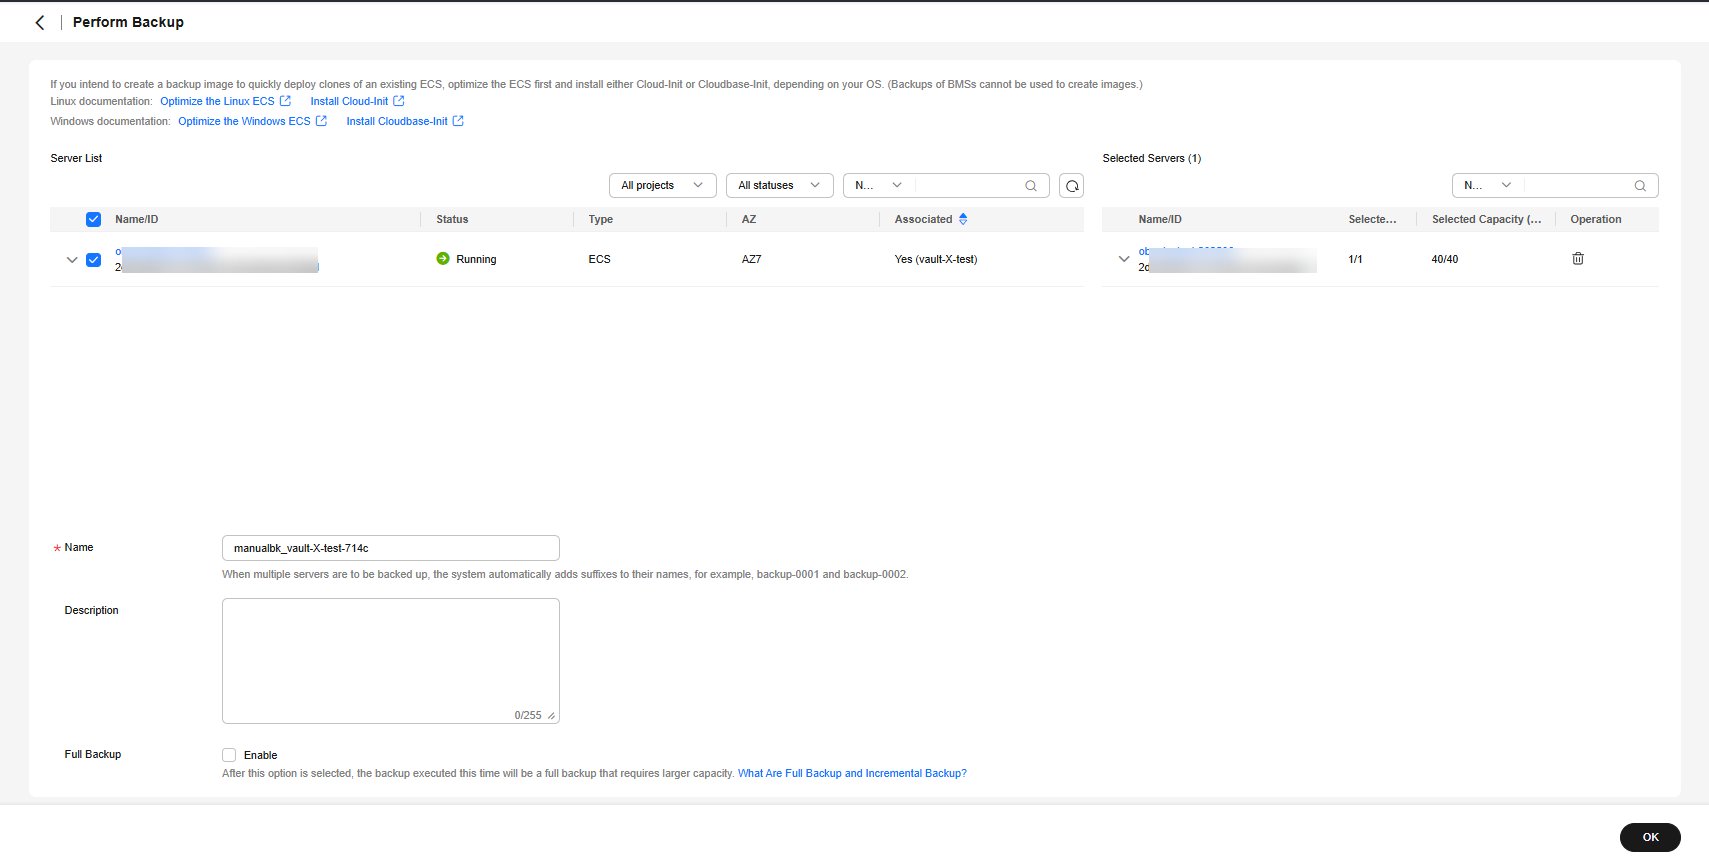
- To create a cloud server backup, configure the parameters below.
Figure 1 Creating a cloud server backup

Table 1 Parameters for creating a cloud server backup Parameter
Description
Server List
By default, the cloud servers to be backed up are selected. Click
 to view the disks attached to the server. Select the disks to be backed up.
Name
Specify your backup name.
Description
Enter a description about the backup.
Full Backup
If you select Enable, CBR performs a full backup for each associated server. This requires a larger capacity than an incremental backup.
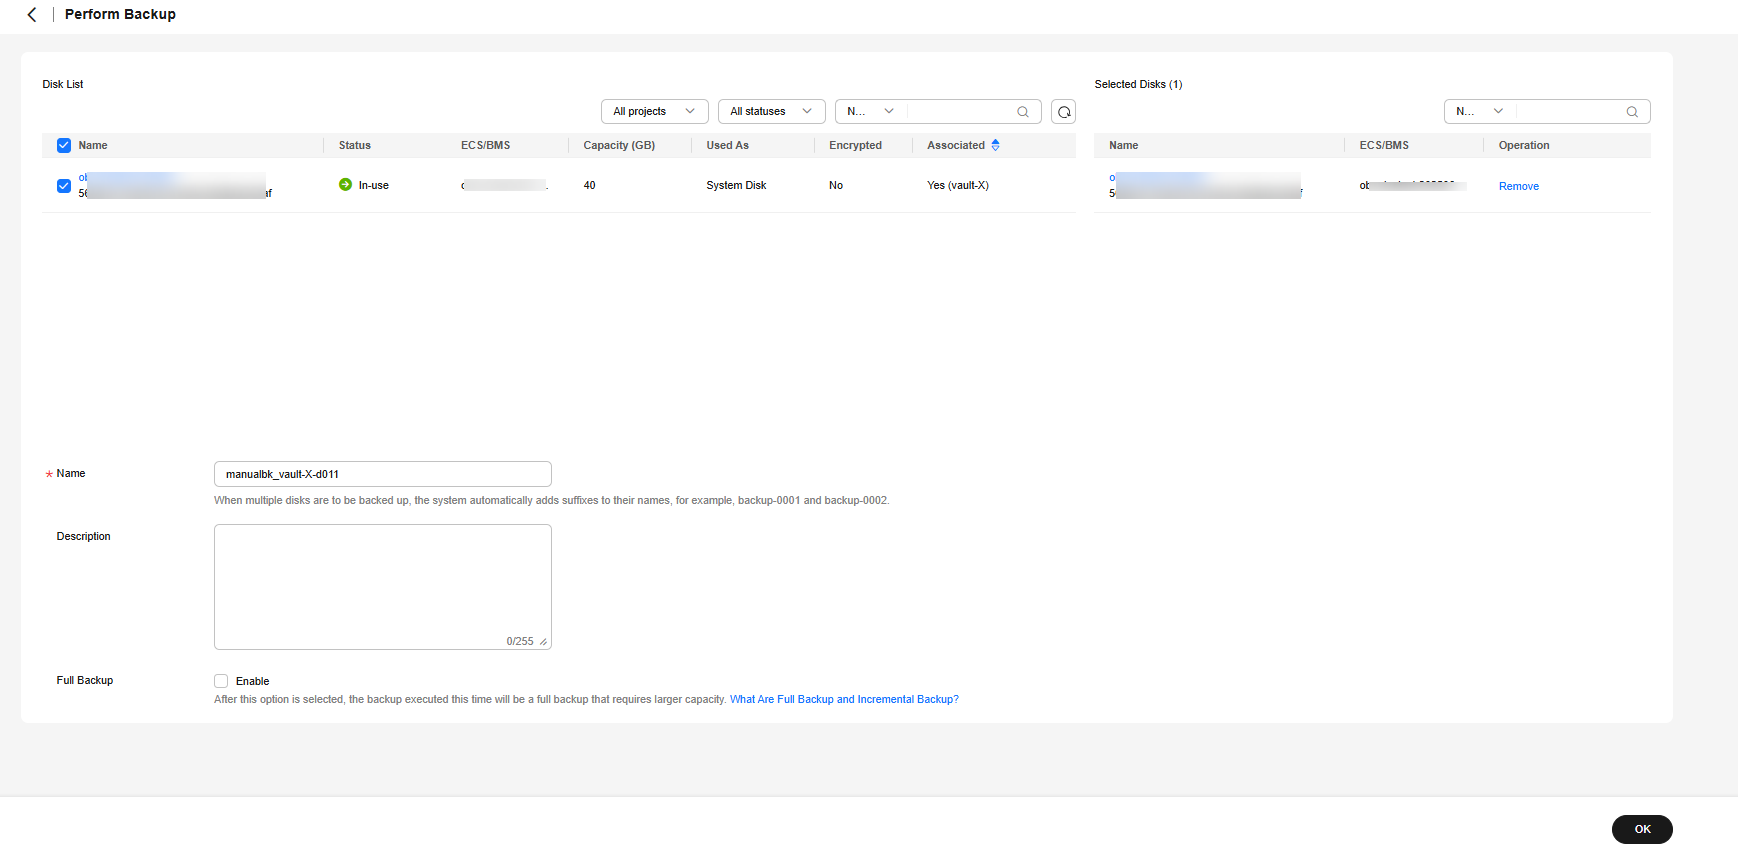
- To create a cloud disk backup:
Click Perform Backup in the Operation column and configure backup parameters as instructed.
Figure 2 Performing a backup Figure 3 Cloud disk backup
Table 2 Parameters for creating a cloud disk backup Parameter
Description
Disk List
In the disk list, all disks are selected by default. Select the disks to be backed up.
Name
Specify your backup name.
Description
Enter a description about the backup.
Full Backup
If you select Enable, CBR performs a full backup on every selected disk. This requires a larger capacity compared to an incremental backup.
- To create a cloud server backup, configure the parameters below.
- Click OK. The system starts to create a backup immediately.
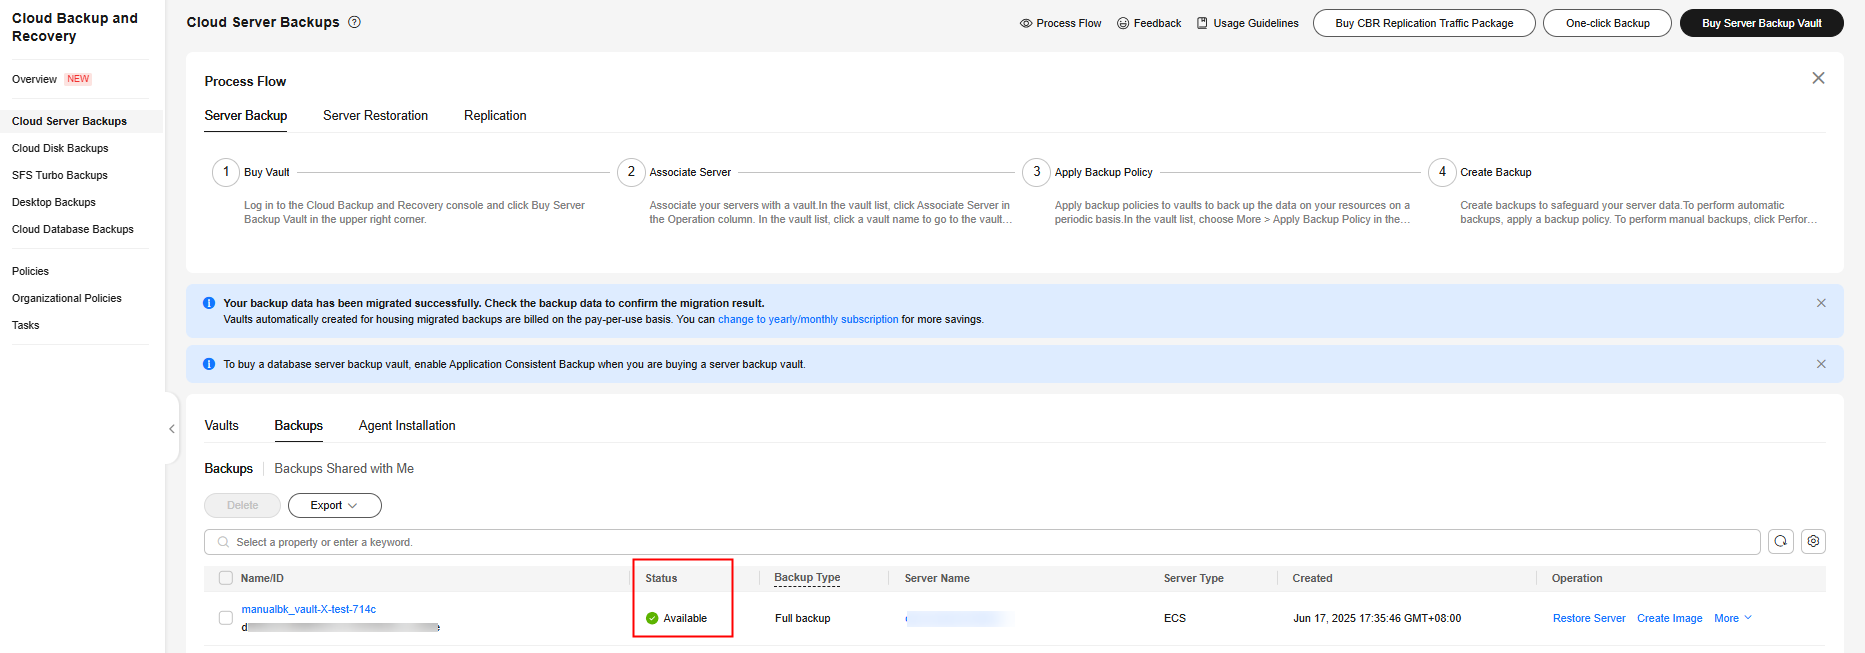
- Click Go to Backup List.
On the Backups tab, if the status of the backup is Available, the backup task is successful. You can use the backup to restore data when needed.
Figure 4 Server backup completed Figure 5 Cloud disk backup completed
Helpful Links
- After the cloud server backup is complete, you can use the backup to restore server data or create images on the CBR console. For details, see Restoring Data Using a Cloud Server Backup and Using a Backup to Create an Image.
- After the cloud disk backup is complete, you can use the backup to restore disk data on the CBR console. For details, see Restoring from a Cloud Disk Backup.
Feedback
Was this page helpful?
Provide feedbackThank you very much for your feedback. We will continue working to improve the documentation.See the reply and handling status in My Cloud VOC.
For any further questions, feel free to contact us through the chatbot.
Chatbot


