Downloading Packages from Self-Hosted Repos to the Client
The repository password for a self-hosted repo is account-specific. If you are prompted for a password when using different accounts, download the configuration file from the repository's Tutorial tab to obtain it.
Downloading a Maven Artifact to the Client
The client tool is Maven. Ensure that the JDK and Maven have been installed.
- Download the settings.xml file from the self-hosted repo page and replace the downloaded configuration file with the new one or modify the settings.xml file of Maven as prompted.

- Download the client.
mvn dependency:get -DremoteRepositories={repo_url} -DgroupId={groupId} -DartifactId={artifactId} -Dversion={version} -Dmaven.wagon.http.ssl.insecure=true -Dmaven.wagon.http.ssl.allowall=true -Dmaven.wagon.http.ssl.ignore.validity.dates=true
Downloading an npm Package to the Client
The client tool is npm. Ensure that Node.js (or io.js) and npm have been installed.
- Download the NPMRC file from the self-hosted repo page and save the downloaded NPMRC file as an .npmrc file.

- Copy the file to the user directory. In Linux, the path is ~/.npmrc. In Windows, the path is C:\Users\<UserName>\.npmrc.
- Go to the npm project directory (where the package.json file is stored) and run the following commands to download the npm dependency:
npm config set strict-ssl false
npm install ––verbose

Downloading a PyPI Package to the Client
The client tools are Python and PIP. Ensure that Python and PIP have been installed.
- Download the pip.ini file from the self-hosted repo page and copy the file to the user directory. In Linux, the path is ~/.pip/pip.conf (C:\Users\<UserName>\pip\pip.ini on Windows)

- Install Python:
pip install {package name}
Downloading a Go Package to the Client
Certificate verification cannot be bypassed on the Go client. You need to add the domain name certificate corresponding to the self-hosted repo to the local certificate trust list and perform the following steps to add the trust certificate:
- Export the certificates.
openssl s_client -connect {host}:443 -showcerts </dev/null 2>/dev/null | sed -ne '/-BEGIN CERTIFICATE-/,/-END CERTIFICATE-/p' |openssl x509 -outform PEM >mycertfile.pem
openssl x509 -outform der -in mycertfile.pem -out mycertfile.crt
mycertfile.pem and mycertfile.crt are the downloaded certificates.
- Add the certificates to the root certificate trust list.
- Run the go commands to download the dependency:
##1. Packages of versions earlier than v2.0
go get -v <moudlename>
##2. v2.0 and later versions
##a. The ZIP package contains go.mod and the path ends with /vN.
go get -v {{moduleName}}/vN@{{version}}
##b. The ZIP package does not contain go.mod or the first line in go.mod does not end with /vN.
go get -v {moduleName}}@{{version}}+incompatible
Downloading an RPM Package to the Client
The following section uses the RPM package from Uploading an RPM Package to the Client as an example to describe how to obtain dependencies from the RPM repository.
- Download the RPM configuration file by referring to 2 and 3.
- Open the configuration file, replace all {{component}} in the file with the value of {{component}} (hello in this file) used for uploading the RPM file, delete the RPM upload command, and save the file.
- Save the modified configuration file to the /etc/yum.repos.d/ directory on the Linux host.

- Download the RPM package: Replace hello with the actual value of component.
yum install hello
Downloading a Conan Package to the Client
- Select the target Conan repository from the self-hosted repo page and click Tutorial on the right to download the configuration file.
You can replace local Conan configurations with the obtained configuration file (the path is ~/.conan/remotes.json in Linux or C:\Users\<UserName>\.conan\remotes.json in Windows).
- Download the Conan dependency from the remote repository:
$ conan install ${package_name}/${package_version}@${package_username}/${channel} -r=cloud_artifact - Check the downloaded Conan package:
$ conan search "*"
- Remove the package from the local cache:
$ conan remove ${package_name}/${package_version}@${package_username}/${channel}
Downloading a NuGet Package to the Client
Ensure that you have installed the NuGet.
- Select the target NuGet repository from the self-hosted repo page and click Tutorial on the right to download the configuration file NuGet.txt.

- Open the file, find the command under NuGet add source, and add the source.
##----------------------NuGet add source----------------------## nuget sources add -name {repo_name} -source{repo_url} -username {user_name} -password {repo_password} - Open the file, find the statement under NuGet Download, replace <PACKAGE> with the name of the package to be downloaded, and run the download statement. (If a configuration source exists, use the configured source name as the parameter following -source.)
##----------------------NuGet Download----------------------##
nuget install <PACKAGE>
Downloading a .NET Package to the Client
Ensure that you have installed the .NET.
- Select the target NuGet repository from the self-hosted repo page and click Tutorial on the right to download the configuration file dotnet.txt.

- Open the configuration file, find the command under dotnet add source, and add the source.
##----------------------dotnet add source----------------------## dotnet nuget add source {repo_url} add -n {repo_name} -u {user_name} -p {repo_password} - Find the statement under dotnet download, replace < PACKAGE > with the name of the package to be downloaded, and run the download statement.
##----------------------dotnet download----------------------##
dotnet add package <PACKAGE>
Downloading a Docker Image to the Client
Prerequisites
- You have installed the Docker client.
- You have created a Docker registry in the self-hosted repo.
Downloading a Docker image to the client
Run the following command on the local client to download the Docker image:
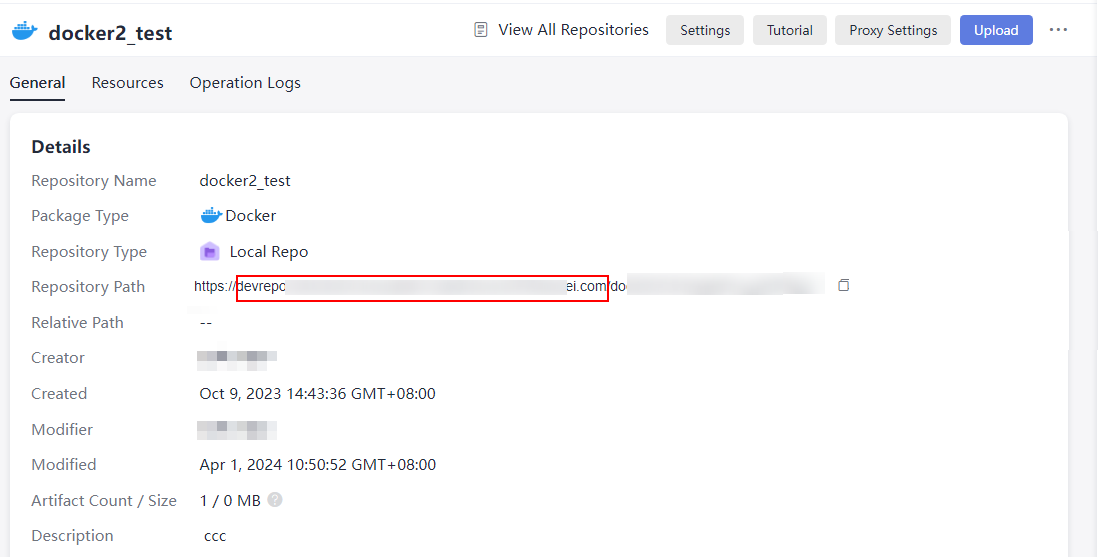
docker pull {url}/${image_name}:${image_version}
url: repository URL, as shown in the following figure.

image_name: component name.
image_version: component version.
Downloading a Generic Package to the Client
Download the client.
curl -o {{localFileName}} -k -u "{{username}}:{{password}}" -X GET {{repo_url}}/{{filePath}}
localFileName: local path (including the name) for downloading the Generic package.
filePath: path (including the name) of the package in the Generic repository.
Obtain the values of username, password, and repo_url from the downloaded generic.txt file in 2, as shown in the following figure.

Downloading a CocoaPods Package to the Client
Prerequisites
- You have installed the Ruby client and cocoapods-art plug-in.
- You have created a CocoaPods repository in the self-hosted repo.
Downloading the provided configuration file to download CocoaPods packages
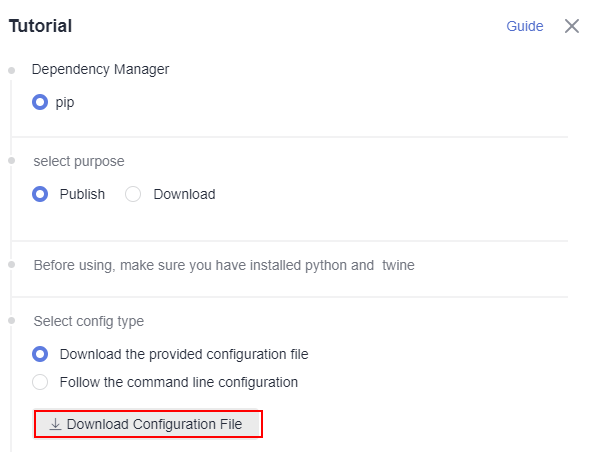
- Select the target CocoaPods repository from the self-hosted repo page and click Tutorial on the right of the page.
- Select Download the provided configuration file and click Download Configuration File to download the cocoapods.txt file.
- In the Select purpose area, click Download.
- Download the local client.
- Perform Cocoapods authentication:
sudo sh -c " echo 'machine {url}
login {username}
password {password}' > <.cocoapods_path>/.netrc"
- Download the package from the remote repository:
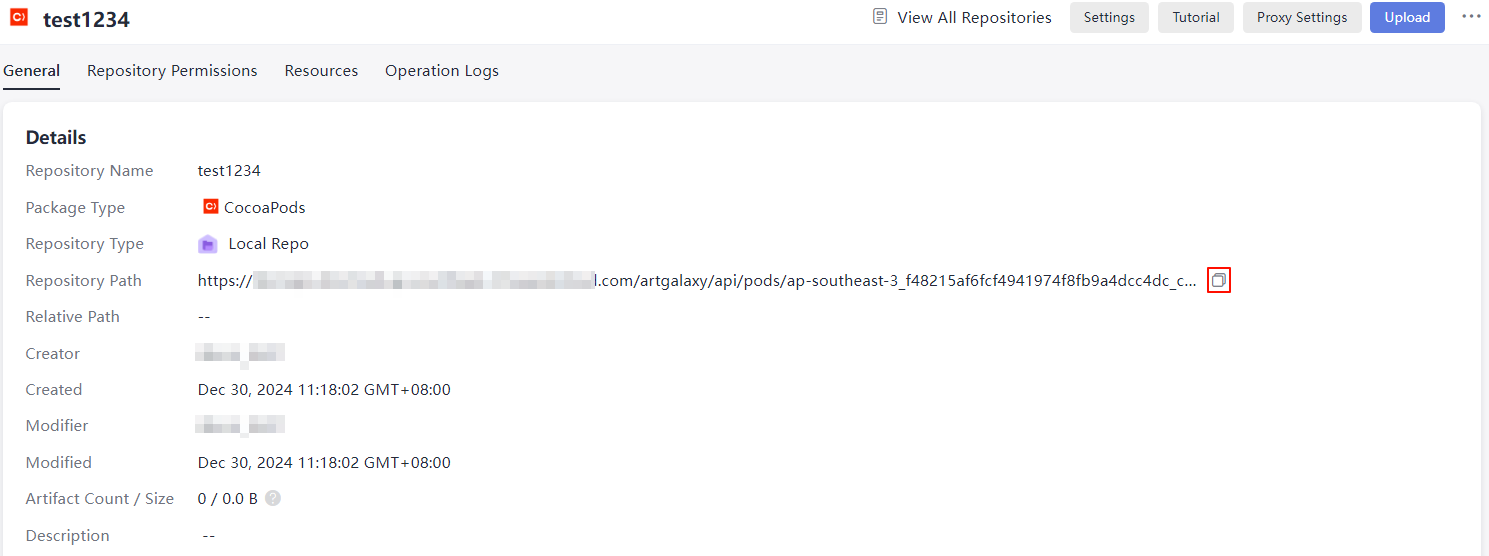
pod repo-art add {package_name} "{url}"package_name: name of the CocoaPods dependency to be downloaded.
url: repository URL of the self-hosted repo.
- Download the artifacts from the CocoaPods repository.
pod repo-art update {package_name} {url}package_name: The CocoaPods dependency cannot be modified.
url: enter the repository URL of the target self-hosted repo.

- Query the downloaded package:
pod repo-art list
- Remove the local dependency:
pod repo-art remove <repo-name>//repo-name: name of the CocoaPods dependency
- Perform Cocoapods authentication:
Following the command line configuration to download the CocoaPods package
- Select the target CocoaPods repository from the self-hosted repo page and click Tutorial on the right of the page.
- Select Follow the command line configuration.
- Check whether the Rudy client has been installed:
rudy -v
- Install the cocoapods-art plug-in:
sudo gem install cocoapods-art
- Add the self-hosted repo to your CocoaPods client:
pod repo-art add <repo_name> "{url}"repo_name: name of the folder for storing packages of self-hosted repos on the local client.
url: repository URL of the CocoaPods repository.
- In the Select purpose area, click Download.
- Download the local client.
Download the package from the remote repository:
pod repo-art update {package_name}//package_name: package name.Query the downloaded package:
pod repo-art list
Remove the local dependency:
pod repo-art remove <repo-name>//repo-name: name of the CocoaPods dependency
Downloading an OHPM Package to the Client
Download the client.
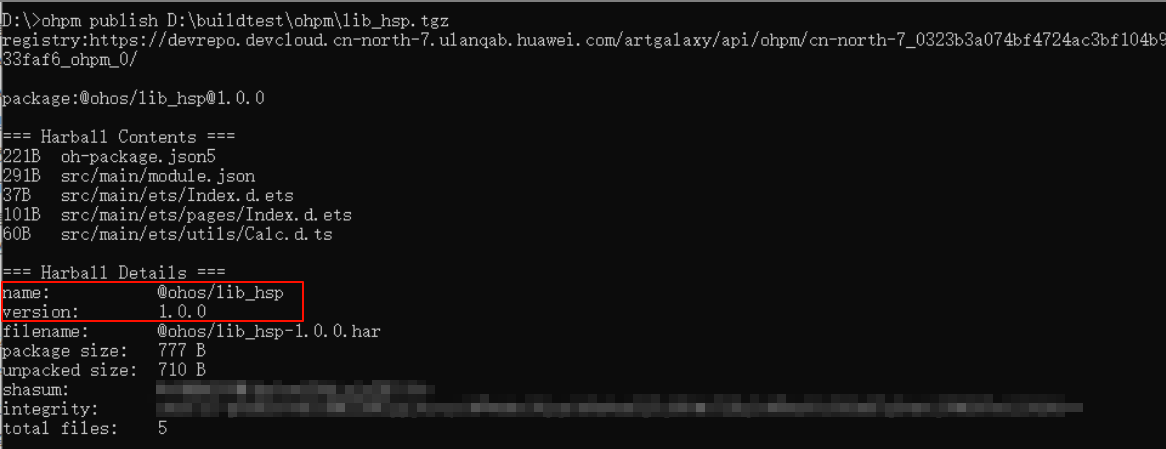
ohpm install {package name}
package name: name parameter in the return value in Uploading an OHPM Package from the Client, as shown in the following figure.

The following figure indicates the download success.

Feedback
Was this page helpful?
Provide feedbackThank you very much for your feedback. We will continue working to improve the documentation.See the reply and handling status in My Cloud VOC.
For any further questions, feel free to contact us through the chatbot.
Chatbot


