
Help Center/
Huawei Cloud Astro Canvas/
User Guide/
Widget Management/
Using the Background Filtering Function of Advanced Tables
Updated on 2025-03-24 GMT+08:00
Using the Background Filtering Function of Advanced Tables
Scenario
The background sorting function requires global variables. When background pagination, sorting, and filtering are enabled together, add the filtering, sorting, and pagination converters one by one, as shown in Figure 1.
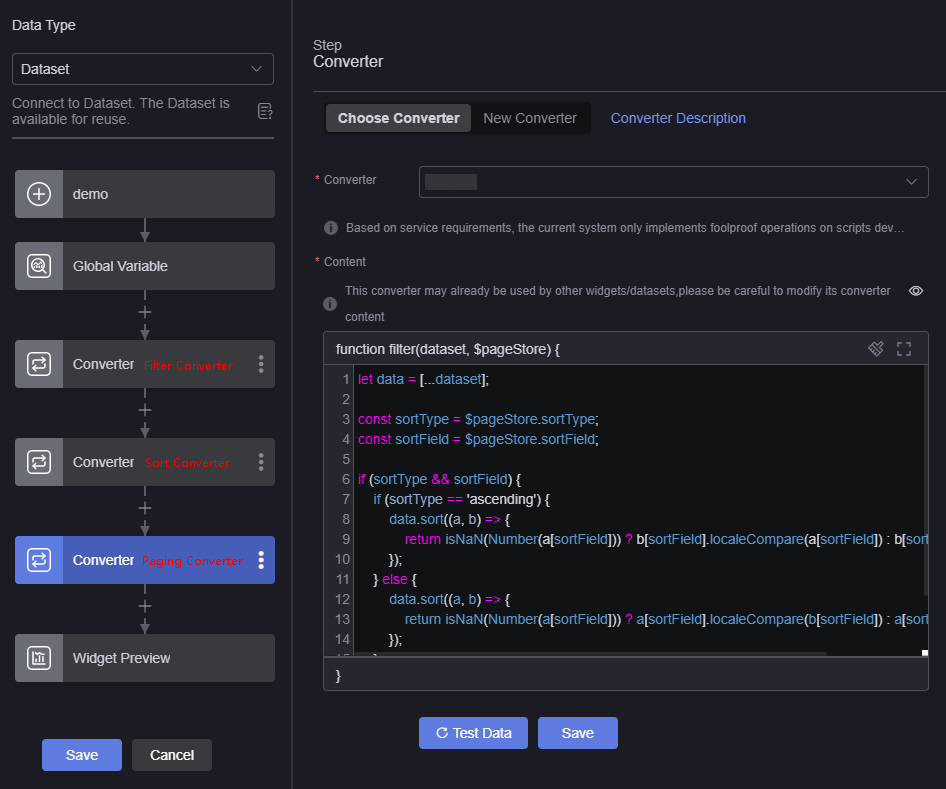
Background Filtering
- Log in to Huawei Cloud Astro Canvas by referring to Logging In to Huawei Cloud Astro Canvas.
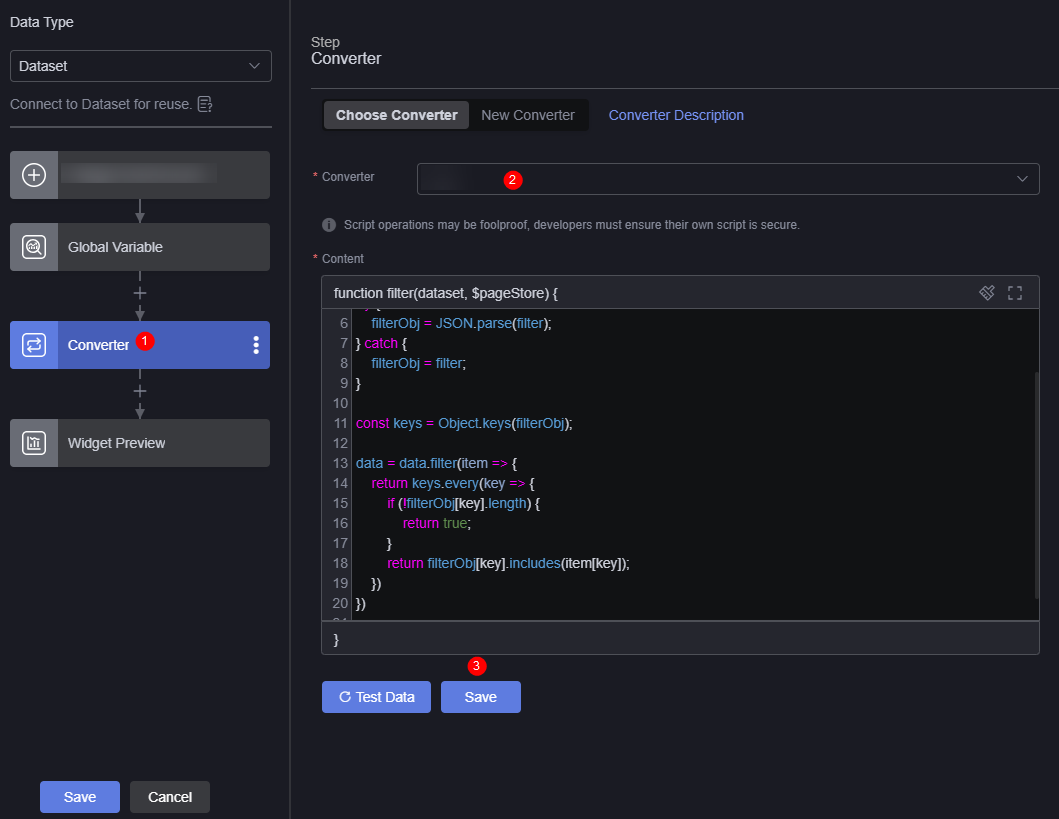
- Create a background filter converter.
- Choose Data Center from the main menu.
- In the navigation pane, choose Converters > All and click Create.
- Enter a converter name and select a folder, and click Confirm.
- Enter the converter code and click Save.
let data = [...dataset];
const filter = $pageStore.filters

let filterObj = "";
try {
    filterObj = JSON.parse(filter);
} catch {
    filterObj = filter;
}

const keys = Object.keys(filterObj);

data = data.filter(item => {
    return keys.every(key => {
        if (!filterObj[key].length) {
            return true;
        }
        return filterObj[key].includes(item[key]);
    })
})

return data;
- Create a large screen page, drag the advanced table widget from the All > Text area to the blank area of the canvas.
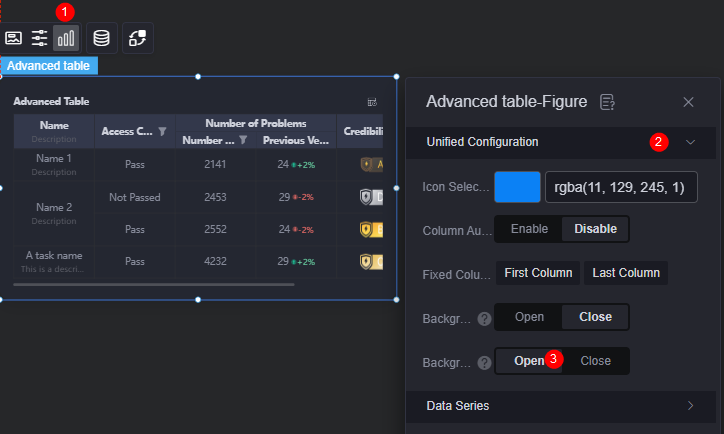
- Enable the background filtering function.
Figure 2 Enabling the background filtering function
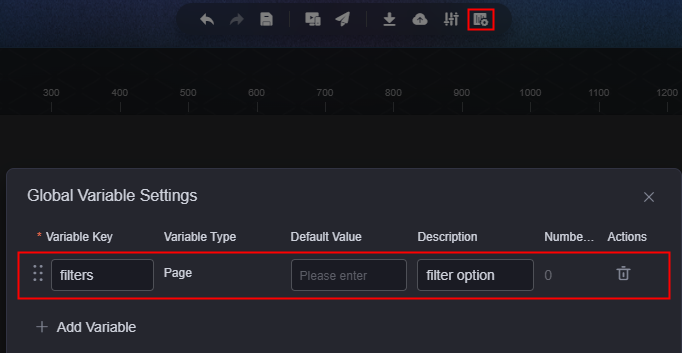
- Create a global variable.
The background filtering function requires a global variable. Create a filters variable.Figure 3 Creating a filters global variable
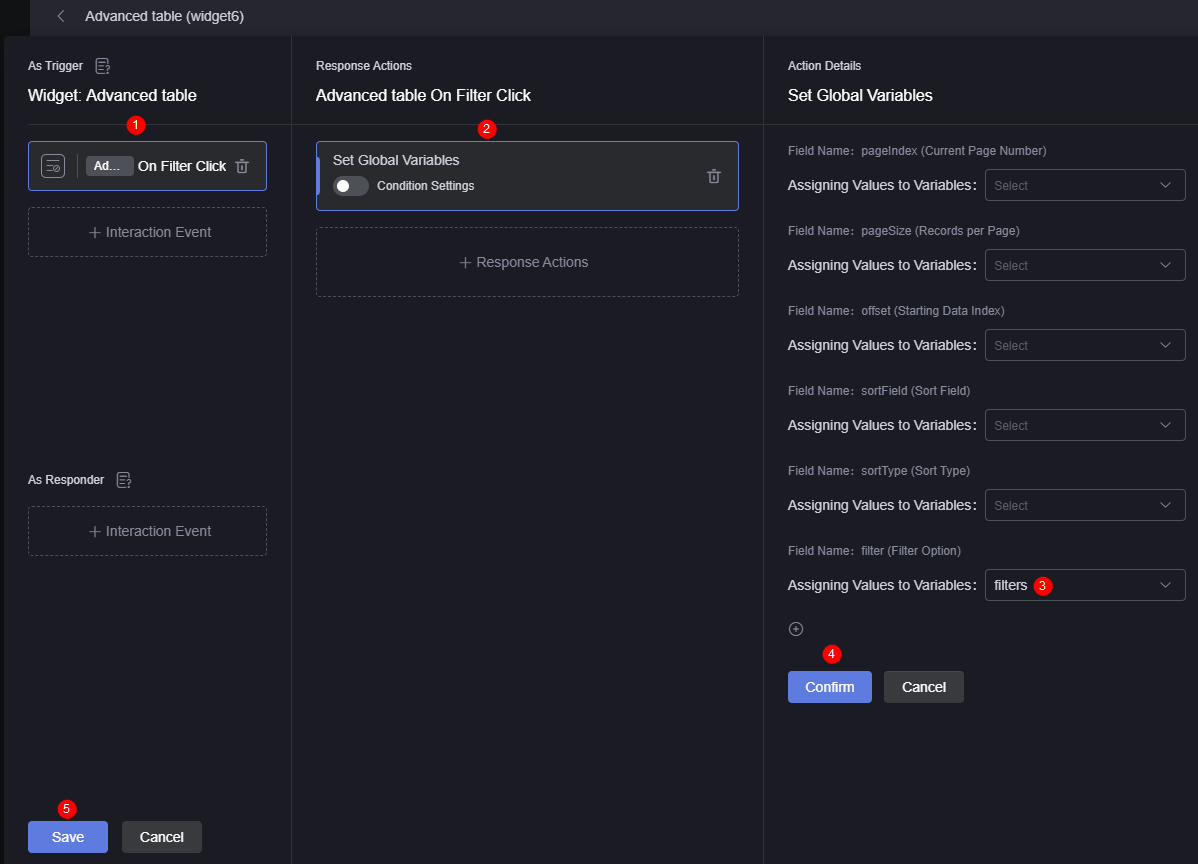
- Set the interaction.
- Select the advanced table widget and click
 to configure the widget interaction.
 - Add an interaction action for when the filter is clicked.
Figure 4 Interaction action when the filter button is clicked
- Select the advanced table widget and click
- Set the widget data source.
- Select the widget. Click
 above the widget.
 - Select the required data type.
- Under the global variable configuration, click +, select a converter, and add the converter created in 2.
Figure 5 Adding a converter
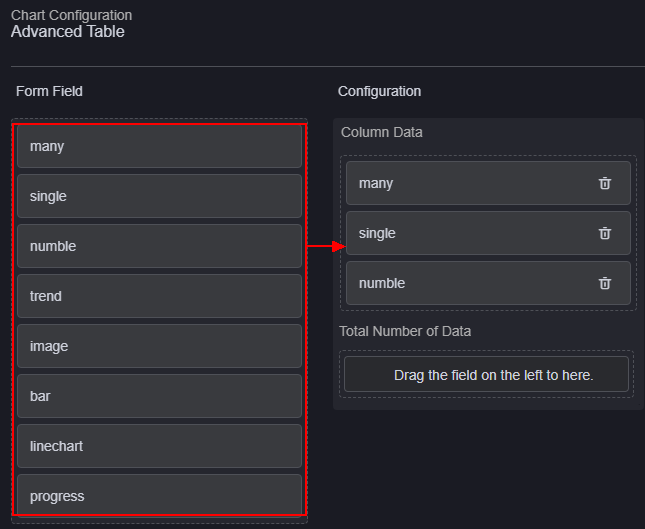
- In the widget preview area, drag the fields in the table to the corresponding configuration area.
Figure 6 Dragging the corresponding field from the table to the configuration area
- Click Save.
- Select the widget. Click
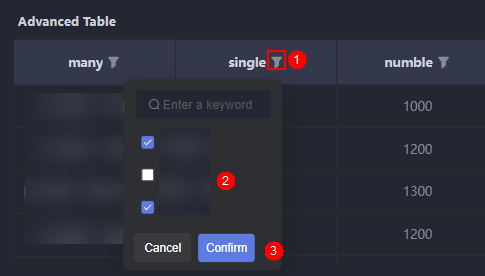
- Save the page and preview the effect.
Figure 7 Checking the background filtering effect
Parent topic: Widget Management
Feedback
Was this page helpful?
Provide feedbackThank you very much for your feedback. We will continue working to improve the documentation.See the reply and handling status in My Cloud VOC.
The system is busy. Please try again later.
For any further questions, feel free to contact us through the chatbot.
Chatbot


