
Custom Bridges
To achieve the best display effect for the widget, you can customize a data bridge to connect additional data sources. Before customizing a bridge, download the bridge template and reconstruct the bridge data according to the widget's data structure.
Custom Bridges
- Log in to Huawei Cloud Astro Canvas by referring to Logging In to Huawei Cloud Astro Canvas.
- In the upper right corner of the Huawei Cloud Astro Canvas page, click Resource Management. The management page is displayed.
- In the navigation pane, choose Page Assets > Bridge Templates.
- On the displayed page, click bridgeBasicTemplate to go to the details page.
- On the displayed details page, click Download to download the template package to the local PC.
- Decompress the downloaded templates and change the bridge model name.
The bridge model name must match the model name defined in the widget using the custom bridge. Otherwise, the bridge instance will not appear in the data source options.
The bridge model name can be found in the widget that uses the bridge. For example, to use a custom bridge in a rose pie chart, follow these steps to obtain the model name:
- Return to the Huawei Cloud Astro Canvas page and choose My Assets from the main menu.
- In the navigation pane, choose Widgets.
- In All Widgets, find the rose pie chart widget, move the cursor to the widget, and click
 to download the widget to the local PC.
Figure 1 Clicking the rose pie chart widget
to download the widget to the local PC.
Figure 1 Clicking the rose pie chart widget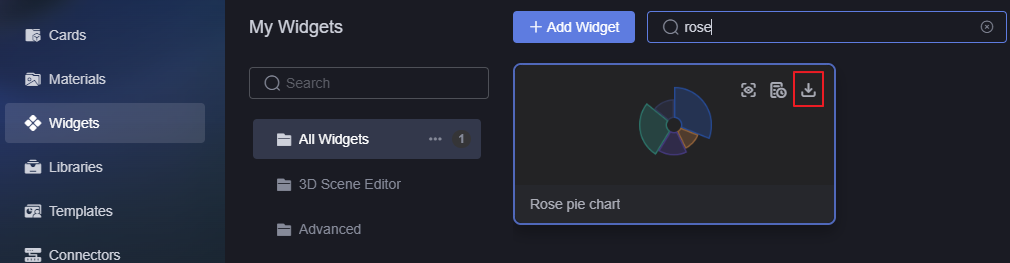
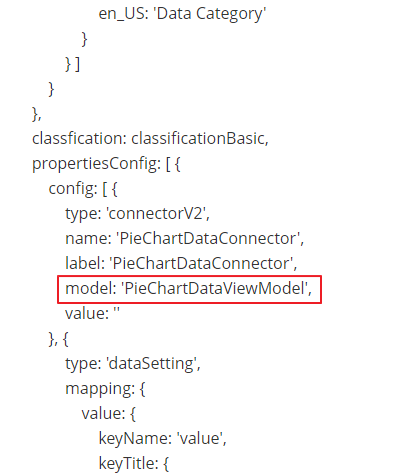
- Decompress the downloaded widget package and search for the model name in RosePieChart_Widget.editor.js.
Figure 2 Searching for the model name
- Set the data connection logic in the custom bridge as required, then compress all files and folders in the directory into a ZIP file.
- Upload the developed ZIP package of the custom bridge to Huawei Cloud Astro Canvas.
Using Custom Bridges
- Create a project. For details, see Creating a Large Screen and PC Project.
- After the project is created, create a blank page by referring to Creating a Page Using an Empty Canvas.
- Go to the development page and drag the rose pie chart widget from All > Chart to the canvas.
Figure 3 Dragging a rose pie chart widget to the canvas

- Select the widget and click
 above the widget. The data setting page is displayed.
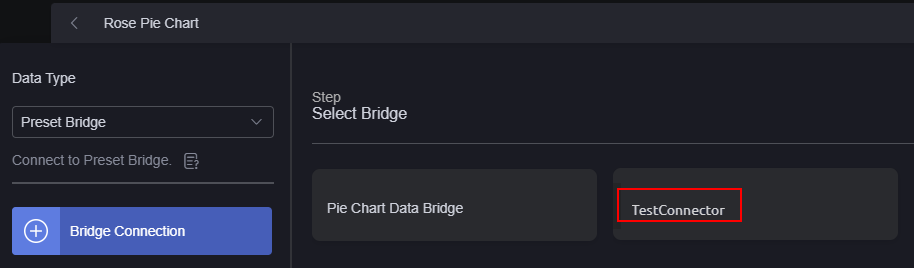
 - Set Data Type to Preset Bridge. In the Select Bridge area, select the custom connector in Custom Bridges.
Figure 4 Adding a custom bridge to a widget
Feedback
Was this page helpful?
Provide feedbackThank you very much for your feedback. We will continue working to improve the documentation.See the reply and handling status in My Cloud VOC.
For any further questions, feel free to contact us through the chatbot.
Chatbot


