
Halaman ini belum tersedia dalam bahasa lokal Anda. Kami berusaha keras untuk menambahkan lebih banyak versi bahasa. Terima kasih atas dukungan Anda.
- What's New
- Function Overview
- Service Overview
- Billing
- Getting Started
-
User Guide
-
Cloud Connection Operation Guide
- Permissions Management
- Cloud Connections
- Cross-Border Permits
- Network Instances
-
Bandwidth Packages
- Buying a Bandwidth Package
- Modifying a Bandwidth Package
- Binding a Bandwidth Package to a Cloud Connection
- Unbinding a Bandwidth Package from a Cloud Connection
- Changing a Pay-per-Use Bandwidth Package to a Yearly/Monthly Bandwidth Package
- Unsubscribing from a Yearly/Monthly Bandwidth Package
- Deleting a Pay-per-Use Bandwidth Package
- Managing Bandwidth Package Tags
- Inter-Region bandwidths
- Cross-Account Authorization
- Routes
- Monitoring and Auditing
- Quotas
- Central Network Operation Guide
-
Cloud Connection Operation Guide
-
Best Practices
- Connecting VPCs in the Same Region But in Different Accounts
- Connecting VPCs in Different Regions and Accounts
- Connecting On-Premises Data Centers and VPCs
- Connecting VPCs in Different Geographic Regions
- Connecting VPCs in Different Accounts
- Using a Cloud Connection and SNAT to Enable Private Networks to Access the Internet
- Using a Cloud Connection and DNAT to Enable the Internet to Access Private Networks
- Using a Cloud Connection and DNAT to Improve the Web Delivery Across Regions
- Using a Cloud Connection and a VPC Peering Connection to Connect VPCs Across Regions
-
API Reference
- Before You Start
- API Overview
- Calling APIs
-
API
-
Cloud Connections
- Creating a Cloud Connection
- Querying the Cloud Connection List
- Querying a Cloud Connection
- Updating a Cloud Connection
- Deleting a Cloud Connection
- Adding a Tag to a Cloud Connection
- Deleting a Tag from a Cloud Connection
- Querying the Tags Added to a Cloud Connection
- Querying Cloud Connections by Tag
- Network Instances
-
Bandwidth Packages
- Creating a Bandwidth Package
- Querying the Bandwidth Package List
- Querying a Bandwidth Package
- Updating a Bandwidth Package
- Deleting a Bandwidth Package
- Adding a Tag to a Bandwidth Package
- Deleting a Tag from a Bandwidth Package
- Querying the Tags of a Bandwidth Package
- Querying Bandwidth Packages by Tag
- Binding a Bandwidth Package to a Cloud Connection
- Unbinding a Bandwidth Package from a Cloud Connection
- Inter-Region Bandwidths
- Cloud Connection Routes
- Authorizations
-
Central Networks
- Creating a Central Network
- Querying the Central Network List
- Querying a Central Network
- Updating a Central Network
- Deleting a Central Network
- Adding a Tag to a Central Network
- Deleting a Tag from a Central Network
- Querying the Tags Added to a Central Network
- Querying Central Networks by Tag
- Adding a Central Network Policy
- Querying the List of Central Network Policies
- Applying a Central Network Policy
- Deleting a Central Network Policy
- Querying the Changes Between the Current Policy and an Applied Policy
-
Central Network Attachments
- Adding a Global DC Gateway to a Central Network
- Querying the List of Global DC Gateways on a Central Network
- Querying a Global DC Gateway on a Central Network
- Updating a Global DC Gateway on a Central Network
- Adding a Route Table of an Enterprise Router as an Attachment on a Central Network
- Querying the List of Enterprise Router Route Tables on a Central Network
- Querying an Enterprise Router Route Table on a Central Network
- Updating an Enterprise Router Route Table on a Central Network
- Querying the List of Central Network Attachments
- Removing an Attachment from a Central Network
- Central Network Connections
- Site Network Management
- Site-to-site Connection Management
- Cloud Connection Quotas
- Central Network Quotas
- Central Network Capabilities
- Site Network Quotas
- Site Network Capabilities
- Specifications
-
Global Connection Bandwidths
- Querying the Global Connection Bandwidth List
- Creating a Global Connection Bandwidth
- Querying a Global Connection Bandwidth
- Updating a Global Connection Bandwidth
- Deleting a Global Connection Bandwidth
- Binding a Global Connection Bandwidth to an Instance
- Unbinding a Global Connection Bandwidth from an Instance
- Querying the List of Global Connection Bandwidths That Meet the Binding Conditions
- Querying the Tenant Configuration of a Global Connection Bandwidth
- Querying the Line Specification List
- Querying the Site List
- Querying the Line Grade List
-
Global Connection Bandwidth Tag Management
- Querying a Global Connection Bandwidth Tag in an Account
- Adding a Tag to a Global Connection Bandwidth
- Deleting a Tag from a Global Connection Bandwidth
- Adding Tags to a Global Connection Bandwidth
- Deleting Tags from a Global Connection Bandwidth
- Querying the Number of Global Connection Bandwidth Tags in an Account
- Querying the List of Global Connection Bandwidths in an Account
- Querying All Global Connection Bandwidth Tags in an Account
-
Cloud Connections
- Permissions and Supported Actions
- Appendix
- Historical APIs
- SDK Reference
-
FAQs
-
Popular Questions
- How Do I Configure Cloud Connect?
- What Can I Do If Cross-Region Network Communications Fail?
- What Tools Can I Use to Test Network Connectivity After All Configurations Are Complete?
- What Can I Do If There Is a Route Conflict When I Load a Network Instance to a Cloud Connection?
- How Can I Modify the Bandwidth of a Purchased Bandwidth Package?
- Do I Need to Create Another Cloud Connection If Network Instances in One Region Need to Communicate with Network Instances in Two Other Regions That Have Already Been Loaded to a Cloud Connection?
- Why Do I Need Cloud Connect If the Network Latency Is the Same as on the Internet?
-
General Consulting and Service Use
- What Can I Do with Cloud Connect?
- How Do I Configure Cloud Connect?
- What Are the Differences Between Cloud Connect and VPC Peering?
- What Tools Can I Use to Test Network Connectivity After All Configurations Are Complete?
- What Network Instance Types Does Cloud Connect Support?
- How Many Bandwidth Packages Can I Bind to a Cloud Connection?
- Are the Uplink and Downlink Rates of the Configured Inter-Region Bandwidth the Same?
- Are There Any Limits on the Traffic for Cross-Region Network Communications?
- What Are the Metrics for Traffic Monitoring?
- What Are the Restrictions of Using Cloud Connect?
- Where Can I Add Routes for a Cloud Connection on the Management Console?
- Do I Need to Bind an EIP to Each ECS in the VPCs Connected over a Cloud Connection?
- How Can I Modify the Bandwidth of a Purchased Bandwidth Package?
- Will the Modified Inter-Region Bandwidth Take Effect Immediately?
- How Can I Modify Inter-Region Bandwidth?
- Do I Need to Create Another Cloud Connection If Network Instances in One Region Need to Communicate with Network Instances in Two Other Regions That Have Already Been Loaded to a Cloud Connection?
- Are Network Circuits Physically Isolated?
- Is Cloud Connect an Out-Of-The-Box Service?
- How Can Cloud Connect Offer High Availability?
-
Console Operations
- How Do I Configure Cloud Connect?
- What Can I Do If There Is a Route Conflict When I Load a Network Instance to a Cloud Connection?
- How Many Bandwidth Packages Can I Bind to a Cloud Connection?
- What Are the Restrictions of Using Cloud Connect?
- How Can I Apply for a Cross-Border Permit?
- Where Can I Add Routes for a Cloud Connection on the Management Console?
- How Can I Modify the Bandwidth of a Purchased Bandwidth Package?
- How Can I Modify Inter-Region Bandwidth?
- What Tool Can I Used to Test the Bandwidth Rate of a Cloud Connection?
- Will the Modified Inter-Region Bandwidth Take Effect Immediately?
- Bandwidth Packages
-
Bandwidth, Latency and Packet Loss
- What Can I Do If Cross-Region Network Communications Fail?
- Will the Modified Inter-Region Bandwidth Take Effect Immediately?
- How Can I Troubleshoot Network Connectivity for a Hybrid Cloud Built Using Cloud Connect and Direct Connect?
- Do I Need a Bandwidth Package for Testing Network Connectivity?
- Why Do I Need Cloud Connect If the Network Latency Is the Same as on the Internet?
- Are the Uplink and Downlink Rates of the Configured Inter-Region Bandwidth the Same?
- Are There Any Limits on the Traffic for Cross-Region Network Communications?
- How Can I Modify an Inter-Region Bandwidth?
- Are Network Circuits Physically Isolated?
- How Can Cloud Connect Offer High Availability?
-
Cross-Border Permit
- Why Do I Need a Cross-Border Permit?
- Who Approves Cross-Border Permits?
- How Can I Apply for a Cross-Border Permit?
- When Would I Need to Apply for a Cross-Border Permit?
- How Long Will a Cross-Border Permit Be Approved?
- Why Is Additional Real-Name Authentication Required After I Have Completed Huawei Cloud Real-Name Authentication?
- Can I Modify the Content of the Cloud Connect Cross-Border Circuit Service Agreement?
- Can I Download the Materials for My Cross-Border Permit Application on the Console After I Delete Them from My PC?
- Does Huawei Cloud Need to Sign and Stamp the Seal on the Materials for Cross-Border Permit Application?
- Networking and Cloud Connect Scenarios
-
Cross-Account Authorization
- Does the Other User Need to Buy a Bandwidth Package If I Want to Load This Other User's VPCs to My Cloud Connection?
- Does the Other User Need to Create a Cloud Connection If I Want to Load This Other User's VPCs to My Cloud Connection?
- How Do I Load VPCs Across Accounts?
- Can a VPC Be Loaded to More than One Cloud Connection?
- Permissions
- Monitoring
- Quotas
-
Popular Questions
- General Reference
Copied.
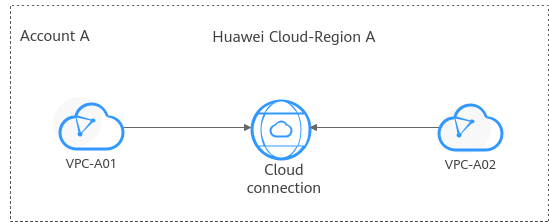
Using a Cloud Connection to Connect VPCs in the Same Region
In this section, the VPCs are in the same account and the same region.
Procedure
|
Step |
Description |
|---|---|
|
Before using cloud services, sign up for a HUAWEI ID, enable Huawei Cloud services, complete real-name authentication, and top up your account. |
|
|
Create a cloud connection. |
|
|
Load the VPCs to the created cloud connection based on your network plan. |
Preparations
Before creating a cloud connection, you need to sign up for a HUAWEI ID, enable Huawei Cloud services, complete real-name authentication, and top up your account. Ensure that your account has sufficient balance.
- Sign up for a HUAWEI ID, enable Huawei Cloud services, and complete real-name authentication.
- Top up your account.
Ensure that your account has sufficient balance. For details about how to top up an account, see Topping up an Account.
Step 1: Create a Cloud Connection
- Go to the Cloud Connections page.
- In the upper right corner of the page, click Create Cloud Connection.
- Configure the parameters based on Table 1.
Table 1 Parameters for creating a cloud connection Parameter
Description
Name
Specifies the cloud connection name.
The name can contain 1 to 64 characters. Only letters, digits, underscores (_), hyphens (-), and periods (.) are allowed.
Enterprise Project
Provides a cloud resource management mode, in which cloud resources and members are centrally managed by project.
Scenario
VPC: VPCs or virtual gateways can use this cloud connection.
Tag
Identifies the cloud connection. A tag consists of a key and a value. You can add 20 tags to a cloud connection.
 NOTE:
NOTE:
If a predefined tag has been created on Tag Management Service (TMS), you can directly select the corresponding tag key and value.
For details about predefined tags, see Predefined Tags.
Description
Provides supplementary information about the cloud connection.
The description can contain no more than 255 characters.
- Click OK.
Step 2: Load Network Instances
Load the VPCs that need to communicate with each other to the created cloud connection.
- Go to the Cloud Connections page.
- Click the name of the cloud connection to go to the Basic Information page.
- Click the Network Instances tab.
- Click Load Network Instance.
- Configure the parameters based on Table 2 and click OK.
Figure 2 Load Network Instance - Current account

Table 2 Parameters for loading a network instance to a cloud connection Parameter
Description
Account
Specifies the account that provides the network instance.
Select Current account.
Region
Specifies the region where the VPC you want to connect is located.
Instance Type
Specifies the type of the network instance that needs to be loaded to the cloud connection. There are two options:
- VPC
- Virtual gateway
Select VPC.
VPC
Specifies the VPC you want to load to the cloud connection.
This parameter is mandatory if you have set Instance Type to VPC.
VPC CIDR Block
Specifies the subnets in the VPC and custom CIDR blocks.
If you have set Instance Type to VPC, you need to configure the following two parameters:
- Subnet: Select one or more subnets in the VPC.
- Other CIDR Block: Add one or more custom CIDR blocks as needed.
Remarks
Provides supplementary information about the network instance.
- Click Continue Loading if you need to load another network instance. If you do not need to load another network instance now, close the dialog box and view the loaded network instance on the Network Instances tab.
Feedback
Was this page helpful?
Provide feedbackThank you very much for your feedback. We will continue working to improve the documentation.See the reply and handling status in My Cloud VOC.
For any further questions, feel free to contact us through the chatbot.
Chatbot


