Pushing Streams and Streaming Content on a PC (for Cloud Stream Live)
This section describes how to push streams and stream content on a PC using the third-party software.
Prerequisites
- You have configured an ingest domain name and a streaming domain name on the Live console by referring to Adding Domain Names.
- You have installed a streaming tool (recommended: Open Broadcaster Software). If you have not installed it yet, download and install it.
- You have installed a media player (recommended: VLC media player). If you have not installed it yet, download and install it.
Pushing Streams
- Obtain an ingest URL.
- Log in to the Live console. In the navigation pane, choose Domains.
- Click Manage in the Operation column of the desired ingest domain name. Obtain the ingest URL on the Basic Info page.
See Figure 1. StreamName is user-defined. Example of ingest URL: rtmp://livepush-test.huaweicloud.com/live/huawei09.

The domain name in the preceding figure is only an example. Use your own ingest domain name.
- Run OBS and click Settings in the lower right corner.
Figure 2 Settings

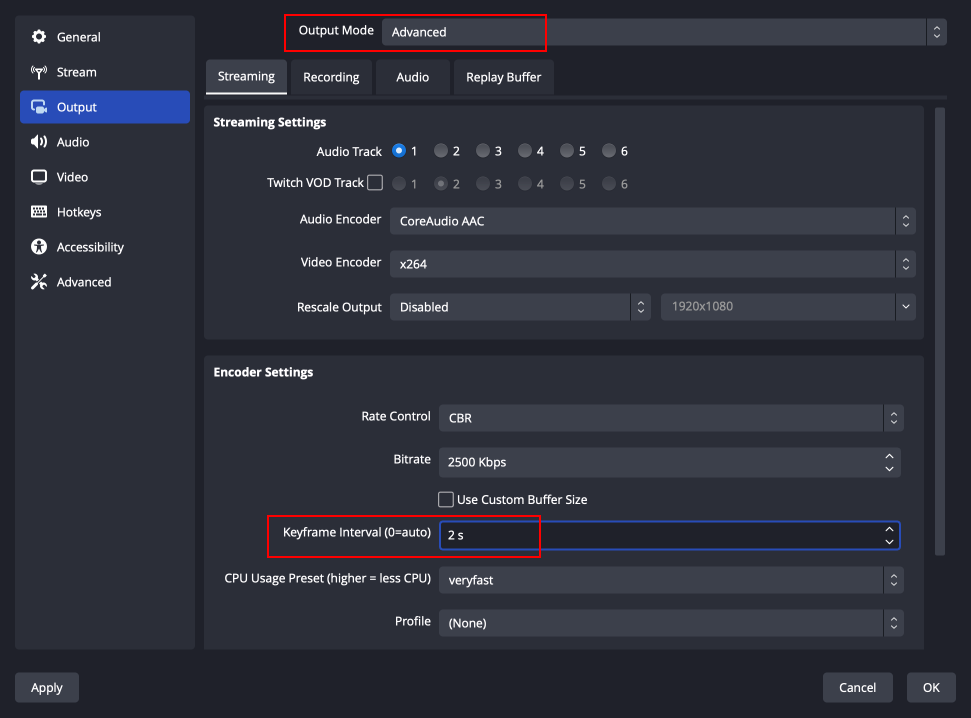
- On the left navigation pane, choose Output. Set Output Mode to Advanced and Keyframe Interval to 2.
Figure 3 Output mode

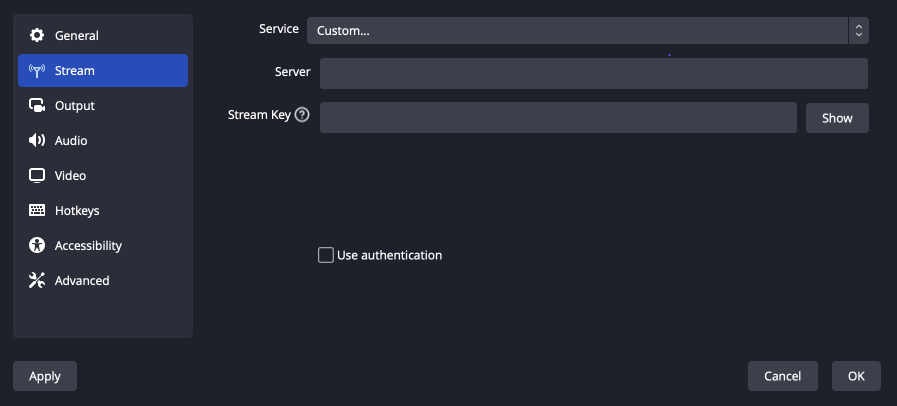
- In the navigation pane, choose Stream and enter the ingest URL obtained in 1.
Figure 4 Livestreaming settings
 An ingest URL consists of the following two parts:
- URL: Enter the part from the beginning of the ingest URL to the AppName, for example, rtmp://livepush-test.huaweicloud.com/live/.
- Stream Key: Enter the part from the StreamName to the end of the ingest URL, for example, huawei09.

The parameter names on the GUI may vary depending on the OBS version, but the rules for configuring the parameters are the same.
- Click OK.
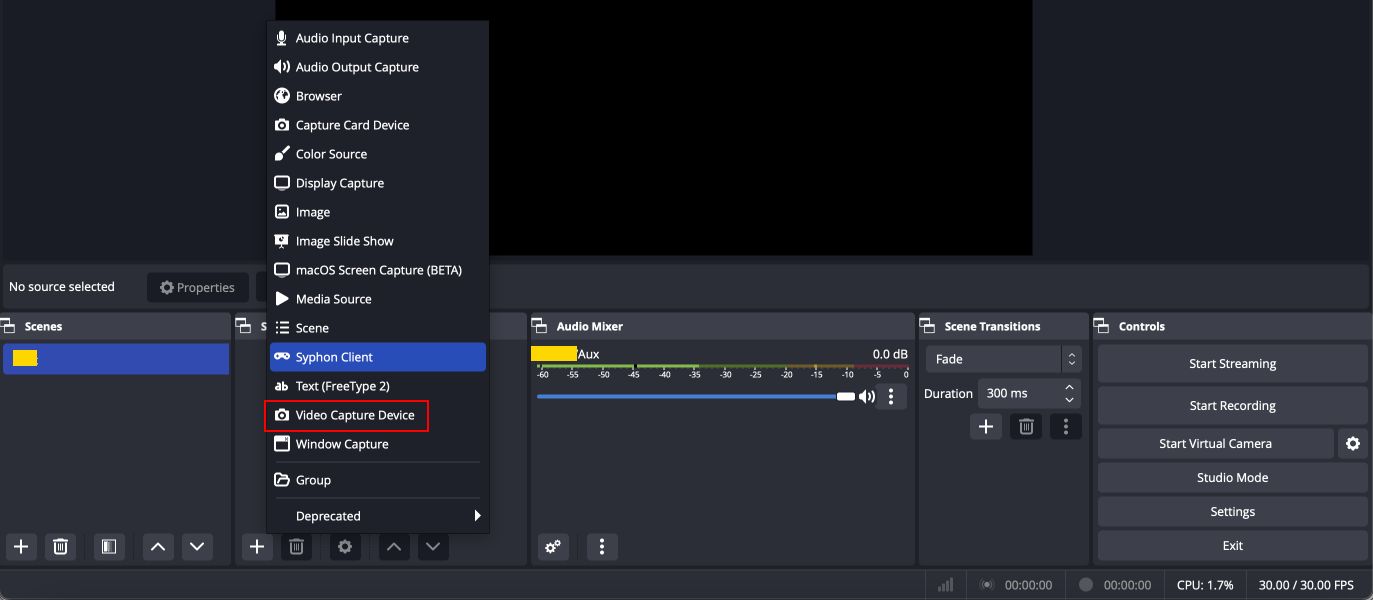
- Right-click + in the lower left part of the Sources area to add a stream source.
Figure 5 Source settings

- Media Source indicates a local media file.
- Video Capture Device indicates a camera. If a camera is available on the PC, the camera is directly enabled.
- Click Start Streaming in the lower right corner.
Streaming Content
- Obtain a streaming URL.
- Log in to the Live console. In the navigation pane, choose Domains.
- Click Manage in the Operation column of the desired streaming domain name. Obtain the streaming URL on the Basic Info page.
See Figure 6. StreamName is user-defined and must be the same as the value of StreamName in the ingest URL. Otherwise, the playback fails.
For example, a streaming URL can be assembled in the following formats:
- FLV: http://exampletest.huaweicloud.com/live/huawei09.flv
- M3U8: http://exampletest.huaweicloud.com/live/huawei09.m3u8
- RTMP: rtmp://exampletest.huaweicloud.com/live/huawei09

The domain name in the preceding figure is only an example. Use your own streaming domain name.
- Run VLC.
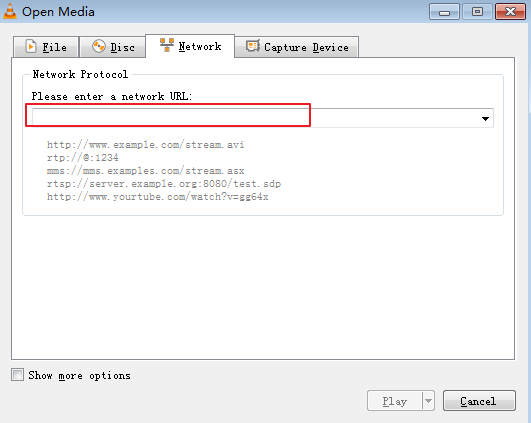
- On the menu bar, choose Media > Open Multiple Files.
- In the displayed dialog box, enter the streaming URL obtained in step 1. Click Play.

Helpful Links
If you use your own domain names for livestreaming, you can configure the following functions before using Live:
- Recording a live video to OBS
- Snapshot capturing
- Transcoding: used to transcode a livestream in different specifications and play the content using a transcoded streaming URL
- Stream authentication: used to protect live resources
Feedback
Was this page helpful?
Provide feedbackThank you very much for your feedback. We will continue working to improve the documentation.See the reply and handling status in My Cloud VOC.
For any further questions, feel free to contact us through the chatbot.
Chatbot


