
Building with Maven (Custom Executors, GUI)
Scenario
If the built-in executors provided by CodeArts Build fall short of your service needs, you can use your own computing resources. Once registered, these computing resources can be hosted in CodeArts Build. You can then configure CodeArts Build to schedule them for running build tasks. In this practice, you configure actions Build with Maven and Upload to Release Repo and run your build on custom executors.
These steps depend on the following services:
- CodeArts Repo: stores your project code.
- CodeArts Artifact: stores your private dependencies.
Requirements
- You have permissions for CodeArts Artifact.
- You have permissions for CodeArts Repo.
Resources and Costs
In this practice, you need to purchase an ECS as a custom executor. For details about the price of an ECS, see Price Calculator.
Prerequisites
You have purchased an Elastic Cloud Server (ECS) for your custom executors by referring to Purchasing an ECS.
Procedure
| Step | Description |
|---|---|
| Create a project. | |
| Create a pool of custom executors (agent pool). | |
| Create a repository to store code. | |
| Create a build task that includes actions Build with Maven and Upload to Release Repo. | |
| Check the build logs to verify the executors used for the build task and view the uploaded software package in CodeArts Artifact. |
Creating a Project
- Log in to the Huawei Cloud console with your Huawei Cloud account.
- Click
 in the upper left corner and choose from the service list.
 - Click Access Service. The homepage of CodeArts is displayed.
- Click Create Project, and select the Scrum template.
- Set the project name to build-bestpractice, and leave the other parameters as default.
- Click OK to access the project.
Creating an Agent Pool
- On the navigation bar, click the username
 and choose All Account Settings.
 - Choose .
- Click Create Pool. In the displayed dialog box, set parameters according to Table 2 and click Save.
Table 2 Agent pool configuration Parameter
Description
Pool Name
Assign a custom name to the pool, for example, custom_pool.
Pool Type
Select LINUX_DOCKER. When a task is initiated, a Linux Docker container will be started to run the task.
Description
(Optional) Enter additional information to describe the pool.
This pool can be used by all users of the current account.
(Optional) Selecting this option allows all users within the current account to use the pool.
- Click the name of the new pool (custom_pool is used in this practice). The pool configuration page is displayed.
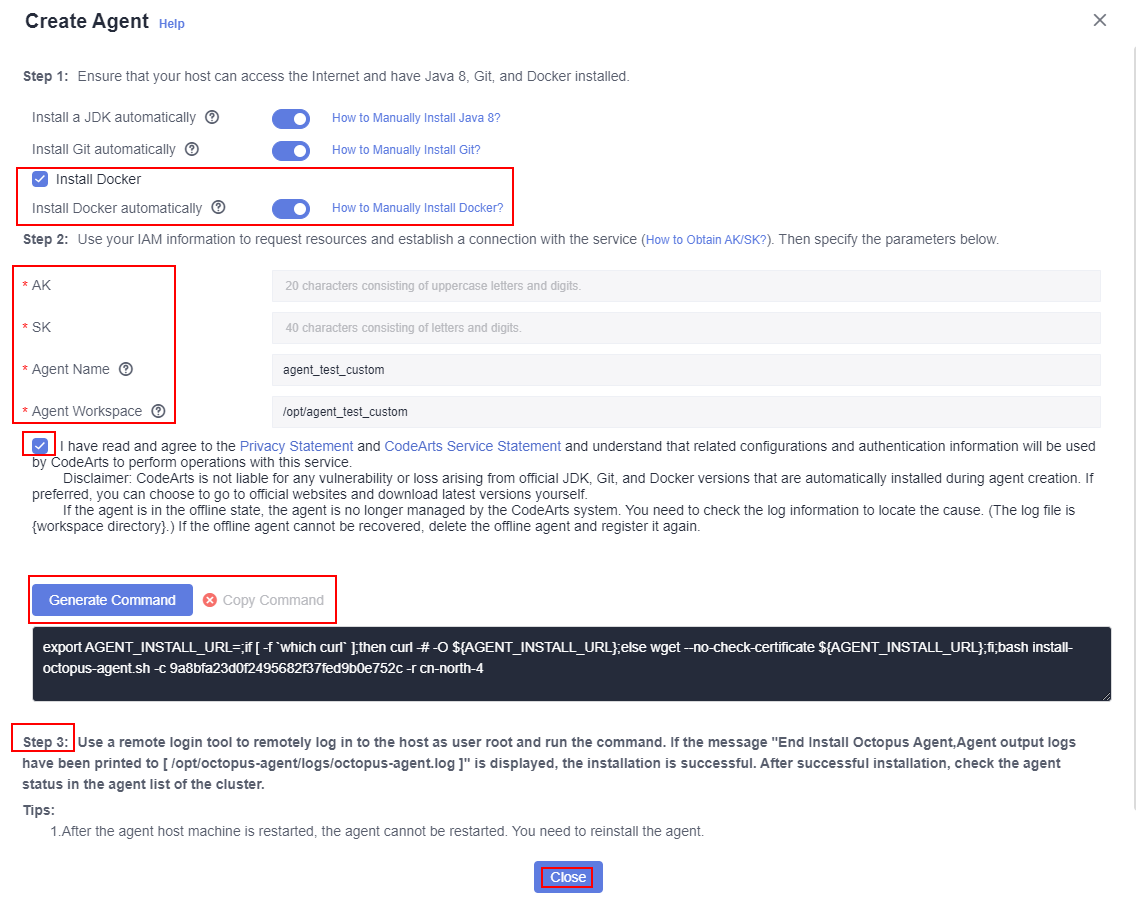
- Click Create Agent. In the displayed dialog box, configure the agent according to Table 3 and leave the other parameters as default.
Table 3 Parameters for creating an agent Parameter
Description
Install Docker
Selecting this option mandates Docker installation.
Install Docker automatically
Toggling on the switch will automatically install Docker.
AK
Obtain the AK by referring to Obtaining an AK/SK.
SK
Obtain the SK by referring to Obtaining an AK/SK.
Agent Name
Assign a custom name to the agent, for example, agent_test_custom.
Agent Workspace
Enter an agent workspace that follows the standard Linux directory structure. For example, /opt/agent_test_custom.
- Select the check box to confirm that you have read and accept the agreements. Then click Generate Command and Copy Command. Click Close. Figure 1 Creating an agent
- Go to the ECS list page, find the row of the ECS purchased to meet prerequisites, click Remote Login, and run the command copied in 6, as instructed by Step 3.
- On the agent list page, click Refresh List. After the information is automatically synchronized in the background, a new item will be added to the list. The agent alias is agent_test_custom-mwlye1NlLG.
Creating a CodeArts Repo Repository
- In the navigation pane, choose . The CodeArts Repo homepage is displayed.
- Click New Repository. On the displayed page, expand the Project drop-down list and select the project name you specify when creating a project. Then, select Template as the repository type. Click Next.
- On the template selection page, select the Java Maven Demo template and click Next.
- On the displayed page, set Repository Name to custom_repo, and leave the other parameters as default. Click OK.
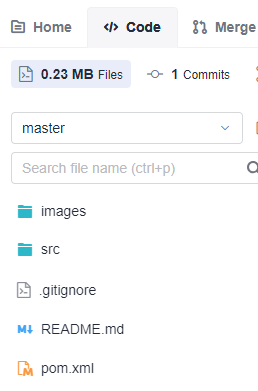
Figure 2 shows the directory that stores files of the code repository.
Creating and Running a Build Task
- In the navigation pane, choose .
- Click Create Task. On the displayed Basic Information page, set parameters according to Table 4. Then, click Next.
Table 4 Basic information Parameter
Description
Name
Assign a custom name to the build task, for example, custom_task.
Code Source
Select Repo to pull the code hosted in a CodeArts Repo repository for your build.
Repository
Select custom_repo, the code repository created in Creating a CodeArts Repo Repository.
Default Branch
Keep the default value master.
Description
Enter additional information to describe the build task.
- Select the Maven template and click OK. The Build Actions page is displayed.
- Configure the build environment according to Table 5. Leave the other parameters as default, and click Save and Execute.
Table 5 Environment parameters Parameter
Description
Execution Host
Select Custom executor.
Agent Pool
Expand the drop-down list and select custom_pool you created in section "Creating an Agent Pool".
Figure 3 Configuring the build environment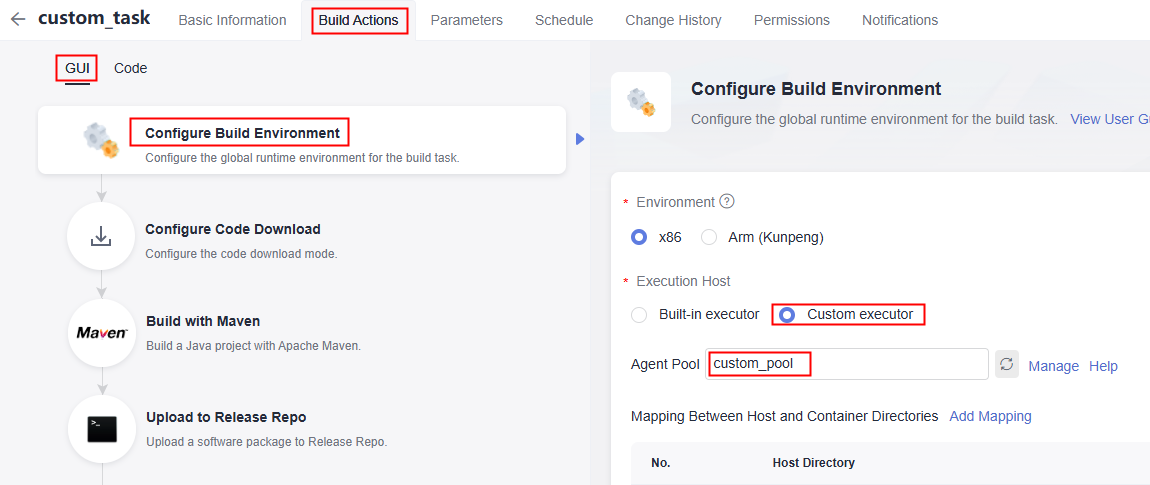
- In the displayed dialog box, click OK. The build task execution page is displayed.
Viewing the Build Task and Its Results
- The console displays the logs of the build task as it runs. The log window automatically scrolls down to show new entries. As shown in Figure 4, the log indicates that the current build task is running on executor agent_test_custom-mwlye1NlLG in pool custom_pool created in section Creating an Agent Pool.
- The build task is considered successful if each build action is marked with
 after running. Figure 5 Build success
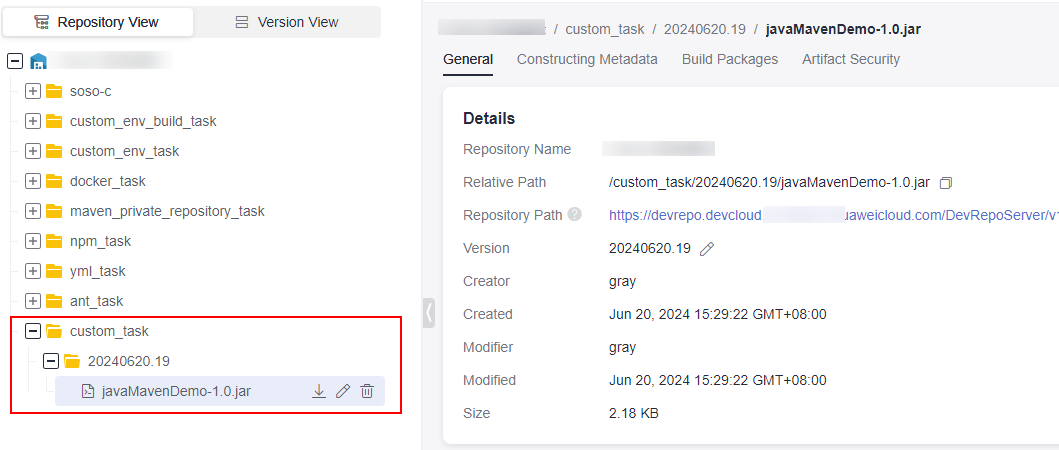
- Click action Upload to Release Repo. In the logs, you can find the path that stores the software package uploaded to the release repo: /custom_task/20240620.19/.
- In the navigation pane, choose . You can find the software package at /custom_task/20240620.19/javaMavenDemo-1.0.jar. Figure 6 Software package information

Related Operations
For Maven build questions, see Maven Build FAQs.
Feedback
Was this page helpful?
Provide feedbackThank you very much for your feedback. We will continue working to improve the documentation.See the reply and handling status in My Cloud VOC.
For any further questions, feel free to contact us through the chatbot.
Chatbot


