Managing Authorization
You can grant permissions to clients and database users who access the database on the Authorization Management page.
The authorization management module supports client and user authorization. Obtain the intersection of client and user authorization. For details, see Authorizing Clients and Authorizing Users.
The management authorization example is described as follows:
|
Parameter |
Example Value |
|---|---|
|
Client Authorization |
IP address range:
|
|
User Authorization |
The WordPress user can query, add, and modify permissions. |
The configuration result is as follows:
- A user whose IP address is 192.168.0.105 can view plaintext data when accessing the database uses WordPress in proxy mode.
- A user whose IP address is 192.168.0.105 can only view encrypted data when accessing the database uses non-WordPress in proxy mode.
- A user whose IP address is 192.168.3.105 can only view encrypted data when accessing the database uses WordPress in proxy mode.
- Log in to a database encryption and access control instance as the sysadmin user.
- In the navigation pane, choose Data Encryption > Authorization Management.
- In the data source list, click a data source.
- Locate the target encrypted database table and click Client Authorization.
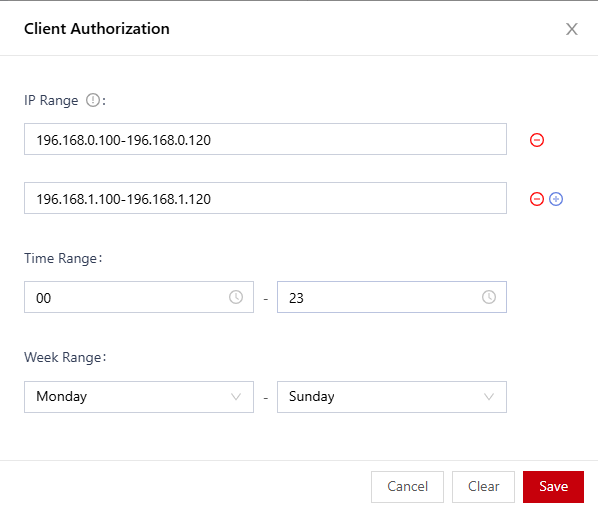
- In the Client Authorization dialog box, set the client IP address range, time range, and week range.
Figure 1 Client authorization


- You can set the start IP address and end IP address for an IP address range. You can click
 to add multiple IP address ranges. A maximum of 10 IP address ranges can be set.
 - The value ranges from 00 to 23. The value indicates the hour. For example, the value 10 indicates 10:00-10:59, including 10:00 and 10:59. If the time range is set to 08-18, the time range is 08:00-18:59, including 08:00 and 18:59.
- You can set the start IP address and end IP address for an IP address range. You can click
- Click Save.
- Log in to a database encryption and access control instance as the sysadmin user.
- In the navigation pane, choose Data Encryption > Authorization Management.
- In the data source list, click a data source.
- Locate the target encrypted database table and click User Authorization.
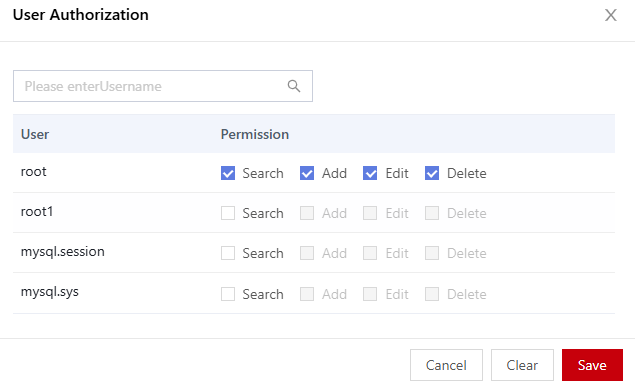
- In the displayed dialog box, set the database user to be authorized.
Figure 2 User authorization

- Click Save.
Feedback
Was this page helpful?
Provide feedbackThank you very much for your feedback. We will continue working to improve the documentation.See the reply and handling status in My Cloud VOC.
For any further questions, feel free to contact us through the chatbot.
Chatbot


