
Restoring Data Using Snapshots
During routine O&M, the ability to rapidly restore data upon data loss or corruption is crucial for Elasticsearch clusters. A snapshot allows you to restore a point-in-time copy of a cluster to the original cluster or to another eligible cluster. This process fetches the backed-up index data, metadata, and shard structure from OBS and reconstruct them in the selected destination cluster, ensuring data consistency. This capability is essential for operations like data rollback, cluster migration, and disaster recovery. With snapshots for CSS clusters, you can restore data quickly and reliably to ensure service continuity.
Constraints
- Creating cluster snapshots will increase CPU load and disk I/O. To minimize impact on system performance, you are advised to schedule it to happen during off-peak hours.
- If the source cluster is unavailable, you can restore its snapshots to a designated destination cluster.
- When creating or restoring a snapshot, you can only perform certain operations, including accessing Kibana, viewing metrics, and deleting other snapshots. However, you cannot perform the following operations: modifying configuration, restarting or deleting the cluster, deleting the snapshot that is being created or restored, and creating or restoring another snapshot. While a snapshot is being created or restored for a cluster, any automatic snapshot creation task initiated for that cluster will be canceled.
- When you create the first snapshot in a cluster, a full backup is performed on all data. Subsequent snapshots are all incremental, storing only the changes since the previous snapshot. Because each incremental snapshot relies on its predecessors, you must restore them in the correct sequence.
- Before snapshot restoration is completed, the indexes being restored to the destination cluster cannot be queried.
- If the two clusters have indexes with the same names but different shard structures, such indexes cannot be restored.
- The version of the destination cluster must be the same as or later than that of the source cluster.
Prerequisites
In the source cluster's snapshot task list, there are snapshots whose Snapshot Task Status is Available. The status of the destination cluster is also Available.
Restoring Data
- Log in to the CSS management console.
- In the navigation pane on the left, choose Clusters > Elasticsearch.
- In the cluster list, click the name of the target cluster. The cluster information page is displayed.
- Click the Cluster Snapshots tab.
- In the cluster snapshot task list, select a snapshot, and click Restore in the Operation column. In the displayed dialog box, configure necessary settings. Figure 1 Restoring a snapshot
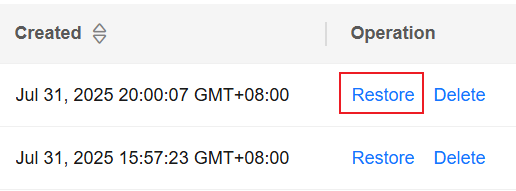
Table 1 Restoration settings Parameter
Description
Index
Specify the name of the index you want to restore.
- The value is a string of 0 to 1024 characters that cannot contain uppercase letters, spaces, or the following special characters: "\<|>/?.
- When restoring an index whose name is prefixed with .kibana, the index name must be specified.
- The .opendistro_security index cannot be restored.
- You can use an asterisk (*) to match multiple indexes. For example, index* indicates that all indexes with the prefix index will be restored. When an asterisk (*) is used for index matching, the .opendistro_security index and any system indexes whose name is prefixed with .kibana are filtered out by default.
- You can restore indexes by specifying their names, for example, index1,index2,index3.
By default, this parameter is left blank. That is, no index name is specified, and all indexes will be restored.
Rename Pattern
Index name matching rule. Enter a regular expression. Indexes that match the regular expression will be restored.
The Rename Pattern and Rename Replacement take effect only when they are both configured at the same time. For an example, see Index, Rename Pattern, and Rename Replacement: Parameters and Examples.
The value is a string of 0 to 1024 characters that cannot contain uppercase letters, spaces, or the following special characters: "\<|>/?,.
For example, index_(.+) indicates that all indexes whose name starts with index_ will be renamed upon restoration.
Rename Replacement
Rule for index renaming. Upon restoration, matching indexes are renamed according to the defined rule.
The Rename Pattern and Rename Replacement take effect only when they are both configured at the same time. For an example, see Index, Rename Pattern, and Rename Replacement: Parameters and Examples.
The value is a string of 0 to 1024 characters that cannot contain uppercase letters, spaces, or the following special characters: "\<|>/?,.
For example, restored_index_$1 indicates that restored_ will prefix the name of all restored indexes.
Cluster
Select the cluster where you want to restore the data to. You can select the current cluster or another.
- You must specify a cluster whose status is Available. If the status of the current cluster is Unavailable, you cannot restore the snapshot to the current cluster.
- When you choose to restore data to another cluster, make sure the target cluster has the same or later version than the current cluster, and that the two clusters are in the same region. After a frozen index is restored using a snapshot, the index is stored on the local node and is read-only by default. To make it writable, run the following command to configure the index:
PUT index_name/_settings
{
  "index.blocks.write": null
}
Overwrite same-name indexes in destination cluster
Whether to overwrite same-name indexes in the destination cluster. By default, this option is unselected.
Restoring a snapshot will overwrite existing data in the destination cluster. When there are same-name indexes in the destination cluster, you need to select this option in order to restore same-name, same-shard structure indexes. Indexes with a different shard structure cannot be restored.
- Click OK to start restoring the snapshot.
If restoration succeeds, Snapshot Task Status of the snapshot in the snapshot task list will change to Restoration succeeded, and the index data captured in the snapshot is reconstructed.
Figure 2 Restoration succeeded
Verifying Snapshot Restoration
After snapshot restoration, go to the destination cluster to check the restored index information.
- Log in to the CSS management console.
- In the navigation pane on the left, choose Clusters > Elasticsearch.
- In the cluster list, find the target cluster, and click Kibana in the Operation column to log in to the Kibana console.
- In the left navigation pane, choose Dev Tools.
The left part of the console is the command input box, and the triangle icon in its upper-right corner is the execution button. The right part shows the execution result.
- Run the following command to check index information.
GET _cat/indices
Index, Rename Pattern, and Rename Replacement: Parameters and Examples
This section describes the Index, Rename Pattern, and Rename Replacement parameters. It also provides examples to show how to configure them.
- Retaining the original index name when restoring an index
Specify Index for the index to be replaced.
- Renaming an index when restoring it To rename an index upon restoring it, specify Index, Rename Pattern, and Rename Replacement. Their meanings are as follows:
- Index: Specifies the name or pattern (wildcard supported) of the indexes you wish to restore. It must include the indexes that need to be renamed. This parameter defines the indexes that you wish to restore using snapshots to a designated destination cluster.
- Rename Pattern: Uses a regular expression to specify indexes that you wish to rename among the indexes to be restored (specified by Index). Only indexes whose names match the regular expression exactly will be renamed.
- Rename Replacement: Defines the naming rule for restored indexes that match Rename Pattern. This rule is a character string that uses a capture group (for example, $1) to reuse the text captured by Rename Pattern.
- Index is set to index_*, old_index: index_* indicates all indexes whose name starts with index_, and old_index specifies a single index.
- Rename Pattern is set to index_(.+): This specifies that indexes whose name starts with index_ will be renamed.
- Rename Replacement is set to restored_index_$1: This replaces the matched index names with restored_index_ plus the text of the capture group.
POST /_snapshot/{repo_name}/{snapshot_name}/_restore
{
  "indices": "index_*, old_index",
  "ignore_unavailable": true,
  "include_global_state": true,
  "rename_pattern": "index_(.+)",   // This corresponds to the Rename Pattern parameter.
  "rename_replacement": "restored_index_$1",  // This corresponds to the Rename Replacement parameter.
} - The source index index_logs is renamed as restored_index_logs.
- The source index index_users is renamed as restored_index_users.
- The source index old_index does not match rename_pattern, and is therefore not renamed. The original name old_index is retained after restoration.
Related Documents
By creating and restoring snapshots, you can migrate data between clusters. For details, see Migrating Data Between Huawei Cloud Elasticsearch Clusters Using Backup and Restoration.
Feedback
Was this page helpful?
Provide feedbackThank you very much for your feedback. We will continue working to improve the documentation.See the reply and handling status in My Cloud VOC.
For any further questions, feel free to contact us through the chatbot.
Chatbot


