
Creating Snapshots to Back Up Data
CSS allows you to use snapshots to back up and restore Elasticsearch cluster data. By storing a snapshot in an OBS bucket, you save a point-in-time copy of the cluster's data. By restoring this snapshot, you can restore the cluster to a previous state. There are two ways to create snapshots: automatic and manual.
- Automatic snapshot creation: Snapshots are automatically created daily or weekly based on a preset time schedule, ensuring ongoing data protection. By configuring an automatic snapshot policy, you reduce manual operations while improving backup reliability and efficiency.
- Manual snapshot creation: You create snapshots manually for special occasions, for example, prior to a high-risk operation (such as a cluster upgrade). This ensures you can restore data using snapshots in case anything should go wrong. Manual snapshots provide additional flexibility.
Impact on Billing
When you use snapshots for data backup, the generated snapshots are stored in OBS buckets, which will result in additional costs. For details, see Object Storage Service Billing.
Constraints
- Snapshots cannot be created for clusters that were created before March 10, 2018.
- Creating cluster snapshots will increase CPU load and disk I/O. To minimize impact on system performance, you are advised to schedule it to happen during off-peak hours.
- When creating or restoring a snapshot, you can only perform certain operations, including accessing Kibana, viewing metrics, and deleting other snapshots. However, you cannot perform the following operations: modifying configuration, restarting or deleting the cluster, deleting the snapshot that is being created or restored, and creating or restoring another snapshot. While a snapshot is being created or restored for a cluster, any automatic snapshot creation task initiated for that cluster will be canceled.
- When you create the first snapshot in a cluster, a full backup is performed on all data. Subsequent snapshots are all incremental, storing only the changes since the previous snapshot. Because each incremental snapshot relies on its predecessors, you must restore them in the correct sequence.
- In a cluster where storage and compute are decoupled, an index that is both frozen and closed cannot be backed up.
- For an index with read/write splitting between leader and follower enabled, synchronization cannot be stopped while a snapshot is being created for it. To stop synchronization, you must wait until snapshot creation is complete.
- An index that is being backed up via snapshot cannot be deleted or closed. This constraint also applies to deletion or closing operations triggered by ISM policies. To perform such operations, wait until snapshot creation is complete.
Prerequisites
- The OBS bucket used for storing cluster snapshots has been created. The OBS bucket must be in the same region as the target Elasticsearch cluster, and the storage class must be Standard or Warm.
- The cluster status is Available.
Enabling Cluster Snapshots
- Log in to the CSS management console.
- In the navigation pane on the left, choose Clusters > Elasticsearch.
- In the cluster list, click the name of the target cluster. The cluster information page is displayed.
- Click the Cluster Snapshots tab, and check whether cluster snapshots are enabled.
- If they are enabled, skip this step.
- If they are disabled, go to the next step.
- On the Cluster Snapshots tab, click Enable Snapshot. In the displayed dialog box, configure the necessary settings. Figure 1 Enabling cluster snapshots

Table 1 Enabling cluster snapshots Parameter
Description
OBS Bucket
From the drop-down list, select an OBS bucket for storing snapshots.
If no OBS buckets meet your requirements, click Create Bucket to go to the OBS console and create one. For details, see Creating a Bucket.
To grant an IAM user access to an OBS bucket, you need to grant the GetBucketStoragePolicy, GetBucketLocation, ListBucket, and ListAllMyBuckets permissions to that user.
Backup Path
Snapshot storage path in the OBS bucket.
The backup path cannot:- Contain the following characters: \:*?"<>|'{}
- Start with a slash (/).
- Start or end with a period (.).
- Contain more than two consecutive slashes (/) or periods (.).
- Exceed 512 characters.
CAUTION:Only standard OBS storage can be used to store snapshots. Do not apply OBS lifecycle rules to the backup path.
Maximum Backup Rate (per Second)
The parameter sets the maximum backup rate per node. When it is exceeded, flow control is triggered to prevent excessive resource usage and ensure system stability. The actual backup rate may not reach the configured value, as it depends on factors such as OBS performance and disk I/O.
Value format: number + unit- Number range: 0–9999
- Unit: KB, MB, GB, TB, PB, or B
Default value: 40 MB
The value 0MB means there is no limit on how fast data is backed up to snapshots. An overly high backup rate may lead to excessive resource usage, which may impact cluster stability. Therefore, set this parameter carefully.
Maximum Recovery Rate (per Second)
The parameter sets the maximum recovery rate per node. When it is exceeded, flow control is triggered to prevent excessive resource usage and ensure system stability. The actual recovery rate may not reach the configured value, as it depends on factors such as OBS performance and disk I/O.
Value format: number + unit- Number range: 0–9999
- Unit: KB, MB, GB, TB, PB, or B
Default value:- For Elasticsearch 7.6.2 clusters or earlier, the default value is 40 MB.
- For Elasticsearch clusters later than 7.6.2, the default value is 0 MB, indicating no limit.
An overly high recovery rate may lead to excessive resource usage, which may impact cluster stability. Configure this parameter carefully to maintain optimal performance.
For Elasticsearch clusters later than 7.6.2, the recovery rate is also limited by the indices.recovery.max_bytes_per_sec parameter.- If Maximum Recovery Rate (per Second) is lower than indices.recovery.max_bytes_per_sec, the former takes effect.
- If Maximum Recovery Rate (per Second) is greater than indices.recovery.max_bytes_per_sec, the latter takes effect.
NOTE:- To check the value of indices.recovery.max_bytes_per_sec, run the following command:
GET _cluster/settings
- To modify indices.recovery.max_bytes_per_sec, run the following command:
PUT _cluster/settings
{
  "transient": {
    "indices.recovery.max_bytes_per_sec": "100mb"
  }
}
IAM Agency
Select an IAM agency to grant the current account the permission to access and use OBS. To store snapshots to an OBS bucket, you must have the required OBS access permissions.- If you are configuring an agency for the first time, click Automatically Create IAM Agency to create css-obs-agency.
- If there is an IAM agency automatically created earlier, you can click One-click authorization to have the OBS Administrator permissions deleted automatically, and have the following custom policies added automatically instead to implement more refined permissions control.
"obs:bucket:GetBucketLocation",
"obs:object:GetObjectVersion",
"obs:object:GetObject",
"obs:object:DeleteObject",
"obs:bucket:HeadBucket",
"obs:bucket:GetBucketStoragePolicy",
"obs:object:DeleteObjectVersion",
"obs:bucket:ListBucketVersions",
"obs:bucket:ListBucket",
"obs:object:PutObject"
- When OBS buckets use SSE-KMS encryption, the IAM agency must be granted KMS permissions. You can click Automatically Create IAM Agency and One-click authorization to have the following custom policies created automatically.
"kms:cmk:create",
"kms:dek:create",
"kms:cmk:get",
"kms:dek:decrypt",
"kms:cmk:list"
- To use Automatically Create IAM Agency and One-click authorization, the following minimum permissions are required:
"iam:agencies:listAgencies",
"iam:roles:listRoles",
"iam:agencies:getAgency",
"iam:agencies:createAgency",
"iam:permissions:listRolesForAgency",
"iam:permissions:grantRoleToAgency",
"iam:permissions:listRolesForAgencyOnProject",
"iam:permissions:revokeRoleFromAgency",
"iam:roles:createRole"
- To use an IAM agency, the following minimum permissions are required:
"iam:agencies:listAgencies",
"iam:agencies:getAgency",
"iam:permissions:listRolesForAgencyOnProject",
"iam:permissions:listRolesForAgency"
WARNING:The agency name can contain only letters (case-sensitive), digits, underscores (_), and hyphens (-). Otherwise, the backup will fail.
Determine whether to enable automatic snapshot creation based on service needs.- To enable it, select Automatic Snapshot Creation, and configure necessary settings by referring to Configuring Automatic Snapshot Creation.
- To disable it, unselect Automatic Snapshot Creation, in which case, you will need to manually create snapshots.
- Click OK to enable cluster snapshots.
The configuration information will be displayed on the Cluster Snapshots tab.
Configuring Automatic Snapshot Creation
You can enable automatic snapshot creation after cluster snapshots are already enabled.
- On the Cluster Snapshots tab, click Modify Settings. In the displayed dialog box, select Automatic Snapshot Creation, and configure necessary settings. Figure 2 Modifying Settings
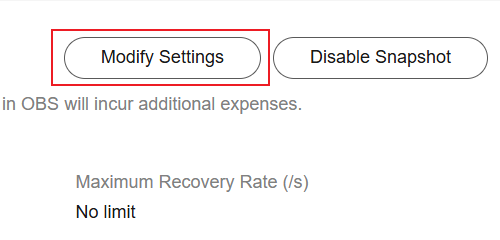
Table 2 Configuring automatic snapshot creation Parameter
Description
Snapshot Name Prefix
A snapshot name consists of the snapshot name prefix and timestamp, for example, snapshot-1566921603720.
The snapshot name prefix can contain 1 to 32 characters. It must start with a lowercase letter, and it can only contain lowercase letters, digits, hyphens (-), and underscores (_).
The default value is snapshot.
Time Zone
Select a time zone for the backup start time.
Backup Start Time
Specify the start time of auto backup.
Select a value from the drop-down list. The interval can be Daily, Hourly, or weekly (by selecting a specific day of the week), and the backup time can be set to any hour from 00:00 to 23:00 (full hours only).
Retained Snapshots
Number of automatic snapshots to be retained. The value ranges from 1 to 90. The system automatically deletes excess snapshots every half hour. (The expiration deletion policy applies only to the snapshots that were automatically created at the same frequency as the current automatic snapshot creation policy.)NOTE:If the snapshot creation interval is short or if the data size of indexes is large, the number of automatic snapshots retained may not reach the value set using this parameter.
Index
Specify the name of the index to be backed up.
- You can back up a specified index. To specify multiple indexes, use commas (,) to separate them, for example, index1,index2,index3.
- You can use an asterisk (*) to match multiple indexes. For example, index* indicates that all indexes with the prefix index will be backed up.
If you do not specify this parameter, all indexes in the cluster are backed up by default.
The index name can contain 0 to 1024 characters. It cannot contain spaces, uppercase letters, or special characters "\<|>/?
NOTE:You can run the GET /_cat/indices command to query the names of all indexes in the cluster.
- Click OK to enable automatic snapshot creation.
After automatic snapshot creation is enabled, the Automatic Snapshot Creation parameter in the Cluster Snapshots area is shown as Enabled.
Figure 3 Automatic snapshot creation enabled
Snapshots automatically created according to the snapshot policy as well as those manually created are displayed in the cluster snapshot task list.
When the snapshot task status changes to Available, the snapshot is created. If snapshot creation fails, click on the right of the snapshot list to view the number of failed tasks and learn the failure causes. A maximum of 20 failed tasks can be displayed. When the snapshot function is disabled or the cluster is deleted, the failure records are also cleared.
- Check whether data is successfully backed up.
In the cluster snapshot task list, click
 on the left of a snapshot name. The snapshot details are displayed. Check the shards and indexes that have been backed up to see if the backup is successful.Figure 4 View Details
- To disable automatic snapshot creation, click Modify Settings. In the displayed dialog box, deselect Automatic Snapshot Creation, and click OK. In the displayed dialog box, choose whether to delete snapshots created automatically. Then click OK to disable automatic snapshot creation.

- When disabling automatic snapshot creation, if you select Delete snapshots created automatically, only existing snapshots will be deleted. Snapshots that are being created will still be created.
- If automatic snapshot creation is disabled without deleting automatically created snapshots, all such snapshots in the cluster cannot be manually deleted later once automatic snapshot creation is enabled again. Instead, they can only be deleted by the system based on the snapshot lifecycle policy. For example, if Retained Snapshots is set to 10 in the policy, the system automatically deletes excess snapshots (oldest first) on the next half hour when the number of existing snapshots exceeds this limit.
After automatic snapshot creation is disabled, the Automatic Snapshot Creation parameter in the Cluster Snapshots area is shown as Disabled.
Figure 5 Disabling automatic snapshot creation
Manually Creating a Snapshot
When snapshots are enabled for a cluster, you can manually create snapshots for it.
- Under Cluster Snapshot Tasks, click Manually Create Snapshot. In the displayed dialog box, configure the snapshot policy. Figure 6 Manually creating a snapshot
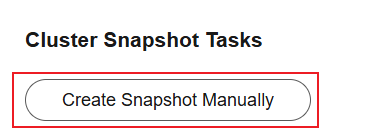
Table 3 Parameters for manually creating a snapshot Parameter
Description
Snapshot Name
Set the snapshot name. Unlike automatically created snapshots, manually created snapshots do not have time information automatically added to their names.
The value can contain 4 to 64 characters and must start with a letter. Only lowercase letters, digits, hyphens (-), and underscores (_) are allowed.
Index
Specify the name of the index to be backed up.
- You can back up a specified index. When specifying multiple indexes, use commas (,) to separate them, for example, index1,index2,index3.
- You can use an asterisk (*) to match multiple indexes. For example, index* indicates that all indexes with the prefix index will be backed up.
If you do not specify this parameter, all indexes in the cluster are backed up by default.
The index name can contain 0 to 1024 characters. It cannot contain spaces, uppercase letters, or special characters "\<|>/?
NOTE:You can run the GET /_cat/indices command to query the names of all indexes in the cluster.
Snapshot Description
Add a snapshot description.
The value contains 0 to 256 characters and cannot contain special characters !<>=&\"'
- Click OK to start creating snapshots.
Snapshots manually created as well as those automatically created according to the snapshot policy are displayed in the cluster snapshot task list.
When the snapshot task status changes to Available, the snapshot is created. If snapshot creation fails, click on the right of the snapshot list to view the number of failed tasks and learn the failure causes. A maximum of 20 failed tasks can be displayed. When the snapshot function is disabled or the cluster is deleted, the failure records are also cleared.
- Check whether data is successfully backed up.
In the cluster snapshot task list, click
on the left of a snapshot name. The snapshot details are displayed. Check the shards and indexes that have been backed up to see if the backup is successful.Figure 7 View Details
Disabling Cluster Snapshots
If you no longer need the cluster snapshot function, you can disable it to reclaim storage resources.
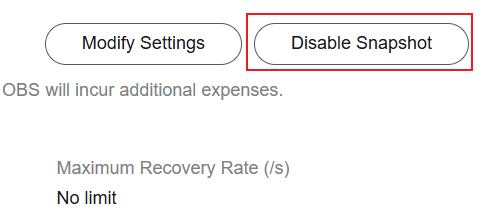
On the Cluster Snapshots page, click Disable Snapshot. In the displayed dialog box, click OK. Disabling cluster snapshots does not automatically delete existing snapshots. Instead, you need to manually delete them on the OBS console.
Related Documents
By creating and restoring snapshots, you can migrate data between clusters. For details, see Migrating Data Between Huawei Cloud Elasticsearch Clusters Using Backup and Restoration.
Feedback
Was this page helpful?
Provide feedbackThank you very much for your feedback. We will continue working to improve the documentation.See the reply and handling status in My Cloud VOC.
For any further questions, feel free to contact us through the chatbot.
Chatbot


