
Creación de su primer servicio de memoria caché de alto rendimiento
-
Distributed Cache Service (DCS) proporciona un alto rendimiento de lectura/escritura y un acceso rápido a los datos. Hay disponibles varios tipos de instancia, incluido el tipo del nodo único, el principal/en espera y el de clúster.
-
En la consola de gestión, puede crear una instancia de caché en modo de un solo clic y realizar O&M de instancia fácilmente.
-
Esta guía describe cómo crear y acceder a una instancia de caché, para que pueda comenzar rápidamente con DCS.
Paso 1: Establecer el entorno
1. Inicie sesión en la consola de gestión. Elija Service List > Networking > Virtual Private Cloud y cree una nube privada virtual (VPC) para el aislamiento seguro de la red de las instancias de DCS.
2. Elija Service List > Compute > Elastic Cloud Server y cree un servidor de la nube elástico (ECS), que se utiliza para descargar un cliente para el acceso a la instancia de DCS.

Notas
1. Un ECS debe estar enlazado con una dirección IP elástica y tiene el permiso para acceder a las redes externas.
2. Si tiene una VPC y un ECS disponibles, no es necesario crearlos de nuevo.
1
Creación de una VPC.
2
Creación de un ECS.


View Image
Paso 2: Crear una instancia
1. Inicie sesión en la consola de gestión y elija Service List > Application > Distributed Cache Service.
2. En la página del panel de control de DCS, haga clic en Buy DCS instance y especifique los parámetros de instancia para crear una instancia.
Notas
1. Seleccione la misma VPC para la instancia y el ECS.
2. Se recomienda configurar el mismo grupo de seguridad que para el ECS, sin la necesidad de agregar reglas de acceso al puerto.
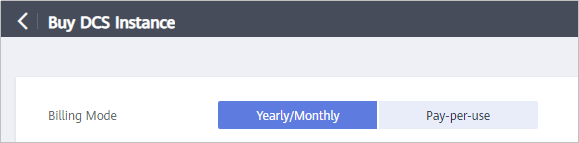
1
Seleccione el modo de facturación.
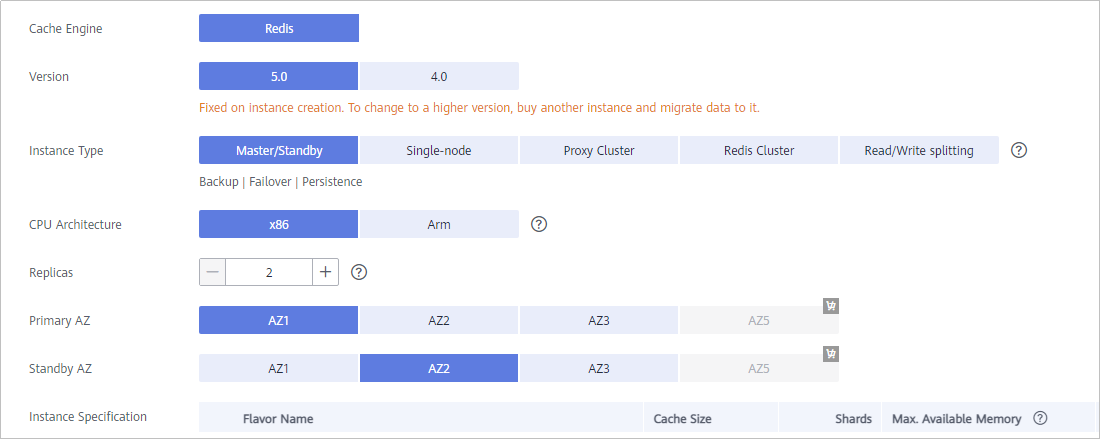
2
Seleccione la configuración de la instancia.
View Image
Paso 3: Acceder a la instancia de DCS
1. Después de crear una instancia de DCS, vea la dirección de conexión y el puerto en la página de gestión de instancias de DCS.
2. Inicie sesión en ECS y descargue e instale un cliente.
3. Acceda a la instancia.
4. Lea y escriba los datos en caché.
Notas
1. Puede descargar un cliente de Redis si ha seleccionado el motor de Redis durante la creación de la instancia.
2. Si ha seleccionado el motor de Memcached, acceda a la instancia consultando la documentación.
1
Obtener la dirección de conexión de la instancia.

2
Descargar e instalar un cliente.

3
Acceder a la instancia de caché.

4
Leer y escribir los datos en caché.

View Image


