
HE2E DevOps Practice: Configuring a Pipeline
This section describes how to connect code check, build, and deployment tasks in DevOps Full-Process Sample Project for continuous delivery.
Before the practice, perform the deployment.
Introduction to Preset Pipelines
There are five pipeline tasks preset in the sample project. You can view and use them as needed.
|
Preset Pipeline Task |
Description |
|---|---|
|
phoenix-workflow |
Implements basic functions. |
|
phoenix-workflow-test |
Runs in the test environment. |
|
phoenix-workflow-work |
Implements the Worker function. |
|
phoenix-workflow-result |
Implements the Result function. |
|
phoenix-workflow-vote |
Implements the Vote function. |
Configuring and Executing a Pipeline
Assume that you use the phoenix-cd-cce application for deployment. Clear the workloads in the cluster before executing a pipeline.
- Go to the Phoenix Mall project, and choose CICD > Pipeline from the navigation pane.
- In the Operation column of the phoenix-workflow pipeline, click
 and choose Edit.
 - Click the Parameters tab, and verify that the default values of dockerOrg and dockerServer are the same as those of the phoenix-sample-ci build task.
- Add a code check stage.
- Click the Task Orchestration tab and click
 between Pipeline Source and Build. A new stage Stage_1 is displayed.
 - Click
 next to Stage_1. In the Edit Stage window, enter the stage name Check and click Confirm.
Figure 1 Editing the stage name
next to Stage_1. In the Edit Stage window, enter the stage name Check and click Confirm.
Figure 1 Editing the stage name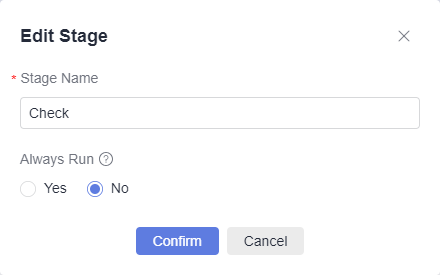
- Click Job, and select From empty. The job creation window is displayed on the right.
- Find the Check job in the list, and click Add.
Figure 2 Adding the Check job

- Select the phoenix-codecheck-worker task and click OK.
The Check job is displayed.
- Click the Task Orchestration tab and click
- Configure a deployment task.
Click the deployment task name, select the associated build task phoenix-sample-ci, and check the values of configuration items.
- The configurations of task phoenix-sample-standalone must be the same as those on the Parameters page of the task with the same name in CodeArts Deploy.
- The configurations of task phoenix-cd-cce must be the same as those on the Parameters page of the task with the same name in CodeArts Deploy.

Two deployment tasks are added in this example. If you selected only one deployment mode in preceding steps, keep the corresponding task and delete the other one.
- Click Save and Execute. In the displayed dialog box, click Execute to start the pipeline.
If
 is displayed, the pipeline is successfully executed.
If the pipeline fails, click the cause to view logs. Then rectify the fault by referring to CodeArts Pipeline FAQs.
Configuring Pass Conditions
To control the code quality, the code must be scanned and the number of errors must be within a reasonable range before being released. By adding quality gates, you can effectively automate the control process.
- Go to the Phoenix Mall project, and choose CICD > Pipeline from the navigation pane.
- In the Operation column of the phoenix-workflow pipeline, click
 and choose Edit.
 - Click the Task Orchestration tab. In the Check stage, click Pass Conditions. The Pass Conditions window is displayed on the right.
- Click Add next to Pass-Conditions-of-Standard-Policies.
- Select SystemPolicy and click OK.
The new pass condition is displayed.
- Click Save and Execute.
If the number of check issues does not meet the pass conditions, the pipeline will fail.
Figure 3 Executing a pipeline
Configuring Code Changes to Automatically Trigger a Pipeline
Through the following configuration, code changes can automatically trigger pipeline execution, implementing continuous project delivery.
- Go to the Phoenix Mall project, and choose CICD > Pipeline from the navigation pane.
- In the Operation column of the phoenix-workflow pipeline, click
 and choose Edit.
 - Click the Execution Plan tab, select Code commit under Trigger Events, select the master branch, and click Save.
Figure 4 Configuring the execution plan

The modified execution plan is displayed.
- Modify the code and push it to the master branch. Then check whether the pipeline is automatically executed.
Feedback
Was this page helpful?
Provide feedbackThank you very much for your feedback. We will continue working to improve the documentation.See the reply and handling status in My Cloud VOC.
For any further questions, feel free to contact us through the chatbot.
Chatbot


