
Connecting Your Website to WAF with Dedicated Mode
If your service servers are deployed on Huawei Cloud, you can use dedicated WAF instances to protect your website services as long as your website has domain names or IP addresses.

Dedicated WAF instances are not available in some regions. For details, see Notice on Web Application Firewall (Dedicated Mode) Discontinued.
Solution Overview
In dedicated mode, after a website is connected to WAF, the website traffic is sent to WAF through the ELB load balancer. WAF blocks abnormal requests and forwards normal requests to the origin server through the back-to-source IP address of the dedicated WAF engine. Figure 1 shows how your website traffic is forwarded when WAF is used.

The details are as follows:
- After a visitor enters a domain name in the browser, the client sends a request to the DNS service to query the domain name resolution address.
- DNS returns the domain name resolution address to the client.
- If no proxies (for example, CDN or AAD) are used, the domain name resolution address returned by the DNS service is the EIP of the load balancer, and the client accesses the load balancer through the EIP. If a proxy is used:
- The domain name resolution address returned by DNS is the IP address of the proxy. The client accesses the proxy through the proxy IP address.
- The proxy accesses the ELB load balancer over its EIP.
- The ELB load balancer forwards the traffic to WAF.
- WAF checks the traffic, blocks abnormal traffic, and forwards normal traffic to the origin server over the back-to-source IP address of the dedicated WAF engine.
Access Process
You need to perform the following operations based on whether your website uses a proxy (such as AAD, CDN, and cloud acceleration products).
|
Procedure |
Description |
|---|---|
|
Add a domain name and origin server details to WAF. |
|
|
Step 2: Configure a Load Balancer for a Dedicated WAF Instance |
Configure a load balancer and health check for a dedicated WAF instance. |
|
Bind an EIP of the origin server to the load balancer configured for a dedicated WAF instance. So that the website request traffic can be forwarded to and checked by the dedicated WAF instance. |
|
|
Step 4: Whitelist Back-to-Source IP Addresses of Dedicated WAF Instances |
Allow the back-to-source IP address of a dedicated engine. |
|
Check WAF traffic forwarding, ELB load balancer, and WAF basic protection. |
Prerequisites
- You have purchased a dedicated load balancer. For details about load balancer types, see Differences Between Dedicated and Shared Load Balancers.
Dedicated WAF instances issued before April 2023 cannot be used with dedicated network load balancers. If you use a dedicated network load balancer (TCP/UDP), ensure that your dedicated WAF instance has been upgraded to the latest version (issued after April 2023). For details, see Dedicated Engine Version Iteration.
- Related ports have been enabled in the security group to which the dedicated WAF instance belongs.
You can configure your security group as follows:
- Inbound rules
Add an inbound rule to allow incoming network traffic to pass through over a specified port based on your service requirements. For example, if you want to allow access from port 80, you can add a rule that allows TCP and port 80.
- Outbound rules
The value is Default. All outgoing network traffic is allowed by default.
For more details, see Adding a Security Group Rule.
- Inbound rules
Step 1. Add a Website to WAF
To connect your services to WAF, you need to add the domain name and origin server information to WAF.
- Log in to the WAF console.
- Click
 in the upper left corner and select a region or project.
 - (Optional) If you have enabled the enterprise project function, in the upper part of the navigation pane on the left, select your enterprise project from the Filter by enterprise project drop-down list. Then, WAF will display the related security data in the enterprise project on the page.
- In the navigation pane on the left, click Website Settings.
Before adding a website to WAF, you can click Usage Guide in the upper right corner of the page to learn about the access process.
- In the upper left corner of the website list, click Add Website.
- Select Dedicated Mode and click Configure Now.
- On the Add Website panel, configure basic information, as shown in Figure 2. Table 1 describes the parameters.
Table 1 Parameter description Parameter
Description
Example Value
Protected Object
Domain name or IP address of the website you want to protect.
- Domain Name: Single domain names or wildcard domain names are supported.
- The wildcard * can be added to WAF to let WAF protect any domain names. If wildcard (*) is added to WAF, only non-standard ports other than 80 and 443 can be protected.
- If the server IP address of each subdomain name is the same, enter a wildcard domain name. For example, if the subdomain names a.example.com, b.example.com, and c.example.com have the same server IP address, you can add the wildcard domain name *.example.com to WAF to protect all three.
- If the server IP addresses of subdomain names are different, add subdomain names as single domain names one by one.
- IP: The IP address can be a public or private IP address.
If a private IP address is used, ensure that the corresponding network path is accessible so that WAF can correctly monitor and filter traffic.
www.example.com
Website Name (Optional)
Website name you specify.
WAF
Website Remarks (Optional)
Remarks of the website.
waftest
Protected Port
Port to be protected.- To protect port 80 or 443, select Standard port from the drop-down list.
- To protect other ports, choose one from the drop-down list. Click View Ports You Can Use to view the HTTP and HTTPS ports supported by WAF. For more information, see Ports Supported by WAF.
If a port other than 80 or 443 is configured, the visitors need to add the non-standard port to the end of the website address when they access the website. Otherwise, a 404 error will occur. If a 404 error occurs, see How Do I Troubleshoot 404/502/504 Errors?
81
Server Configuration
Information about the website server, including:- Client Protocol: protocol used by a client to access the website server. The options are as follows:
- HTTP: If you select Standard port for Protected Port, port 80 is protected by default for HTTP.
- HTTPS: If you select Standard port for Protected Port, port 443 is protected by default for HTTPS.
- Hypertext Transfer Protocol Secure (HTTPS) is an extension of the Hypertext Transfer Protocol (HTTP). In HTTPS, the communication protocol is encrypted using Transport Layer Security (TLS) or, formerly, Secure Sockets Layer (SSL). HTTPS is widely used to protect privacy and integrity of data in transit and to authenticate website identities. So, if HTTPS is selected, you need to configure a certificate.
- Server Protocol: the protocol supported by your website server. Server Protocol: protocol used by WAF to forward client requests. The options are HTTP and HTTPS.
NOTE:
If the client protocol is different from the origin server protocol, WAF forcibly uses the origin server protocol to forward client requests.
- VPC: the VPC that the dedicated WAF instance belongs to.
- Make sure that you have IAM permissions for the enterprise project the VPC you select belongs to, and that you have dedicated WAF instances deployed in this VPC.
- To implement active-active services and prevent single points of failure (SPOFs), you can buy at least two WAF instances and provision them in the same VPC.
- Server Address: private IP address of the website server. The origin server address cannot be the same as that of the protected object.
Log in to the ECS or ELB console and view the private IP address of the server in the instance list.
The following IP address formats are supported:- IPv4, for example, XXX.XXX.1.1
- IPv6, for example, fe80:0000:0000:0000:0000:0000:0000:0000
- Server Port: the service port of the server to which the dedicated WAF instance forwards client requests.
- Weight: Requests are distributed across backend origin servers based on the load balancing algorithm you select and the weight you assign to each server.
- If you select the weighted round robin algorithm, requests are distributed across origin servers in turn based on the weight you assign to each origin server.
- If you select the source IP hash or session hash algorithm, the weight only determines whether traffic is distributed. To distribute traffic, enter 0 for Weight. Otherwise, enter any other numbers for Weight.
- Weight range: 0 to 65,536. A larger weight indicates more requests distributed to the server.
- If the weight is set to 0, the origin server will not accept new requests if multiple origin servers are configured. If only one origin server is configured, all requests are distributed to the origin server.
Client Protocol: HTTP
Server Protocol: HTTP
Server Address: XXX.XXX.1.1
Server Port: 80
Certificate Name
If you select HTTPS for Client Protocol, you need to select the certificate associated with the website. International websites are supported.
- Each domain name must correspond to a certificate. A wildcard domain name can only be used for a wildcard domain certificate. If you only have single-domain certificates, you need to add domain names to WAF one by one.
- If your website certificate is about to expire, purchase a new certificate before the expiration date and update the certificate associated with the website in WAF.
WAF can send notifications if a certificate expires. You can configure such notifications on the Notifications page. For details, see Enabling Alarm Notifications.
You can import a new certificate, select an existing certificate, or select an SCM certificate.- Importing a certificate: If you have not created a certificate, click Import New Certificate. In the Import New Certificate dialog box, set certificate parameters. For more details, see Uploading a Certificate.
Only .pem certificates can be used in WAF. If the certificate is not in PEM format, convert it into PEM first. For details, see How Do I Convert a Certificate into PEM Format?
The newly imported certificates will be listed on the Certificates page as well.
- Selecting an existing certificate: If you have created a certificate in WAF, click the drop-down arrow, select Existing certificates, and select a correct and valid certificate from the list.
- Selecting an SCM certificate: If you have used a CCM certificate under the same account, you can select an SSL certificate from the drop-down list. The name of the SSL certificate you select must be the same as that in CCM.
- Currently, certificates purchased in Huawei Cloud SCM can be pushed only to the default enterprise project. For other enterprise projects, SSL certificates pushed by SCM cannot be used.
- A record is automatically generated for the selected SSL certificate on the Certificates page. You can change the certificate name on this page, but the certificate name displayed in CCM will not be changed accordingly.
--
Layer-7 Proxy Used
Check whether a layer-7 proxy is used before WAF. Layer-7 proxies include web proxy products, such as anti-DDoS (layer-7 proxy), CDN, and other cloud acceleration services.- Yes: Web proxy products, such as anti-DDoS (layer-7 proxy), CDN, and other cloud acceleration services have been deployed before WAF.
- If your website has a layer-7 proxy configured, WAF reads the real client IP address from the related fields in the header. If you deploy AAD before WAF for your website, to let WAF obtain the real IP address of the client, you need to set IP Tag to $remote_addr in the Traffic Identifier area on the basic information page for the protected domain name. For details, see Configuring a Traffic Identifier for a Known Attack Source.
- WAF cannot be switched to the Bypassed mode if a proxy is used before WAF. For more details, see Changing the Protection Mode.
- No: No layer-7 proxies are used.
No
Policy
Select the protection policy you want to use for the website.- System-generated policy: This is the default option. Its details are as follows:
- Basic Web Protection: General Check is enabled by default. It can defend against attacks such as SQL injections, XSS, remote overflow attacks, file inclusions, Bash vulnerability exploits, remote command execution, directory traversal, sensitive file access, and command/code injections.
General Check includes:
- Rule Set: Default rule set (medium) is selected.
- Protective Action: Log only is selected. It means WAF only logs detected attacks but does not block them.
- Anti-Crawler: Scanner detection is enabled by default, and Protective Action is set to Log only. WAF only logs detected attacks but does not block them. This type of detection can defend against web scans, such as vulnerability and virus scanning, and crawler behaviors from tools like OpenVAS and Nmap.
- Basic Web Protection: General Check is enabled by default. It can defend against attacks such as SQL injections, XSS, remote overflow attacks, file inclusions, Bash vulnerability exploits, remote command execution, directory traversal, sensitive file access, and command/code injections.
- A policy created manually: a custom policy you create based on your security requirements. For more details, see Configuring a Protection Policy.
NOTE:
Only professional and enterprise editions allow you to specify a manually-created policy.
System-generated policy
- Domain Name: Single domain names or wildcard domain names are supported.
- Click Configure Load Balancer Now on the panel and configure a load balancer for the dedicated WAF instance.
Figure 3 Configure Load Balancer Now
You can also click Later and complete the operations by referring to Step 2: Configure a Load Balancer for a Dedicated WAF Instance, Step 3: Bind an EIP to a Load Balancer, and Step 4: Whitelist Back-to-Source IP Addresses of Dedicated WAF Instances.

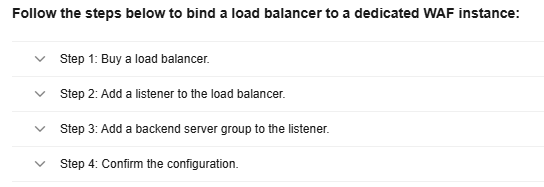
Step 2: Configure a Load Balancer for a Dedicated WAF Instance
To ensure your dedicated WAF instance reliability, after you add a website to it, use Huawei Cloud Elastic Load Balance (ELB) to configure a load balancer and a health check for the dedicated WAF instance.
- Go to the ELB console and add a listener to the load balancer.
- In the upper left corner of the page, click
 and choose .
 - Click the target load balancer name to go to its details page.
- Click the Listeners tab, click Add Listener, and configure the listener information.
The key parameters are described below. For details about other parameters, see Adding an HTTP Listener, Adding an HTTPS Listener, or Adding a TCP Listener.
Table 2 Key parameters for adding a listener Item
Parameter
Description
Example Value
Configure Listener
Frontend Protocol
Protocol used by the load balancer to receive requests from the clients. You can select HTTP, HTTPS, or TCP.
HTTP
Frontend Port
Port used by the load balancer to receive requests from the clients. Value range: 1 to 65535
80
Configure Routing Policy
Load Balancing Algorithm
Algorithm used by the load balancer. The options are Weighted round robin, Weighted least connections, Source IP hash, and Connection ID.
CAUTION:If you select Weighted round robin, disable Sticky Session. If you enable Sticky Session, the same requests will be forwarded to the same dedicated WAF instance. If this instance becomes faulty, an error will occur when the requests come to it next time.
Weighted round robin
Add Backend Server
Health Check
If Health Check is enabled, the health check result must be Healthy, or the website requests cannot be pointed to WAF. For details about how to configure a health check, see Configuring a Health Check.
Enable Health Check.
After the listener is added, you can check the added listener on the Listeners tab and learn the details about the ELB load balancer (① in Figure 4), ELB listener (② in Figure 4), and backend server group (③ in Figure 4).
- In the upper left corner of the page, click
- Configure a load balancer for a dedicated WAF instance.
- Click
 in the upper left corner of the page and choose Web Application Firewall under Security & Compliance.
 - In the navigation pane on the left, choose .
- Locate the row containing the WAF instance. In the Operation column, choose More > Add to ELB.
If you are in the CN East-Shanghai1 or CN North-Ulanqab1 region, you can select multiple running dedicated WAF instances that function as reverse proxies, click Add to Load Balancer in the upper left corner of the instance list, and add them to a load balancer to distribute workloads across the dedicated WAF instances.
- On the Add to ELB panel, select the ELB (Load Balancer), ELB Listener, and Backend Server Group configured in 1.c, and click Next.
If Health Check is enabled, the health check result must be Normal, or the website requests cannot be pointed to WAF. For details about troubleshooting, see How Do I Troubleshoot an Unhealthy Backend Server?
Figure 5 Add to ELB
- After configuring the service Port and Weight for the WAF instance, click OK.
Backend Port: Select the protected port you configured in Step 1. Add a Website to WAF.
- Click

Step 3: Bind an EIP to a Load Balancer
If you configure a load balancer for your dedicated WAF instance, unbind the EIP from the origin server and then bind this EIP to the load balancer you configured. For details, see Configuring a Load Balancer. The request traffic then goes to the dedicated WAF instance for attack detection first and then go to the origin server, ensuring the security, stability, and availability of the origin server.
This topic describes how to unbind an EIP from your origin server and bind the EIP to a load balancer configured for a dedicated WAF instance.
- Unbind the EIP from the origin server.
- In the upper left corner of the page, click and choose .
- On the Load Balancers page, unbind the EIP from the origin server.
- Unbinding an IPv4 EIP: Locate the row that contains the load balancer configured for the origin server. Then, in the Operation column, click More > Unbind IPv4 EIP.
- Unbinding an IPv6 EIP: Locate the row that contains the load balancer configured for the origin server. Then, in the Operation column, click More > Unbind IPv6 Address.
Figure 6 Unbinding an EIP
- In the displayed dialog box, click Yes.
- In the upper left corner of the page, click
- Bind the EIP unbound from the origin server.
On the Load Balancers page, locate the load balancer configured for the dedicated WAF instance and bind the EIP unbound from the origin server to the load balancer.
- Binding an IPv4 EIP: Locate the row that contains the load balancer configured for the dedicated WAF instance, click More in the Operation column, and select Bind IPv4 EIP.
- Binding an IPv6 EIP: Locate the row that contains the load balancer configured for the dedicated WAF instance, click More in the Operation column, and select Bind IPv6 Address.
- In the displayed dialog box, select the EIP unbound in 1.b and click OK.
Step 4: Whitelist Back-to-Source IP Addresses of Dedicated WAF Instances
In dedicated mode, website traffic is pointed to the load balancer configured for your dedicated WAF instances and then to dedicated WAF instances. The latter will filter out malicious traffic and route only normal traffic to the origin server. In this way, the origin server only communicates with WAF back-to-source IP addresses. By doing so, WAF protects the origin server IP address from being attacked. In dedicated mode, the WAF back-to-source IP addresses are the subnet IP addresses of the dedicated WAF instances.
The security software on the origin server may most likely regard WAF back-to-source IP addresses as malicious and block them. Once they are blocked, the origin server will deny all WAF requests. Your website may become unavailable or respond very slowly. So, you need to configure ACL rules on the origin server to trust only the subnet IP addresses of your dedicated WAF instances.
The way to whitelist an IP address varies depending on where your origin servers are provisioned. You can follow the way suitable for you.
If your origin servers are deployed on Huawei Cloud ECSs, perform the following steps to configure a security group rule to allow only the back-to-source IP address of the dedicated instance to access the origin servers.
- Obtain the subnet IP addresses of all dedicated WAF instances.
- Click in the upper left corner of the page and choose Web Application Firewall under Security & Compliance.
- In the navigation pane on the left, choose .
- On the Dedicated Engine page, click the IP address in the IP Address column of the dedicated engine and copy the address.
Figure 7 Obtaining the subnet IP address of a dedicated engine

- Click
- Add the subnet IP address to the ECS security group.
- Log in to the ECS console..
- On the Elastic Cloud Server page, click the target ECS instance name.
- On the ECS details page, click the Security Groups tab and click Change Security Group.
- On the Change Security Group panel displayed, select a security group or create a security group and click OK.
- Click the security group ID and view the details.
- Click the Inbound Rules tab and click Add Rule. In the Add Inbound Rule dialog box, configure parameters as follows and click OK. Table 3 describes the parameters.
Figure 8 Add Inbound Rule

Table 3 Inbound rule parameters Parameter
Configuration Description
Priority
Security group rule priority. Retain the default value.
Action
Security group rule policy. Set this parameter to Allow.
Type
Set the IP address type of the origin server.
Protocol & Port
Protocols and ports that will be allowed. If you select TCP (Custom ports), and leave Port empty or enter 1-65535 for it, traffic on all ports over the back-to-source IP addresses or IP address ranges is allowed.
More details about protocols and ports are as follows:
- Protocols are used to match traffic in a security group rule. TCP, UDP, GRE, and ICMP are supported.
- Ports are destination ports used to match traffic in a security group rule. Value range: 1 to 65535
Port formats:
- Individual port: Enter a port number, such as 22.
- Consecutive ports: Enter a port range, such as 22-30.
- Non-consecutive ports: Enter ports and port ranges, such as 22,23-30. You can enter up to 20 port ranges. Each port range must be unique.
- All ports: Leave it empty or enter 1-65535.
Source
Add IP Address/Mask of all WAF back-to-source IP addresses/ranges copied in 1 one by one.
NOTE:One inbound rule can contain only one IP address. To configure an inbound rule for each IP address, click Add Rule and add more rules. A maximum of 10 rules can be configured.
- Click OK.
Now, the security group allows all inbound traffic from the back-to-source IP addresses of all your dedicated WAF instances.
To check whether the configuration takes effect, use the Telnet tool to check whether a connection to the origin server service port bound to the IP address protected by WAF is established.
For example, run the following command to check whether the connection to the origin server service port 443 bound to the IP address protected by WAF is established. If the connection cannot be established over the service port but the website is still accessible, the security group inbound rules take effect.
Telnet Origin-server-IP-address 443
If your origin server uses Huawei Cloud ELB to distribute traffic, perform the following steps to configure an access control policy to allow only the IP addresses of the dedicated WAF instances to access the origin server:
- Obtain the subnet IP addresses of all dedicated WAF instances.
- Click in the upper left corner of the page and choose Web Application Firewall under Security & Compliance.
- In the navigation pane on the left, choose .
- On the Dedicated Engine page, click the IP address in the IP Address column of the dedicated engine and copy the address.
Figure 9 Obtaining the subnet IP address of a dedicated engine

- Click
- Add the subnet IP address to the access control whitelist of the load balancer.
- In the upper left corner of the page, click and choose .
- Locate the row containing the load balancer configured for your dedicated WAF instance and click the load balancer name in the Name column.
- In the Access Control row of the target listener, click Configure.
Figure 10 Listener list

- In the displayed dialog box, select Whitelist for Access Control.
- Click OK.
Now, the access control policy allows all inbound traffic from the back-to-source IP addresses of your dedicated WAF instances.
To check whether the configuration takes effect, use the Telnet tool to check whether a connection to the origin server service port bound to the IP address protected by WAF is established.
For example, run the following command to check whether the connection to the origin server service port 443 bound to the IP address protected by WAF is established. If the connection cannot be established over the service port but the website is still accessible, the security group inbound rules take effect.
Telnet Origin-server-IP-address 443
- In the upper left corner of the page, click
Step 5: Test Dedicated WAF Instances
After adding a website to a dedicated WAF instance, verify that it can forward traffic properly and ELB load balancers work well.
Follow-up Operations
- (Optional) Recommended Configurations After Website Connection: After a domain name is connected to WAF, you need to configure security settings as required. For example, you can configure PCI DSS/3DS compliance checks and TLS, enable IPv6 protection, enable breakdown protection, set the website connection timeout interval, configure traffic identification for attack punishment, and modify the blocked page.
- Configuring Protection Rules: If the default protection rules cannot meet your website security requirements, you can configure custom protection rules.
- Querying a Protection Event: View website protection details.
FAQs
- Why Is the Access Status of a Domain Name or IP Address Inaccessible?
- What Can I Do If the Message "Illegal server address" Is Displayed When I Add a Domain Name?
- Why Am I Seeing the "Someone else has already added this domain name. Please confirm that the domain name belongs to you" Error Message?
- Why Cannot I Select an SCM Certificate When Adding a Domain Name to WAF?
- How Do I Troubleshoot 404/502/504 Errors?
- Why Does the Requested Page Respond Slowly After My Website Is Connected to WAF?
- What Can I Do If Files Cannot Be Uploaded After a Website Is Connected to WAF?
- Why Cannot the Protection Mode Be Enabled After a Domain Name Is Connected to WAF?
Feedback
Was this page helpful?
Provide feedbackThank you very much for your feedback. We will continue working to improve the documentation.See the reply and handling status in My Cloud VOC.
For any further questions, feel free to contact us through the chatbot.
Chatbot


