Adding a Tag
You can add tags for IoTDA instances in either of the following ways:
For details about how to use predefined tags, see Using Predefined Tags.
Adding a Tag on the Instance Details Page
- Access the IoTDA service page and click Access Console.
- In the navigation pane, choose IoTDA Instances and click Details under Enterprise Edition.
- Click the Tags tab and then Add Tag. In the displayed dialog box, enter the tag key and tag value. For details, see Tag naming rules.
Figure 1 Instance management - Adding a tag

Adding a Tag on the Tag Management Service Page

This method is suitable for adding tags with the same tag key to multiple resources.
- Access the IoTDA service page and click Access Console.
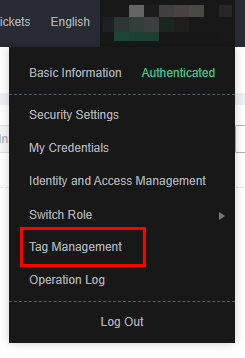
- In the upper right corner of the page, click the username and select Tag Management from the drop-down list.
Figure 2 Tag management

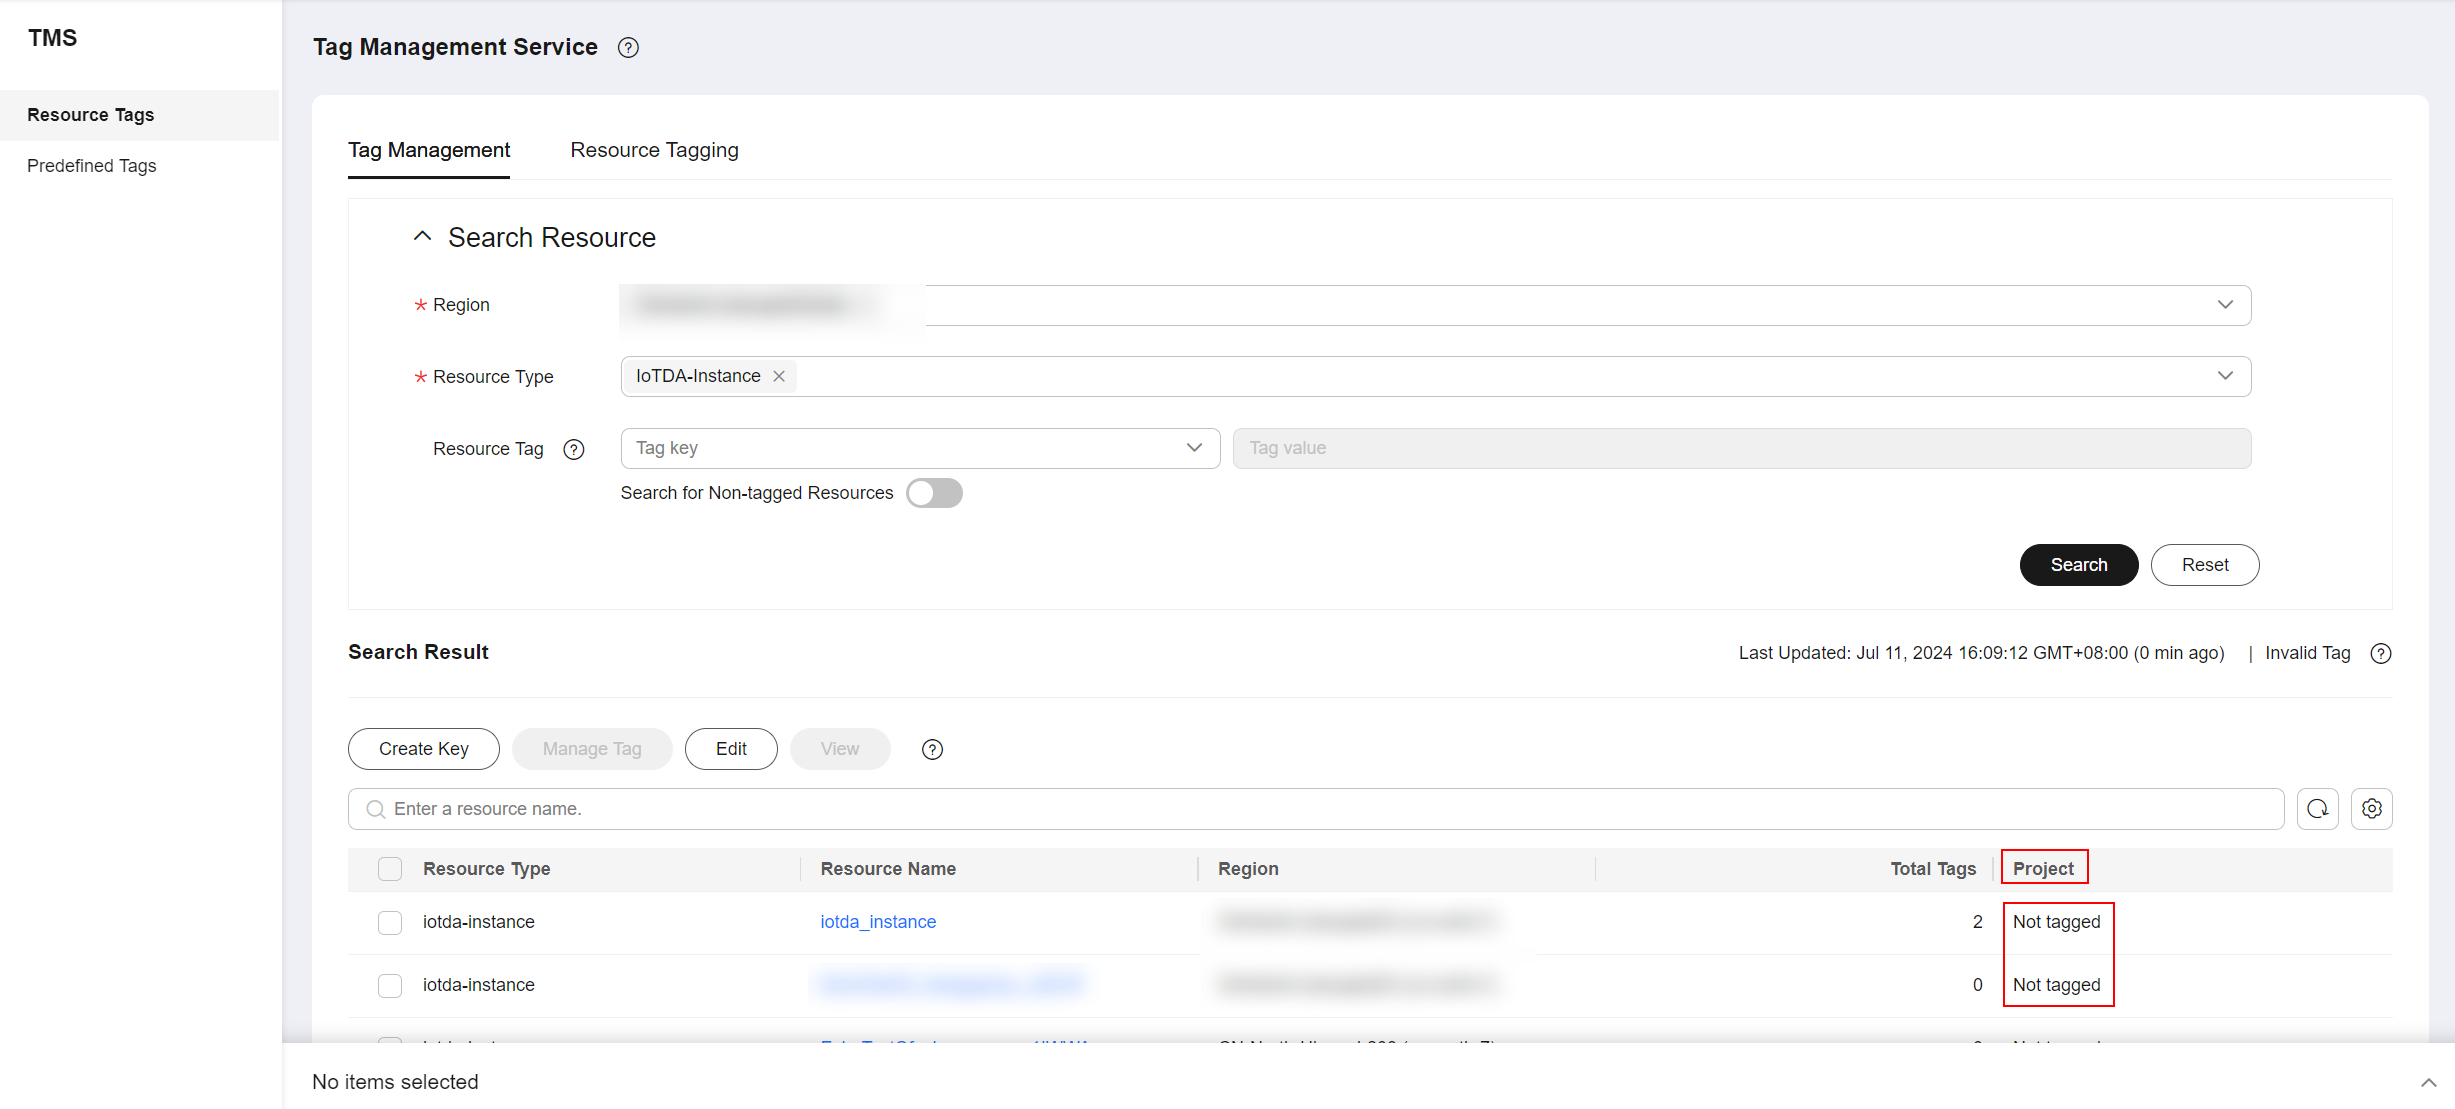
- On the Resource Tags page, select the region where the resource is located, set Resource Type to IoTDA-Instance, and click Search. All IoTDA instance resources in the selected region are displayed.
- In the Search Result area, click Create Key. In the displayed dialog box, enter a key (for example project) and click OK. After the tag is created, the tag key is added to the resource tag list, as shown in Figure 3. If the tag is not contained in the list, click
 and select the created tag from the drop-down list. By default, the value of the tag key is Not tagged. You need to set a value for the tag of each resource to associate the tag with the resource.
- Click Edit to make the resource list editable.
- Select the row where the IoTDA instance resource is located, and enter the tag value (for example, A). After a value is set for a tag key, the number of tags is incremented by 1. Repeat the preceding steps to add tag values for other instances.
Figure 4 Instance tag - Entering a tag value

Using Predefined Tags
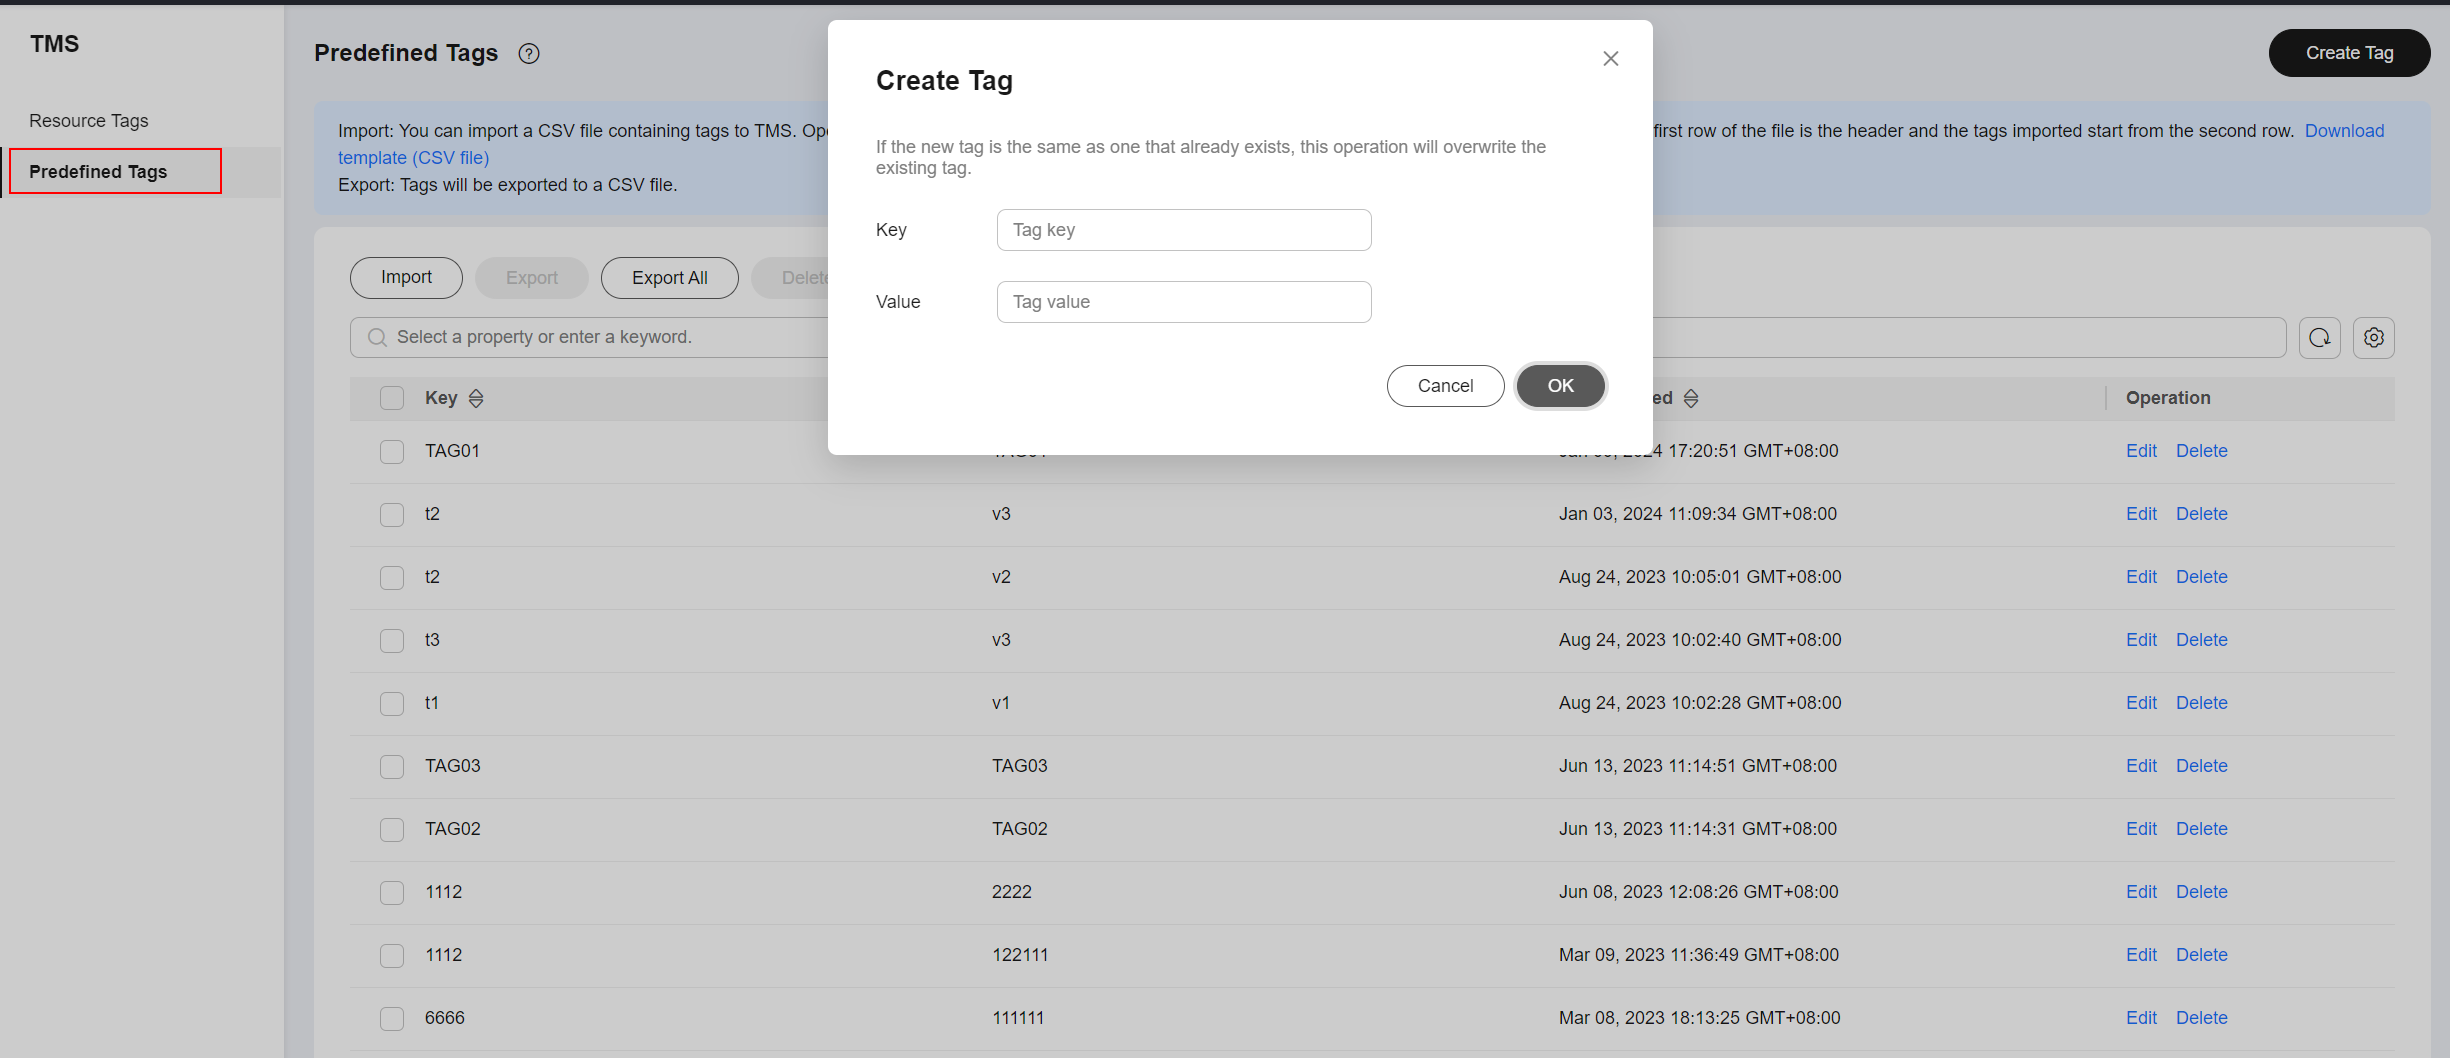
If you want to add the same tag to multiple resources, you can create a predefined tag on the Tag Management Service (TMS) console and select the tag for the resources. This frees you from having to repeatedly enter tag keys and values. The procedure is as follows:
- Log in to the console.
- In the upper right corner of the page, click the username and select Tag Management from the drop-down list.
- In the navigation pane, choose Predefined Tags. In the right pane, click Create Tag enter a key (for example project) and a value (for example A) in the displayed dialog box.
- Choose Service List > IoT Device Access and select the predefined tag by following the procedure for adding a tag.
Figure 5 Instance tag - Predefined tags

Feedback
Was this page helpful?
Provide feedbackThank you very much for your feedback. We will continue working to improve the documentation.See the reply and handling status in My Cloud VOC.
For any further questions, feel free to contact us through the chatbot.
Chatbot


