Device Self-Registration
Overview
The device self-registration function enables automatic registration of a device with the IoT platform upon initial connection, eliminating the need for pre-registration on the console. This process is facilitated through certificate authentication, with device information stored in device certificates.
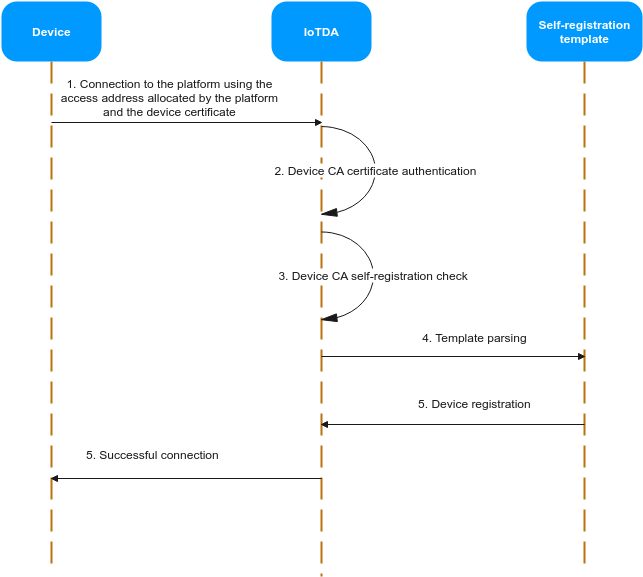
Scenarios
- Device requirements: Some devices cannot be pre-registered on the console or by calling APIs.
- Internet of Vehicles (IoV): When a head unit is started, it automatically registers with the platform and reports data to the platform, simplifying the development of the vehicle application.
- Multi-instance scenario: Enterprise customers can utilize the self-registration function to efficiently manage devices across multiple IoTDA instances. This eliminates the need to provision and register devices separately on each instance beforehand.
Constraints
- Max. self-registration templates for an instance: 10.
- To use the device self-registration function, the device must use transport layer security (TLS) and enable the Server Name Indication (SNI) extension. The SNI must carry the domain name allocated by the platform. To obtain the domain name, see How Do I Obtain the Platform Access Address?
- Only available for MQTTS certificate authentication.
- Not available for standard edition instances in the CN East-Shanghai1 region.

Devices registered through self-registration are authenticated based on the self-registration template. Modifying or disabling the self-registration template may affect device authentication. Exercise caution.
Procedure
- Access the IoTDA service page and click Access Console. Click the target instance card.
- Create a product.
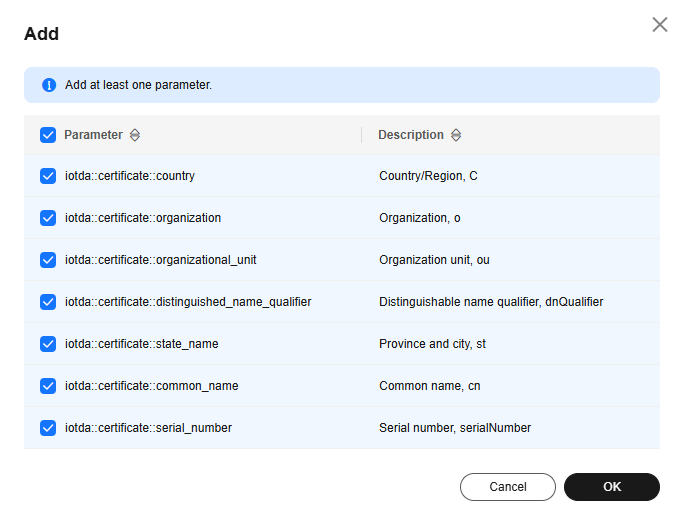
- In the navigation pane, choose Devices > Self-registration Template. Click Create Template. On the displayed page, enter basic information, and click the button for adding the required parameters to the template.
Figure 2 Self-registration template - Adding parameters
- Select the device name, node ID, device ID, and product ID in the resource configuration area.
Figure 3 Self-registration template - Creating a template


The platform predefines the parameters that can be declared and referenced in the template, as shown below. The certificate must contain the parameters referenced in the template.
- iotda::certificate::country: country
- iotda::certificate::organization: organization
- iotda::certificate::organizational_unit: department
- iotda::certificate::distinguished_name_qualifier: distinguished name
- iotda::certificate::state_name: province/state
- iotda::certificate::common_name: common name
- iotda::certificate::serial_number: serial number
- Add a policy in the policy configuration area. The added policy is automatically bound to the device during self-registration. For details about how to use device policies, see Device Topic Policies.
- In the navigation pane, choose Devices > Device Certificates. Create a device certificate by referring to Registering a Device Authenticated by an X.509 Certificate. Upload the CA certificate to the platform for verification, bind the self-registration template created in 3, and enable the self-registration function.
Figure 4 Device CA certificate - Binding a template


The CA certificate and the product associated with the product ID in the template must be in the same resource space.
- On the device CA certificate tab page, click Debug, upload the device certificate created in 6, and check whether the pre-parsed device information meets your expectation.
Figure 5 Device CA certificate - Debugging a certificate

Verification
Use MQTT.fx to simulate a device to access the platform for automatic device registration.
- Download MQTT.fx (64-bit OS) or MQTT.fx (32-bit OS) and install it.
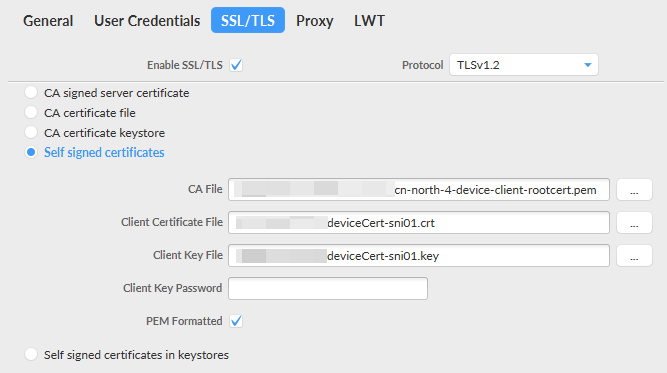
- Open MQTT.fx, set connection parameters by referring to Table 1, and click Apply.
Table 1 Connection parameters Parameter
Description
Broker Address
Platform access address (see How Do I Obtain the Platform Access Address?)
Broker Port
8883
Client ID
Any string. Recommended: Set this parameter according to the platform rules in Device Connection Authentication to ensure continued access to the platform via certificate authentication even after the template is disabled.
User Name
Any string. Recommended: Set this parameter according to the platform rules in Device Connection Authentication to ensure continued access to the platform via certificate authentication even after the template is disabled.
Password
Empty
Enable SSL/TLS
True
Self signed certificates
True
CA File
Platform CA certificate (see Certificates)
Client Certificate File
Path of the device certificate file
Client Key File
Path of the private key file of the device certificate
Client Key Password
Private key password (not necessary if there is no password)
Figure 6 MQTT.fx Settings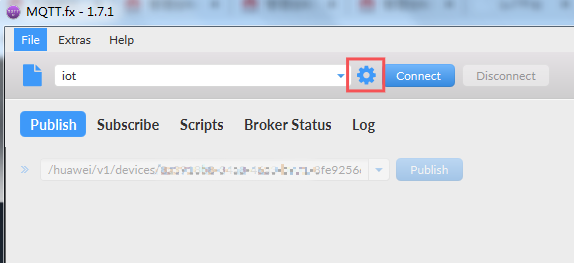 Figure 7 Connection parameters
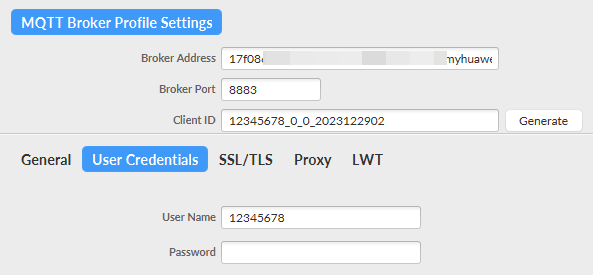 Figure 8 Certificate information
- Click Connect. If the icon in the upper right corner turns green, the simulated device has been authenticated and connected.
Figure 9 Device simulator connected

- In the navigation pane of the IoTDA console, choose Devices > All Devices. On the device list tab page, search for the device by device ID or node ID. The device is displayed as registered and online.
Figure 10 Device - Self-registered device details

Feedback
Was this page helpful?
Provide feedbackThank you very much for your feedback. We will continue working to improve the documentation.See the reply and handling status in My Cloud VOC.
For any further questions, feel free to contact us through the chatbot.
Chatbot


