
Changing a Security Group
Scenarios
This section describes how to change the security group associated with the network interface of a FlexusX instance.
Procedure
- Log in to the FlexusX console, in the upper left corner, click
 , and select a region and project.
 - On the FlexusX Instances page, locate the target FlexusX instance and click its name.
The details page of this instance is displayed.
- On the Security Groups tab, click Change Security Group.
The Change Security Group dialog box is displayed.
Figure 1 Changing a security group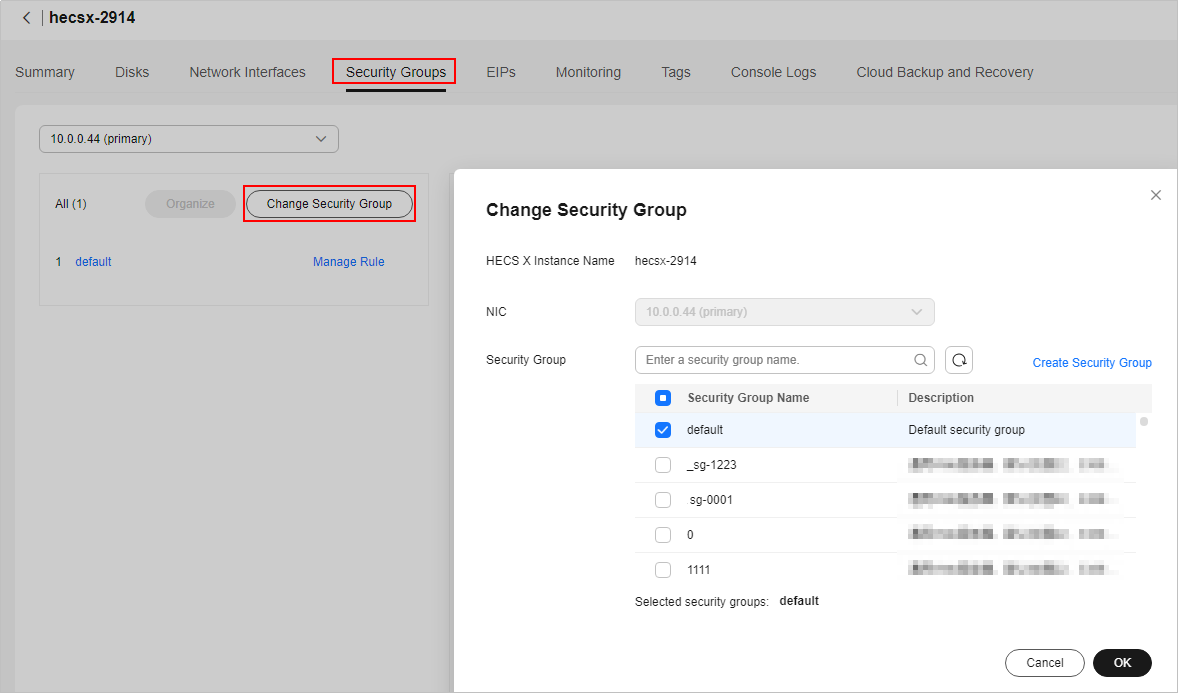
- Select the target NIC and security groups.
You can select multiple security groups. In this case, the access rules of all the selected security groups are applied to the cloud server. To create a security group, click Create Security Group.

Using multiple security groups may impact the network performance of a FlexusX instance. You are advised to select no more than five security groups.
- Click OK.
Feedback
Was this page helpful?
Provide feedbackThank you very much for your feedback. We will continue working to improve the documentation.See the reply and handling status in My Cloud VOC.
For any further questions, feel free to contact us through the chatbot.
Chatbot


